You are using an out of date browser. It may not display this or other websites correctly.
You should upgrade or use an alternative browser.
You should upgrade or use an alternative browser.
MF/LF Outing - Whampoa , Balestier Trail Part II 25th Feb 2012 afternoon
- Thread starter Nikkornos
- Start date
By the colored one. Cheaper. 199
will consider it last.. i still have my powerful EOS lightmeter! ;p
wootsk
Deregistered
Zone system is not easy to practise. Use an averaging to get the general exposure, and spot to fine tune.
You might want to try drawing 36 square for a 6x6 format, then you meter 1 square by 1 square with a 3 degree light meter. Lastly add all the value and average. You might find some legendary number for your metering.
Else you can just meter the average and take, don't make life harder than it is.
")
Green Vege White rice.
Thedraperyfalls
New Member
Sfoto100, sometimes they go for cheap at our own classifieds, stalk RFF too. Cheers!
zguy said:yeah i am using the pentax asahi spotmeter. This old model usually go for around US$100+ while the pentax digital usually go for $300-400 plus.
It is an old style analogue meter. You set the ISO via a wheel and take a reading via the viewfinder. The needle inside will point to a EV number. Then you refer to the EV number to get the fstop/shutter speed combination on the outer wheel again. There is also no PC sync connector on this meter so you can't use it in a studio to meter the strobe output.
when is spot metering useful ? I found it most useful when you have a sunny spot among a sea of shadows. Spot metering the shadow spot and exposing for that will ensure the shadows parts go dark. I suppose for those who want to do Zone System also have to do spot metering.
anyway if you bring yr Canon DSLR along then you can use its spot meter function or for that matters any of its metering modes will be useful.
Haha the part on the sea of shadows is the one im thinking about.
Imagine i cant reach my sekonic to a spot far away or vice versa im standing under the sun n trying to meter someone inside a shop....den really got to compensate it mentally.
lkkang said:pei fu ...pei fu...
first time I see a girl handheld ( without neck strap ) and use a "brick" to shoot throughout...
steady hands you have... clap clap clap....
Billy
Now u make me shy..i still neck strap mine..haha
mamypoko said:Using a Minolta IVF, which I got for free when I bought my Leica M4, also using a Polaris meter as a backup
I realised that minolta has very good lightmeter but they didnt continue the series n compete in the market now?
By e way, side track the last i heard of minolta is linked with konica..to come out a konica minolta..the last i saw a konica film shop is like v long ago..n the last konica film i saw is the centura..not to mention the last camera i saw from them...
Wat happen to this company???
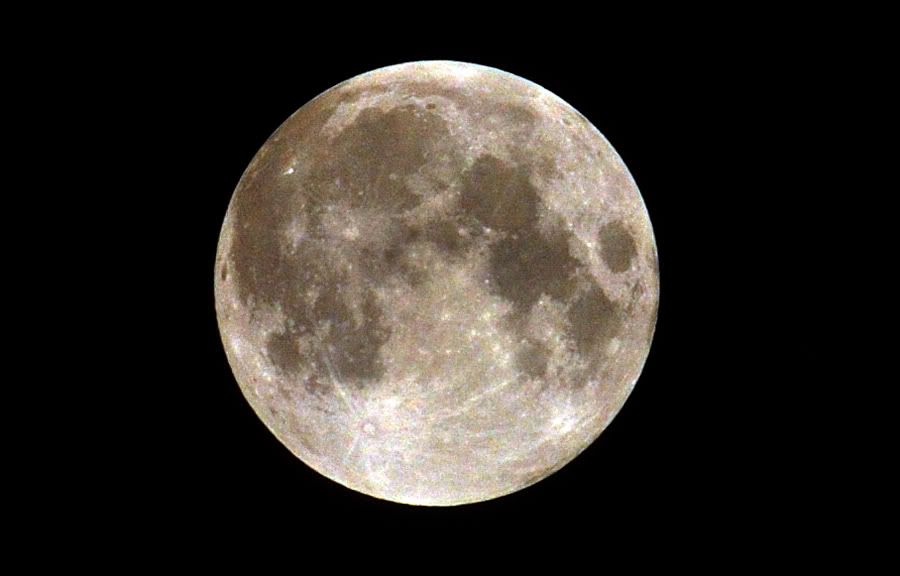
tonight the moon is very bright. good example of bright spot in sea of shadows..Haha the part on the sea of shadows is the one im thinking about.
Imagine i cant reach my sekonic to a spot far away or vice versa im standing under the sun n trying to meter someone inside a shop....den really got to compensate it mentally.
my spot meter is just nice to measure the moon but the problem is i can't the where the needle is as it is pointing on a dark area inside the viewfinder. the modern spotmeter or a DSLR with a mid telephoto lens should be able to do a better job in this case.
Last edited:
Nikkornos
Senior Member
Whatever the meter, it is only the reference. You still need experience to compensate.
When my dad was crazy about Kodakchrome 64, he taught me to use 3 step exposures.
Expose at meter, +1/2 stop and -1/2 stop. The meter used was the Gossen Lunar Pro 6 with 7.5 degree spot adapter.
When it comes to very critical subjects, he recommended 5 step exposures.
That is Original, +-1/2 and +- 1 stops. Sound Kia Su, but the limitation of the meter does not cover the complex situation.
The 5 step exposures always gave one that is vibrant and accurate.
The other factor was last time the E6 was sent to Australia to process. Depending on the concentration of developer, the slides quality varied.
So the 3 steps or 5 steps always gave at least one good slide.
Also bear in mind, the mechanical shuttle has gross errors as much as 10%. Some Japanese even use film to calibrate/mark out their LF shuttle.
The find out 1s +/ how many percent, and use aperture to compensate.
On shooting the moon, my dad and I went thru in details in Malaysia many many years ago.
Using the Lunar 6 the reading on the moon using spot adapter was f8 4 seconds. That was a gross error, the reason being
the reading was still a bright spot averaged with the dark background.
The correct exposure for the moon should be F11 1/60.
Using a modern spot meter still can give errors, even Nikon 3D matrix metering (SK's 36 square is something close, but that does not cover the light sensitivity of color).
Essentially, you need two things. Meter + Experience.
Nikkornos
Senior Member
Loshen, this is the note I dug out from my late father's note book. For us to think why in the past experiments we had so much issues:
Any slide film that can be developed in Singapore (aka 1960-1970) will have issues with Black Purple (red) and Grey.
The film coating is thin. In theory, the black section should not pass light at all, but in reality, the darkest still pass light.
Hence, black or hair may appear like deep deep blue. If the Kodakchrome is over exposed, black may even appear as blue.
Purple is another challenge, will always biased towards pink or greenish purple.
Grey is the worse, impossible to be free from other colour contamination.
All these were due to the film emulsion structure of Kodakchrome devloped in Singapore (60-70) using one one step developer.
The film already contains colour emulsion layers and dye. As the dye is organic, changes will always happen.
Hence film cannot be exposed to heat, moisture, and thermal cycle. And must be developed Asap to preserve true colour.
For Kodakchrome that must be developed by Kodak using dedicated machines, the color were added during the developing process.
Before development, film has no color, like B&W.
Development process usese 3 colour development to develop 3 layers of color emulsion layers. Require dedicated machine with strict control.
The final film density is very high, colour is much more saturated. Black, Purple and Grey are nearly ideal.
(I look at some old 70s Kodakchrome, the film appears thicker).
Looks like your test strip may never arrive at what you want, because your starting baseline may already shifted already.
Last edited:
knight84
Senior Member
The key thing to remember is what is the meter telling you - All it tells you is that at 0.0 compensation the value will give you an 18% grey scene. Anything that is more than 3 stops over ( for medium format digital -this is prob 4 stops for film and 2 stops or lesser for slide - someone please correct me) you will get white without details ( ie blow out) anything that is about 4.5 to 5 stops under will give you black without detail.
Once we know this - look at the scene - see what we want to show or not show and then make our exposure based on that. So to use what the meter says, to average etc ..all depends!
To Bracket or not or how much to bracket depends on a lot of factors ranging from type of film/slide, number of exposures left, how critical the exposure is, harshness of the scene, who is developing etc
btw Nikkornos 1/60 moon will be blurry - have to shoot at atleast 1/250 to get a sharp shot.
Nikkornos
Senior Member
To be exact in the process description, here is a note from some old faded Kodakchrome aka 1976 in Hong Kong somewhere.
My dad used a 105mm lens on Nikkormat body. Mirror lock up.
written record:
Lunar 6 measurement :
15 degree adapter 6.3 divisions
7.5 degree adapter 5 divisions
64 Kodakchrome F11 30 seconds exposure for brightest.
Actual exposures
F11 30seconds
F11 45 seconds
F11 60 seconds
based on the old faded slides notes on slide frame,
F11 30seconds best for brightest location of slide
F11 45 seconds more details on dark sections
Moon notes got 5 - 6 pages!!
Nikon 200mm F4 Nikkormat
Daylight type film, Kodakchrome 64
Bright moon use F11 1/30s
Faded moon use F8 1/30s
other apertures lost the details of the shades of the moon
F5.6 and below lost details or light fringing cover up all the details....
Moon phases 9 sets of exposures compensations. Using F8, F11 for asa 64, it was challenge.
New moon, first quarter, full moon, last quarter, new moon
Wanning crescent, waxing crescent, waxing gibbous, wanning gibbous.
The notes are in Chinese, if you are interested I can bring next outing.
Nikkornos
Senior Member
Bro, not true. this is a shot done in Lunar Eclipse June 16 2011. 300mm lens using F11, 1/30 in science center.
Scroll to bottom, moon shot by me.
http://www.clubsnap.com/forums/kopitiam/911675-lunar-eclipse-june-16-2011-a-8.html
Scroll to bottom, moon shot by me.
http://www.clubsnap.com/forums/kopitiam/911675-lunar-eclipse-june-16-2011-a-8.html
Last edited:
Similar threads
- Replies
- 20
- Views
- 6K
- Replies
- 12
- Views
- 3K
- Replies
- 70
- Views
- 7K