Kallitype Printing


zguy

Senior Member
Jan 10, 2003
1,201
5
38
Singapore
www.sgwetplate.com
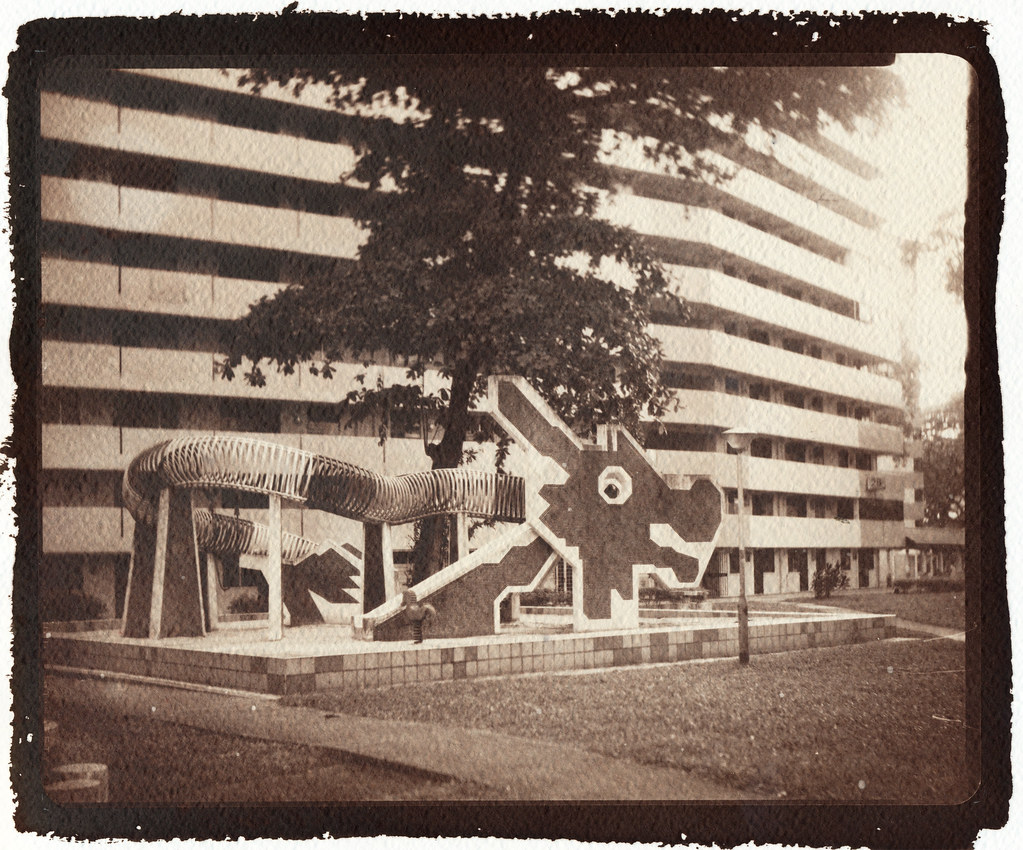
Anyone doing alternative printing process? I have recently start doing kallitype printing and find it to be very interesting. Here is a quick summary gathered from various articles found online.


Kallitype is contact printing process in the iron-silver family. In this case we are using ferric oxalate and silver nitrate.

1. The Sensitizer is made up of silver nitrate at 10% and ferric oxalate at 20% mixed in equal amount. Then it is applied with a brush or rod on a suitable paper under week, artificial light. After application the paper should left to dry.

2. A suitable negative is then placed on top of the coated paper and weigh down with a thick piece of glass.

3. It is then exposed to UV Light. Sunlight can be used but it is inconsistent. A better option is to use UV tubes.

4. The print is then developed using a 20% sodium citrate solution for 8-10 mins.

5. Then it is rinse with water for 5 mins follow by 5 mins of EDTA (ethylenediaminetetra acetic acid tetrasodium salt) solution.

6. Toning may be apply at this stage.

7. Else the print is fixed using a hypo fixer for one min.

8. To reduce washing time, the print is immersed in a Hypo Clearing Agent solution for one min.

9. Wash for 20 mins before hanging up to dry.
 

i did not source for raw chemicals in Singapore but instead bought the kit off ebay. Similar kits are available on Bostick-Sullivan or the one from Photographers' Formulary carried by B&H.
 

i put together a short video on the process based on the printing kit i have. If you are using another kit, the process may differs a bit.

[video=youtube;ydt47aZK9W4]http://www.youtube.com/watch?v=ydt47aZK9W4[/video]
 

I do salt and cyanotype prints


BTW, did you make your own light box? I'm thinking of making one myself
 

Last edited:
I do salt and cyanotype prints


BTW, did you make your own light box? I'm thinking of making one myself

yes.. the UV exposure box is put together by me using a a few pieces of plywood and 4 UV tubes. it is good up to exposing a paper size of 12x10. Total cost =$150. a good investment as now i can the printing either in the day or night w/o depending on the sun.
 

zguy said:
yes.. the UV exposure box is put together by me using a a few pieces of plywood and 4 UV tubes. it is good up to exposing a paper size of 12x10. Total cost =$150. a good investment as now i can the printing either in the day or night w/o depending on the sun.

Wow, that's quite expensive. How much does the UV tubes and ballast cost?

Oh, I tried albumen before. But it was very very difficult to get a smooth coating.
 

Wow, that's quite expensive. How much does the UV tubes and ballast cost?

Oh, I tried albumen before. But it was very very difficult to get a smooth coating.
I cant remember the exact breakdown. One 12" UV tube with starter, ballast and fixture is about $20-30. I just bought it off the first shop in sim lim that i found selling UV tubes. so you may find cheaper sources but then again, it is relatively cheaper compared to buying commercial unit.
 

Clap clap clap!
 

Dragon Playground at Toa Payoh Lorong 6.

Another kallitype print off a 8x10 Fuji Xray film


Fabriano Artistico paper
Paper size is about 10x12.
 

cool! the brush strokes edge is an art by itself. usually i marked the corners of the negative on the paper using a pencil. Then when i coat the paper, i make sure i exceed that area a bit.

What size is yr negative and what paper is this on?
 

Last edited:
zguy said:
cool! the brush strokes edge is an art by itself. usually i marked the corners of the negative on the paper using a pencil. Then when i coat the paper, i make sure i exceed that area a bit.

What size is yr negative and what paper is this on?

Unfortunately I don't shoot LM. I print scans from my 35mm on transparency and print with those. My daughters would make cyanotype photograms using twigs and leaves
 

Platinum Palladium Printing with Leica M Monochrom on Vimeo


Same same, but different. Looks pretty awesome with the rich blacks

very nice prints...the video is also very well made.

I did consider doing platinum printing initially but later i read that kallitype printing is the poor man's platinum printing as when the image is toned in platinum or palladium the result is nearly chemically identical to a true Platinum print.
 

i hope this is not a Rube Goldberg machine but i DIY an agitator. The Kallitype developing process is quite long and rather than manually agitate the tray, I thought an semi automatic process will help a lot.

The concept is simple. i use a string with S hook to hook the developing tray/box and a motor will reel it up and down . I use an Arudino board with a motor shield to control the timing and motor turn direction.


Now I am still using a breadboard. Each LED indicates a process. For eg, when the developing stage timing is reached, the LED will go off and the buzzer will sound. Then I will pour out the developer and pour in the critic water for the rinsing stage. To start the motor rotation, I will press the push button.


The 12V 30rpm motor. You can see the fishing line on the wooden screw which act as a reel.


The S hook.
 

  • Like
Reactions: Zichar
W O O D
4.jpg