
Here’s how to create a nameplate using your own signature that goes at the bottom of your prints (or even a slideshow) in Lightroom Classic.
STEP ONE: The nameplate I’m going to create uses your signature, and there are a couple of ways to get your signature into Photoshop:
(1) Take a nice blank ink pen and sign your name on a fairly large piece of paper, then take a photo of your signature with your phone. Open that photo in Photoshop; take the Magic Wand tool, click it anywhere on the background (to select everything but your signature), then
(2) if you’re lucky enough to have a graphics tablet, then go to Photoshop, open a new document, 6”x3” with a resolution of 240, and then set your foreground color to black, choose a small hard-edged brush from the Brush Picker, and sign your name and save the file. Easy enough.
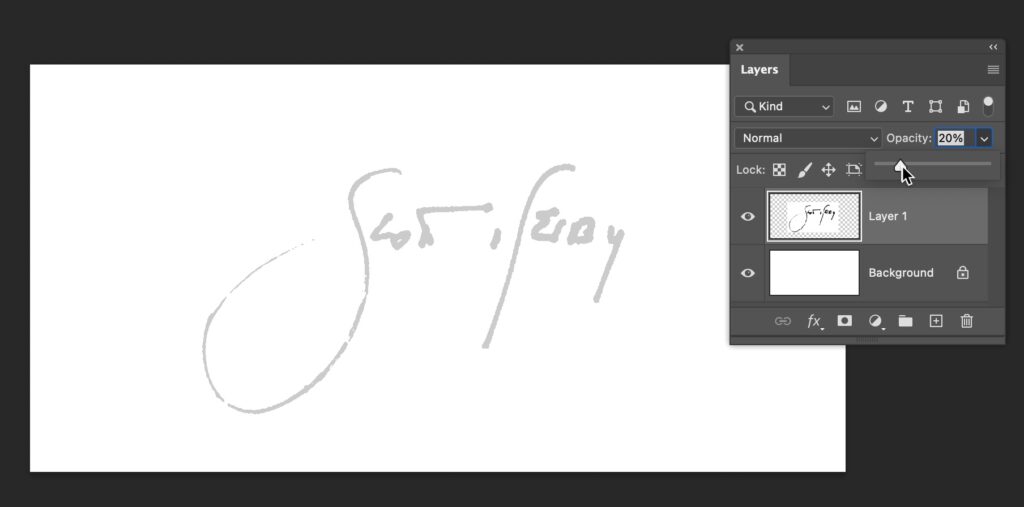
STEP TWO: Open a new document that is 6”x3” at a resolution of 240, then open up your signature file and drag it onto this document. In the Layers palette, lower the Opacity of this layer to 20% (as shown here), so your signature looks light gray.
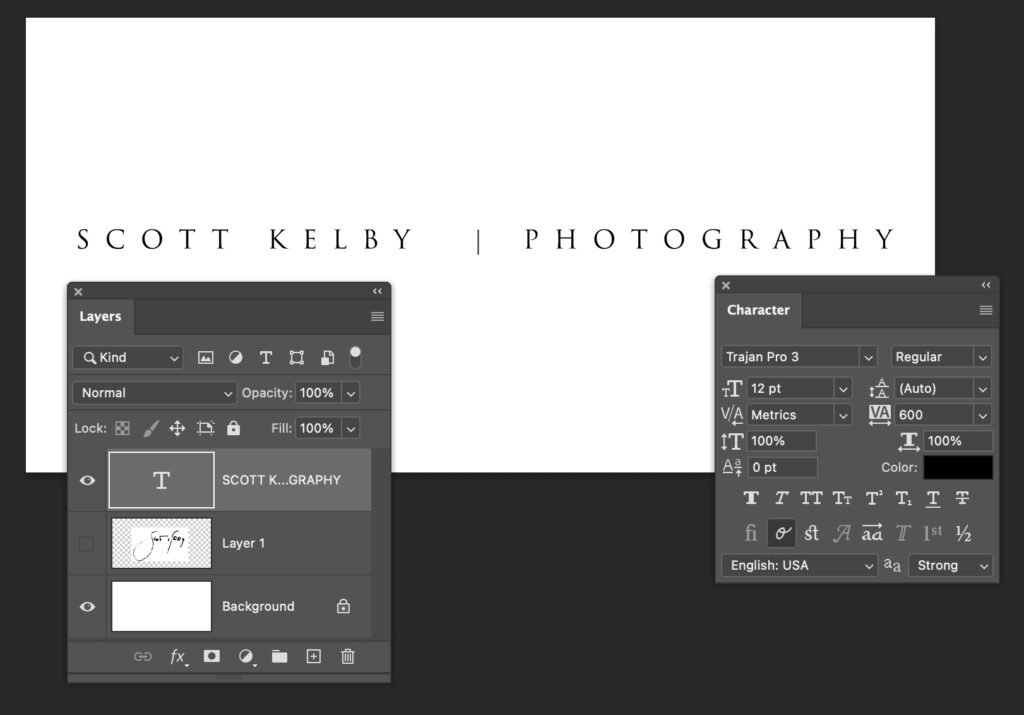
STEP THREE: Go ahead and hide that signature layer by clicking on the eye icon next to Layer 1. Now, get the Type tool and type in your studio’s name. In my case, I typed in “Scott Kelby Photography” (I know — how original). The font I chose is Trajan Pro, which, if you don’t already have it installed, you can download it from Adobe’s Creative Cloud app. Add lots of space between the letters. In my example in class, I set the Tracking (space between letters) in the Character palette to 600.
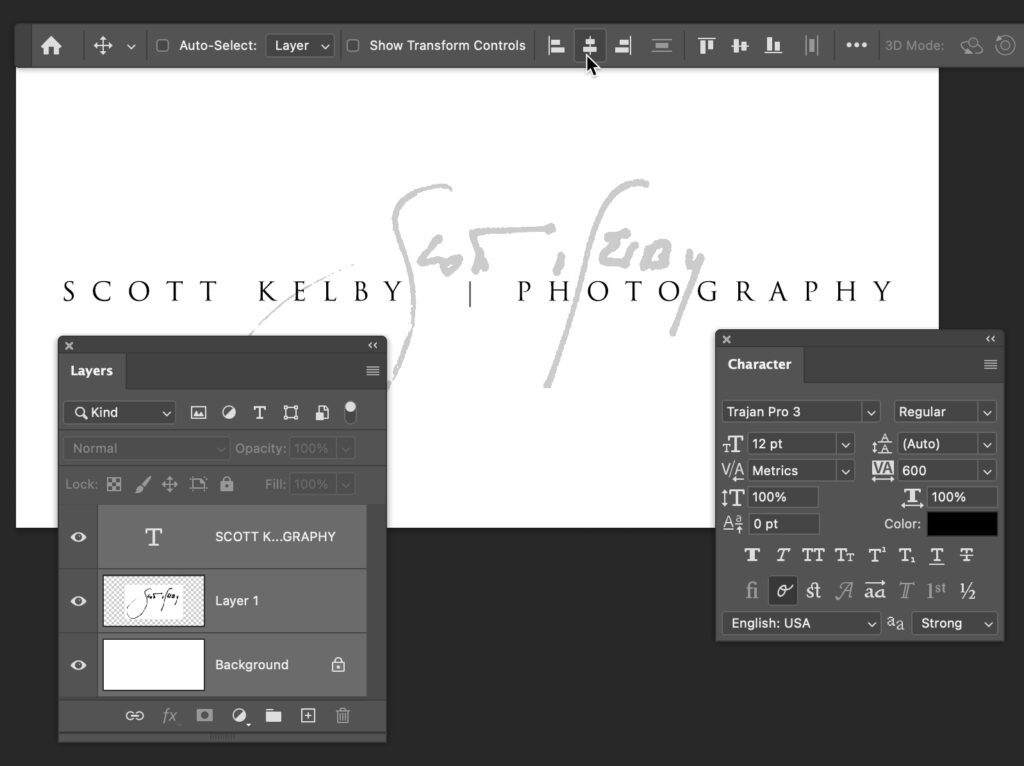
STEP FOUR: Make your signature layer visible once your text is in place. Now, select all three layers (the Background, Layer 1, and your Type layer), go up to the Options Bar, and click on the Center Alignment icon (as shown above) to perfectly center your elements within your image area. Flatten your image layers, and now save your file as a JPEG.
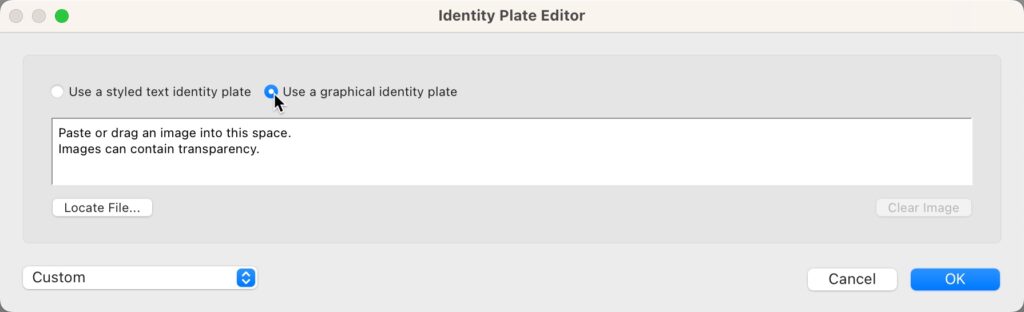
STEP FIVE: Now go to the Lightroom, to the Print Module, and in the Page panel, turn on the Identity Plate checkbox. Then, in the Identity Plate preview, click on the little down-facing arrow in the bottom right corner to bring up a pop-up menu. From that menu, choose Edit to bring up the “Identity Plate Editor” dialog shown above. Click on the “Use a graphical identity plate” button (as shown above), then navigate to your newly saved signature file and choose it. Now, it will appear on your printed page, and you can drag to position it where you want it. That’s all there is to it.
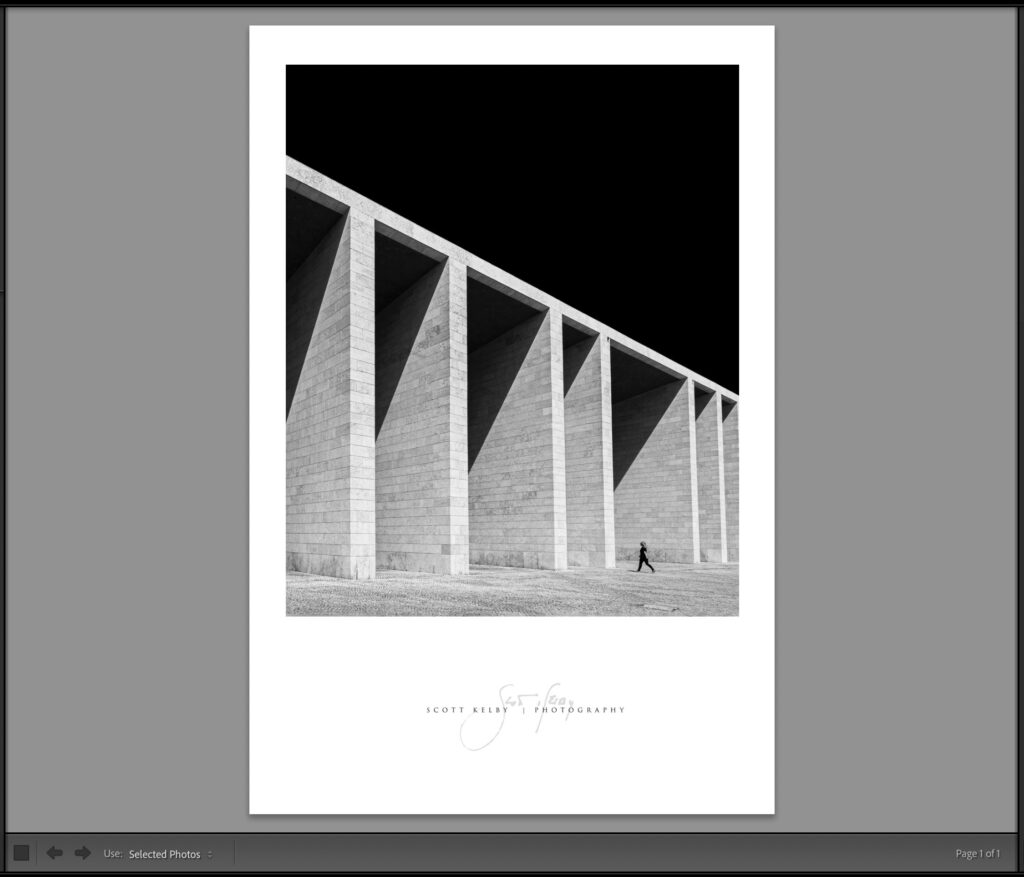
Above: here’s how the nameplate looks at the bottom of a print. As I mentioned at the top, you can also import this nameplate into the slideshow module as well.
There you have it.
UNRELATED NOTE: It’s a BIG divisional playoff weekend for my Bucs. We’re playing the Detroit Lions up in Detriot at Ford Field (a very nice dome stadium – I shot a Bears/Lions there a few years back). However, although of course I want the Bucs to win, I do like the Lions. They are a super tough team this year, and I’ve been rooting for them all season, so if the Bucs lose to them (which is likely – the Lions are favored to win), at least it’s to the Lions, which haven’t been this far in the playoffs in 30+ years, so they definitely earned it. However, if the Bucs do win…OMG!!!! Hey, like I said last Friday…it could happen.

Have a great divisional playoff weekend!
-Scott
The post How To Use Lightroom’s Identity Plate to Add a Fine Art Signature Nameplate appeared first on Lightroom Killer Tips.
Continue reading...
STEP ONE: The nameplate I’m going to create uses your signature, and there are a couple of ways to get your signature into Photoshop:
(1) Take a nice blank ink pen and sign your name on a fairly large piece of paper, then take a photo of your signature with your phone. Open that photo in Photoshop; take the Magic Wand tool, click it anywhere on the background (to select everything but your signature), then
(2) if you’re lucky enough to have a graphics tablet, then go to Photoshop, open a new document, 6”x3” with a resolution of 240, and then set your foreground color to black, choose a small hard-edged brush from the Brush Picker, and sign your name and save the file. Easy enough.
STEP TWO: Open a new document that is 6”x3” at a resolution of 240, then open up your signature file and drag it onto this document. In the Layers palette, lower the Opacity of this layer to 20% (as shown here), so your signature looks light gray.
STEP THREE: Go ahead and hide that signature layer by clicking on the eye icon next to Layer 1. Now, get the Type tool and type in your studio’s name. In my case, I typed in “Scott Kelby Photography” (I know — how original). The font I chose is Trajan Pro, which, if you don’t already have it installed, you can download it from Adobe’s Creative Cloud app. Add lots of space between the letters. In my example in class, I set the Tracking (space between letters) in the Character palette to 600.
STEP FOUR: Make your signature layer visible once your text is in place. Now, select all three layers (the Background, Layer 1, and your Type layer), go up to the Options Bar, and click on the Center Alignment icon (as shown above) to perfectly center your elements within your image area. Flatten your image layers, and now save your file as a JPEG.
STEP FIVE: Now go to the Lightroom, to the Print Module, and in the Page panel, turn on the Identity Plate checkbox. Then, in the Identity Plate preview, click on the little down-facing arrow in the bottom right corner to bring up a pop-up menu. From that menu, choose Edit to bring up the “Identity Plate Editor” dialog shown above. Click on the “Use a graphical identity plate” button (as shown above), then navigate to your newly saved signature file and choose it. Now, it will appear on your printed page, and you can drag to position it where you want it. That’s all there is to it.
Above: here’s how the nameplate looks at the bottom of a print. As I mentioned at the top, you can also import this nameplate into the slideshow module as well.
There you have it.
UNRELATED NOTE: It’s a BIG divisional playoff weekend for my Bucs. We’re playing the Detroit Lions up in Detriot at Ford Field (a very nice dome stadium – I shot a Bears/Lions there a few years back). However, although of course I want the Bucs to win, I do like the Lions. They are a super tough team this year, and I’ve been rooting for them all season, so if the Bucs lose to them (which is likely – the Lions are favored to win), at least it’s to the Lions, which haven’t been this far in the playoffs in 30+ years, so they definitely earned it. However, if the Bucs do win…OMG!!!! Hey, like I said last Friday…it could happen.
Have a great divisional playoff weekend!
-Scott
The post How To Use Lightroom’s Identity Plate to Add a Fine Art Signature Nameplate appeared first on Lightroom Killer Tips.
Continue reading...