Archive: from the old newbie guide.


Status
Not open for further replies.
Pictures with learning points

I dun have any formal training in this, so dun take it as if it is some teaching. it is more like a blog and my personal thoughts, perhaps with some reading and hopefully some contributions and even disagreements. picture works for a reason, although we may not always be able to explain why, but sometimes we do, and sometimes there is even some science with it.

I dun have any system of sorting it out, but i guess i would just post a picture at a time, randomly, until a point of time, there is enough to sort in order.

.
 

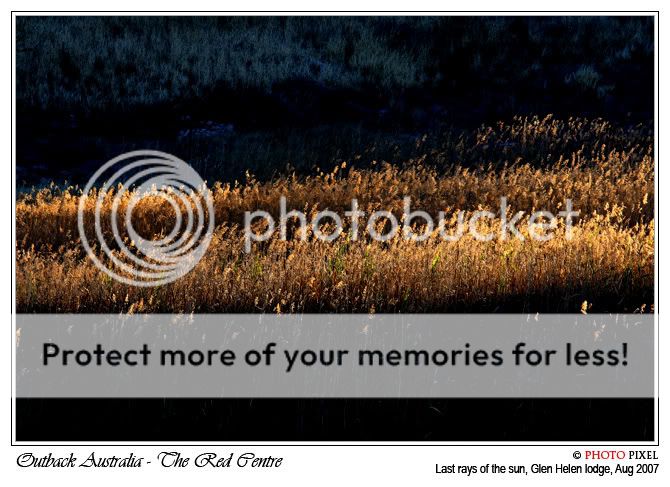
Details in shadow

with permission from photographer of the picture, asterixsg : #4 Light streaking through tall grass - Glen Helen lodge

1345804674_859892bdfa_o.jpg
00001-1.jpg


The left is the original jpeg. The right is what i simulated through further post-processing to be a high levels of dark tones, with which beautiful details are lost. I may have exaggerated the differences though.

In the pursuit of high contrast impact, there is a tendency of people to either sacrifice shadow details or post process without regards to details and textures. The former is something that we have to consider in exposure, as it affects factors such as shutter duration and handshake likelihood. The latter is of less excuse as we have enough time to consider and reconsider in front of the screen. Just remember that sometimes slight details in the shadows, even if they are monotone, can give beautiful patterns, hence you should consider retaining it if it is worthwhile. of cos, the other side of the story, if there is nothing interesting in the shadows, discard the details, make it black and contrast it against the brigher subjects.

Another thing to take note is the calibration of your screen. Some monitors have high gamma setting and can make a picture like that on the left looks like the one on the right, even though it is the same picture. It is in a way good to look at your monitor now - if there is not much of details you on seeing even on the left and worse on the right, do consider to calibrate your monitor with some calibration devices (google or check in the product listing in this thread).

.
 

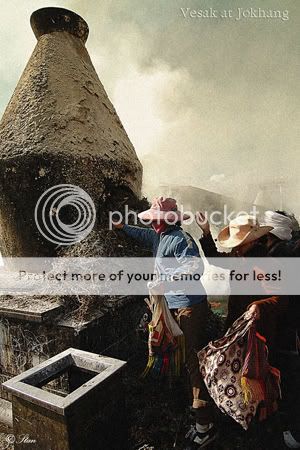
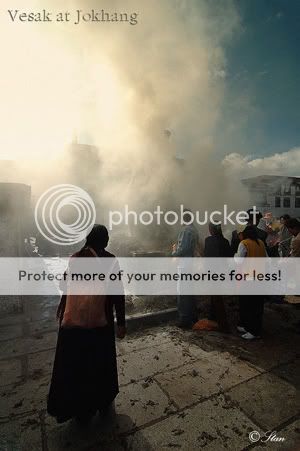
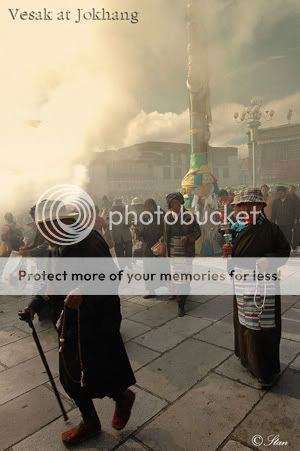
Use of grainy effects versus film grain or digital noise

with permission from photographer of the picture, hosea : Vesak at Jokhang

resized below into smaller prints to put side by side, larger pictures is in his thread as linked above. a better appreciation of the grainy effects is to be seen on the original on the link above.

DSC_1446amsfza.jpg
DSC_1451asMza.jpg
DSC_1463asza.jpg


Noise often occurs at high ISO where random variations increased in prevalence and may or may not be corrected sufficiently by in camera processing.

If a low ISO cannot be achieved by the dim lighting condition, noise reduction of high ISO pictures may be achieved by post processing using reduce noise filter in adobe photoshop or other softwares, or with additional plugin such as neat image.

Noise can be differentiated into chrominance noise or luminance noise, which are random variations in color and brightness between pixels. It's fine tuning is important to achieve the desired effect.

Digital noise usually are different from film grains, in the way that while film grains are a result from random layout of larger silver halide crystals in the film emulsion, giving a more neutral sandy texture, whereas digital noise occurs due to random defects or by thermal noise, and can give rise to variable degree of chrominance and luminance difference, and often can be further amplified due to digital manipulation by post processing software or simply from data deletion from jpeg conversion. Sharpening, such as USM filter in adobe photoshop (unsharp mask), is one of the function that i realise can easily increased noise on post processing if used zealously without control.

The problems that occur with digital noise reduction on software is the smudging of details, especially when luminance noise is being evened out. The fine textural detail is often smudged if excessive noise reduction is applied.

On the other hand, grains can be added and refined on post processing techniques to bring out a texture, especially in areas that appears rather blown and blended. This is not so commonly done but appears to give inspiring effects. I got the permission from fellow forumer hosea to link his pictures directly here to illustrate post processing use of grainy effects. The grainy effects is very suitable for these subjects becos there is indeed a dusty and smoky ambience there.

.
 

Filling of frames

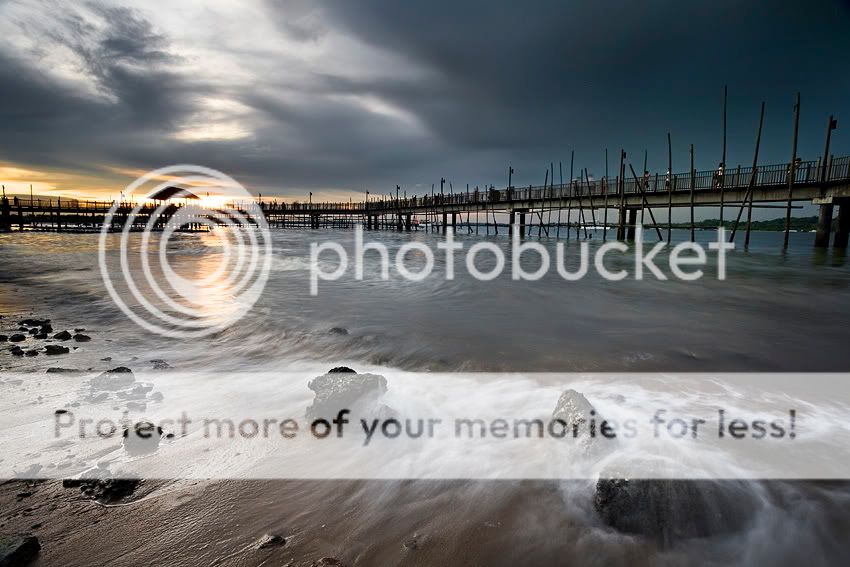
with permission from photographer of the picture, Hazmee : Changi Boardwalk

hazmee20071110235414__mg_3730.jpg


One of the fundamental problem with wide angle photography is in addition to ease of perspective distortion and introducing of cluttering/distraction, the minimization of distant subjects. Things looks further than they are, and very often smaller. If the structure is a horizontal structure at the horizon, wide angle photography will show large areas of foreground and sky, both of which can potentially be empty, dull and in lack of texture, which is often the case of snappish looking photographs.

Good users of wide angle photography will anchor an interest in the foreground and compliments it with a sky of good colors, gradient and details. The Changi Boardwalk presented with exactly the same challenge to many who have went there. Hazmee may not get the best sky in the gloomy sunset with a dark overcast in the top right (but fortunately contrasted with people walking around in white shirts), but the good use of shutter duration in the foreground anchors the picture down. If there are no rocks in the foreground, no amount of foam and smoothing in long exposure is going to give much forms in the bottom, leading to a picture with the composition lined by mainly the boardwalk in the middle and large areas of sky and sea in a few similar hues. Of cos, needless to say, the rocks also contribute to different patterns of the waves which adds interest. Finding the right shutter duration and exposure for each situation draws the best effect for the waves.

.
 

Filters and Photoshop still can't replace being in the right place at the right time.

Quoted from Ken Rockwell, nothing beats being in the right place at the right time.

Look at Michael Fatali's works and you will know what a dedicated landscape photographer can produce.

Most neutral density and graduated neutral density (GNDs) filters try to be neutral, but nonetheless carry a tinge of color, which may serve towards or against your picture. For example, the red tinge in Hitech GNDs serve for a magenta or purple sky, but badly against a blue sky.

Most of these filters comes in stops of 1-4 stops, mostly 1-3. That's big intervals but nonetheless you can adjust the vertical length of the rectangular GNDs to vary the degree of density. What you are restricted by is the degree/rate of graduation and the horizontal contour of graduation - it cannot be applied onto a landscape with undulating contours. Natural light however, will fall onto the landscape whatever its contour is.

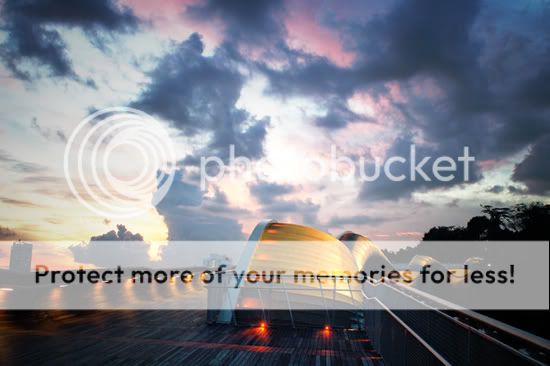
with permission from photographer of the picture, dennisthetiger : The Henderson Wave

DSC_0122a-1jr.jpg


This is a very good example of getting the right timing and location together, making the spectacular colors natural and unique, something that stands out from all others taken at the location at other times.

.
 

pls ignore the following

k) characteristics of camera body and lens with regards to the above relationship

Understanding of the different components will give you an understanding of what do look out for in the specifications of the camera body and lens.

1. shutter duration: determined by the camera body, for example for Nikon D50, the minimum (fastest) to maximum (longest) shutter duration is 1/4000 seconds and 30 seconds.

2. bulb mode: determined by the camera body, which is 30mins for both Nikon D50 and D70s. This duration is a consideration in very long exposure, e.g. capturing of star trail in DSLR.

3. aperture size: determined by the lens, for example for Nikkor 18-200mm f/3.5-5.6 VRII AF-S DX, the largest aperture size is f/3.5 (at 18mm) and the smallest aperture size possible is f/36 (at 200mm). This is influenced by the focal length of the lens, for example, the smallest aperture size at 18mm is f/22, only if you push it to nearing 200mm can you achieve a smaller aperture size to f/36.

4. bokeh characteristics: determined by the blades of aperture in the lens, whereas the lens focal length and maximum aperture size may also determined the degree of bokeh.

5. ISO, ISO intervals & high ISO noise: determined by the camera body, e.g. ISO 200-1600, in manual intervals of 1 stop each (200, 400, 800, 1600) in Nikon D50, which sometimes become unacceptably noisy at about ISO 1600.

6. metering mode: determined by the camera body. centre weighted and average metering modes are the usual ones, and the matrix metering mode (called evaluative metering by canon, or multi-pattern metering by Nikon) may determine how "smart" is the technology you are equipped by the automation. on the other hand, for most precise metering decided by user, spot metering is an option. In Nikon D50, spot metering covers a diameter of 3.5mm (by width) or 2.5% of frame (by area). usually the significance is judged by presence of absence of spot metering, which is increasingly a common feature of most newer DSLRs.

7. exposure compensation increment interval: determined by the camera body, usually from -5 to +5 stops in the whole range in intervals of 1/3 or 1/2 stops. this is usually standardized and is not a key consideration in selection of modern DSLRs.

.
 

Having a subject of interest

Having a subject of interest cannot be emphasized more, so much so it is taken for granted and little mentioned.

Composition and details are varied and sophisticated, and is hard to be classified, categorised or defined, but broadly speaking, from the viewpoint of a subject of interest, it can be categorised largely into

1. a detailed area of interest.
2. a conventional pattern. (e.g. mountain ranges)
3. an abstract pattern.

When we see a subject as a circumscribed item, then it is difficult to classify 2. & 3. into it, yet that doesn't mean patterns have nothing interesting or have no subject. In some cases, they can be merged together with relationship established between the two.

In the example below, it depicts a good story telling composition that ties the two together.

with permission from photographer of the picture, Jeff: Naruwan, Danshui, Painting a frame

88509634.jpg


The photographer's angle is apparently different from the artist. From the artist viewpoint, the mountain is the subject. In the photographer's angle, the whole painting is the subject supplemented primarily by the artist in the picture and secondarily correlation to the background which can also be seen in the painting. The complexity adds to the interest, yet composition is still clear cut and clean.

Moreover, the artist is well dressed and conveys the mood as well as the color rendering the photographer has applied for the picture. If we can see the brush in profile, even better, but all in all, this is a good example that illustrate the importance of the subject matter and how it ties in with everything.

.
 

Optical lines - shared gaze

with permission from photographer of the picture, Parka : New York City, Museum of Modern Art, It's the best place to snap photos of people with puzzled and amused looks on their faces.

1341976512_615bce6f9d.jpg


In any portraits, the eyes of the person can look either at you or elsewhere, both of which can be effective. A gaze that is directed away from you, can suggest a sense of dissociation or distraction, or it may suggest that the person in question is actually absorbed or concentrated on something else.

Use of shared gaze of different people looking at the same direction at something outside of the frame increase the suggestion of them sharing their concentration on the same thing, and invoke a sense of curiosity. Shared gaze are powerful, and need just two to work effectively, whereas inconcordant gaze usually requires at least 3 or more people (in my opinion) to have a strong suggestion of dissociation.

The above picture show a good shared gaze. both directed out of the frame, likely an item in a short distance, comfortable distance, as suggested by their comfortable posture. There is a good expression of appreciation and thoughts from both subject in the picture.

Composition is there, with sufficient negative space. there's depth with differential size and narrow depth of field. there's appropriate focus. and there's good lighting on his blond hair. also the leaning forward and backward of the two person not just show a difference in posture but also give a sense of balance.

.
 

Getting gaze in different directions

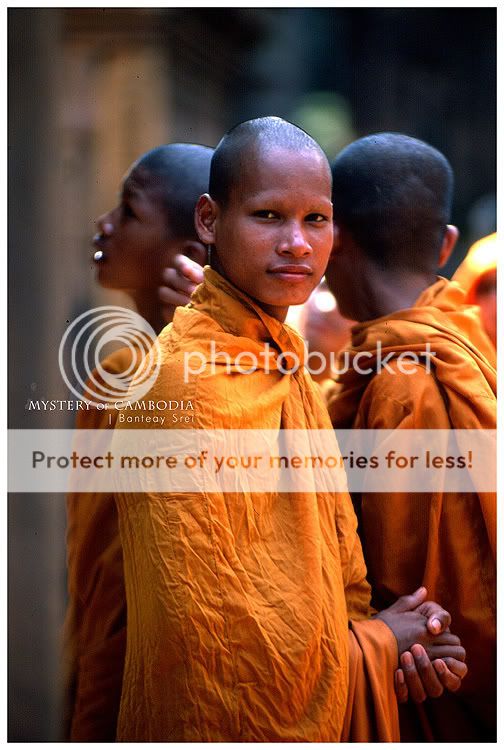
with permission from photographer of the picture, Vivian: Cambodia, Ban Teay Srei

cambodiabanteayvivianbanteay_srei05.jpg


A good balance of cool and warm hues between the ambient light and the saffron robe. The crease on the robe is beautiful and great dynamic range there is. Face is sharp and you can even see the details on the head. The hand posture suggest a sense of grace and comfort. This picture is taken using slide (fuji velvia 50), so details are intricate and colors is fantastic. The photographer roughly remember using a 80-200mm zoom all the way from about 3 meter far to take this picture.

There is a few ways to catch a portrait. The way why I say catch in travel photography is because portraits are often done in an instinctive capture of a fleeting moment, very unplanned and not hold for long (as the people under candid snaps would not get comfortable if "lock on" for too long) but snapped at a moment that seems to be the moment.

Among a group of people, the first person who turns and look at you instanteously is often the best time to capture. It creates an association, and an eye contact very often out of curiosity. Very often other people are looking elsewhere, and creates an isolated subject of the eye contact. A shallow depth of field and proper focus of the eyes (essential) will further add to that isolation. In contrast to post-interactive group shot (where you speak or gesture at least briefly at a group of people, usually kids, who are willing to pose for you), gaze in different directions is often effective for shots at a distance. In group shots where attention is already directed at you, they may all look at you, or most of them may look at you while some are looking elsewhere, giving a sense of them each doing their own things. For shots where all the guys are looking at you, it can quickly become monotonous if they are rigid in posture, standing all in profile, and are of the same height with non-contrasty attire.

.
 

Tilting in dynamic angles

with permission from photographer of the picture, Wolfgang: Fujian, Shantou

P1010473edsized.jpg


Horizons are almost always put into balance, and so is the main verticals. However, there are some of the scenes that either is indeed or mimics a view that is not seen in the normal way we do at eye level.

Every often, when we look in front, we do not tilt our head to the left or right; we rotate our head to the left or right, or simply turn out body with the head. When we look up or down however, we dun follow this behaviour and depending on what catches our attention, our head will adapt to it in a 3 dimensional sense, be it rotation, tilts or the degree of the flexion or extension of the nect. That forms the basis of the possibilities of including tilts into the photograph and a sense of depth.

.
 

pls ignore the following

The technical parts of basic photography revolves over
1. control of exposure and degree of motion (shutter duration)
2. control of timing with relation to stability.
3. control of spatial relationships
4. correct and properly rendered focusing
5. appropriate color balance (white balance)


How do I tie the specifications with their technical purposes?

The specifications of body and lens that plays a part in the control of exposure include
1. metering (body): types of metering available (accuracy/appropriateness of metering results may vary in models but this is not specified; spot metering allows fine control to difficult lighting)
2. ISO (body): maximum and minimum ISO, and the quality of each ISO level (control of noise, shutter duration and exposure).
3. shutter duration (body): maximum and minimum shutter duration, maximum duration of bulb mode (control of freezing/motion and exposure)
4. aperture size (lens): maximum and minimum aperture size (control of depth of field and exposure)


The specifications of body and lens that plays a part in the control of timing with relation to stability include
1. shutter duration (body): minimum shutter duration (ability to freeze high speed subjects
2. burst mode (body): frames per seconds, of raw output and large fine jpeg output (ability to capture multiple frames of fast moving subjects continuously)
3. VR, IS, SSS (body, lens): present or absent
4. weight (body, lens): suitability of weight to your handheld ability
5. viewfinder size & magnification factor (body): ease to the eye is essential in taking control and framing properly


The specifications of body and lens that plays a part in the control of spatial relationship include
1. focal length (lens): range
2. viewfinder size & magnification factor (body): ease to the eye is essential in taking control and framing properly


The specifications of body and lens that plays a part in the control of correctly and properly rendered focusing
1. focusing (body, lens): speed, accuracy, ability to handle low light or difficult contrast
2. DOF button (body): present or absent
3. blades of aperture (lens): appearance of bokeh

While there are many specifications that can be listed, the more important ones are listed in Pt 8.

Things that are very important but cannot be quantified
1. viewfinder layout, menu layout, buttons layout
2. build quality and ergonomics to grip
 

Hiding the sun to help control exposure

with permission from photographer of the picture, Klose : Royal Botanic Gardens, Sydney

rbg003.jpg


In backlighting as described in further details in Page 5, 7. Light interplays with space and time, there is a strong lightsource that can blows the rest of the picture into strong silhouette. That may not be desirable, and we would like to see some details or interesting patterns that is otherwise revealed if the bright area is smaller.

The above example shows that the sun is conviniently hidden among the branches while a little slit of it allowed to shine through a small hole, making a star burst effect.

Also, backlighting gives long shadows that adds patterns to the foreground.

.
 

Light breaks are supposed to be dramatic and natural looking

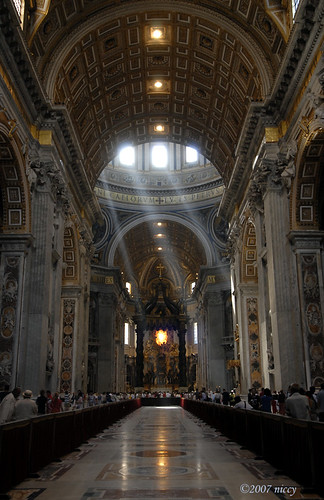
with permission from photographer of the picture, nicZnap : Vatican City, St Peter's Basilica, lights streaming through the windows.

1589185874_a0edf4eb9b.jpg


When a strong directional light source breaks through a hole in the clouds or similar structures, it can produce such light beams, especially if there is dust particles to reflect the light. This is especially prominent if the background is dark, and as such is a technique often applied by salon photography in a dark and slightly dusty room illuminated by small windows.

On the other hand, landscape photography may also show the same phenomenon in a less controlled manner. Light breaks through the clouds are mostly transient and are often less prominent as the background are brighter. Sometimes it lead to over zealous users tweaking the brightness and contrast of the picture just to bring out the light beams, totally destroying the tranquilness of the picture without realising or admitting to it. The beauty of subtlety is where experience and good appreciation comes into place.

The subtlety can be seen in the above picture with the exposure of the inside of the dome versus the less illuminated roof in the front as well as in the far back. The strong light are expected to spill around the edges and becomes diffuse with internal reflections. Controlling the exposure is paramount in this kind of pictures as you do not wish to overexpose and burn out the light rays, neither do you want to underexpose and ruin the details in the dark background.

The photographer metered on the ring below the windows in the dome, where the light was moderate (not too bright nor too dark). then he take the reading and switch to manual mode at f/8, 0.167 sec at ISO 400.

.
 

Let those that is bright glow

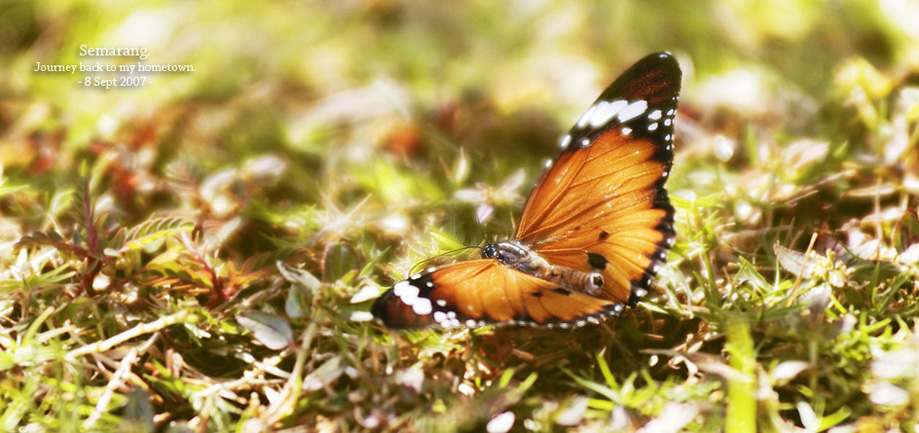
with permission from photographer of the picture, coklat : My journey back to Semarang, Enjoying the morning sun.

1400554462_735714ee58_o.jpg


Subtlety is the keyword. The midtone orange is correctly exposed and texture is not lost. The shadows is not overlightened. And the grasses are allowed to be blown.

Usually, we will try to prevent overexposure and clipping off of details in the highlights to avoid losing details that are not retrievable, however, if used judiciously on subjects that we know have high reflectance or are bright as a light source, e.g. the sun, they are supposed to be blown.

The above is an excellent example that combines blown highlights for the reflective parts of the grasses with nice bokeh from a large aperture size from a good lens - giving the glow a diffuse margin. It wouldn't be possible if we are try to underexpose our raw files in order to work on it. Be experimental with exposure and try out glowing it with the best light flooding the scene, if it is truely that bright.

1465550741_c77bd6d78a_o.jpg


Another work from the same photographer allows the sun to be overblown. In this case, the technique applied make use of strong backlighting through translucent subjects. The difference in the opacity shows how dense the vegetation varies, giving both pattern and depth. Note that most works that deals with pattern can be pretty two dimensional, but this overturned the presumption i have previously.

.
 

People at work
Military: LogicA
Models at backstage: runner10
Opera: tkbonz

Reportage
Fire at Yio Chu Kang Food center
Navy Sprint 2008 - Leinaj
Honda F1 party 2008 - douls
Minor accident: inrewind
Celebration of winning the bid for Olympics Youth 2010: harrynkl
Bape Store HK 2nd anniversary: hkdigit
Beijing Summer Olympics 2008, support in HK: hkdigit
HK, protest against insufficient police action on unconsented public display of obscene photos: hkdigit

Cosplay
Cosfest VII @ 2008 Jul 06: jasonlcs, ahquan, kazesuki, Itismoi, lim8395 1, 2, 3

Missionary & Humanitarian Projects
Thailand, Khao Laak: nickmak
Burma, post Cyclone Nargis: Light1972

.
 

Wedding and family
Wedding: iamsaint, joho, SniperD (1), (2), behyx
Family and friends: Clown, xray, Reflection, stupidbloke
Children: Our Child Series., shahrecover, wind30, mengtorapher, ndroo 1, 2 & 3, yehosaphat, marlboro_guy, BigRsg, jiven, HVB88
Children's party: iamasaint, jiven
Babies: lkkang

Travel and environmental portraits
Children: 2004 to 2006, 2007 onwards, 2008 onwards
Elderly: 2008 onwards
Streets portraits - Jia Wang World and Siem Reap Market, nuts, hlyeoh Luobo
Bali - bhteh
Geisha - lewfs
Cambodia - janesis
Various - 動感小帆

Links to some great children travel portraiture, children from
Angkhang (chiangmai) by Jeff
Khao Lak by Jiawang
Vietnam by haechoo
Cambodia by janesis
Yunnan by sathea
Tasik Chini in Pahang by cyrilng

.
 

Urban/streets - mainly characters
Singapore - lestwe4get, Azure, Bcool, denniskee, misterthomas, jeff
Singapore, City - nivlaOof
Chinatown - wayne_min, pyrique
Laselle C day - Karandang
Little India - sinkasa
Malacca - ortega
Hong Kong - distagon
Japan - eikin
General - IceCarbon, ongbenghui

Urban/streets - a mixture
Chinese Garden - andrewtansj
Pulau Ubin - various
Sungei Road - cheguthamrin
Little India - various
Singapore - Ah_K

Urban/streets - mainly still-life
National Stadium: eamesboy
National museum: Cheesecake
Mount Faber: speedblade
Substation: oracle0711
Fort Canning Park: Xevox
Hort Park: lastboltnut
Marina City Park: speedblade
Hillview avenue: Slivester
Tanjong Pagar: behyx
Tanjong Katong: retrovox
Tiong Bahru & Chinatown: eugene, LazerLordz, razor
Emily Hill - wxwayne
Hock Kee House: synapseman
Kampung Glam: Ecclesiasm, Esculent
Arab street: mjjphoto
Mayo street: Leinaj
Merlion Park (during photoaid): g-khoo
Punggol: cullenjeremy, S11loop, Yapster
Pulau Ubin: Leinaj
Amusement parks: wynx
Botanic garden: oracle0711
West Coast: cowism
Jurong East MRT station: andrewtansj
Seletar reservoir: rTwin
Singapore in general: theveed 1, 2, waileong, babykailan
Japan: eikin sakura, autumn in town, glenncain
Unknown location: Geckorian, cowism, kruger, scaredcloud, hidden3, yclee99, Blacksurrealism

Street Art: mattlock super hyper real, bumortic

.
 

Abstract and still-life
SniperD: insomnia, balance, showerhead, Happy Valentine's
doUbleCHIN: Joy in the bar
lunas: exams

Humor: nazure
General still-life: xray (1), (2), (3), plant abstracts, DarkForce, velasco
Indoor daily living items: theveed
Sand castle: vivian
Shoes: night86mare
Dolls: Stereobox
Outdoor miniatures: John Tan
Night time urban lighting: quoppy, zhang3feng
Product related: SniperD
Water droplets: wxwayne

Abstract and mirror imaging
IfourDesign, Redsun
Reflections: alex01sg, Mezzotint
The ORBs

Processing with varied themes
velasco

Digital art
Pop-art: runner10

3D panaroma with virtual reality
hazmee, merliondude1, 2, 3:Sri Mariamman Temple, etegration

.
 

IR
Choa Chu Kang Cemetry: archlover
NTU: hweechwee
Chinese Garden: zerodivine, Montmelo
Henderson waves: airforce1
Istana Woodnuek: photoexpress, thl
Jurong East MRT: karfee
Punggol & Maltida: Dennis, night86mare
Bishan Park: martadinata171, HVB88
Seletar/AMK: AuntieHuat, Khowen
Seng Kang, Fernvale: catchlights
Kallang: ark19, Dennis
Bedok reservoir: teerex, Dennis
Bidadari cemetry: eikin
Changi Point: sweeper
Pasir Ris: Dennis
Dempsey Road: photoexpress
Marina: teerex, Dennis, ahsosl1e8
City: Dennis, teerex
Clarke Quay: archlover
Sentosa: archlover, teerex
Upper Serangoon Road, formal Bidadari Christian Cemetery: catchlights
Botanic Garden: photoexpress
Tree top trail: hweechwee
Malacca: karfee
Pahang, Colmar Tropicale: teerex
Thailand resorts: hweechwee
Cambodia: archlover (1), (2), Khowen
Bali: teerex
Perth: adamadam
Japan: eikin (1), (2)
India, Taj Mahal: thl
UK, Victoria Park: vortex
Switzerland and France: adamadam
General: Hosea Previous collection, the woods, windshadow
Human activities: teerex
Unknown location: eikin

.
 

Travel & Variety - Central Asia

Pakistan to Uyghurstan: boochap
Uyghurstan, Ningxia & Gansu: Leongfm, centrino, nuts (1), (2), (3), (4), (5), cheersjy, lestwe4get, lim8395, lhjz, luosangjian et al Kanas, Baihaba and Hemu, Habahe Xian and Jeminay, Buerjin, cheersjy, 29tim05, melvynyeo, asterixsg
(luosanjian et al includes luosangjian, melvynyeo, Guni_hoon, stevepow)
Mongolia & Inner Mongolia: ZeroDivine, Gosu_John, nuts, melvynyeo (1), (2), larryloe, pat33 flickr/cs
(zerodivine's thread in Mongolia have links to individual locations)

.
 

Status
Not open for further replies.