
Hi, gang – if you see those nasty magenta/purple or green lines around the edges of objects in your image, more visible sometimes after some serious post-processing, here are a few methods for getting rid of that stuff fast in Lightroom Classic or ‘cloud:’
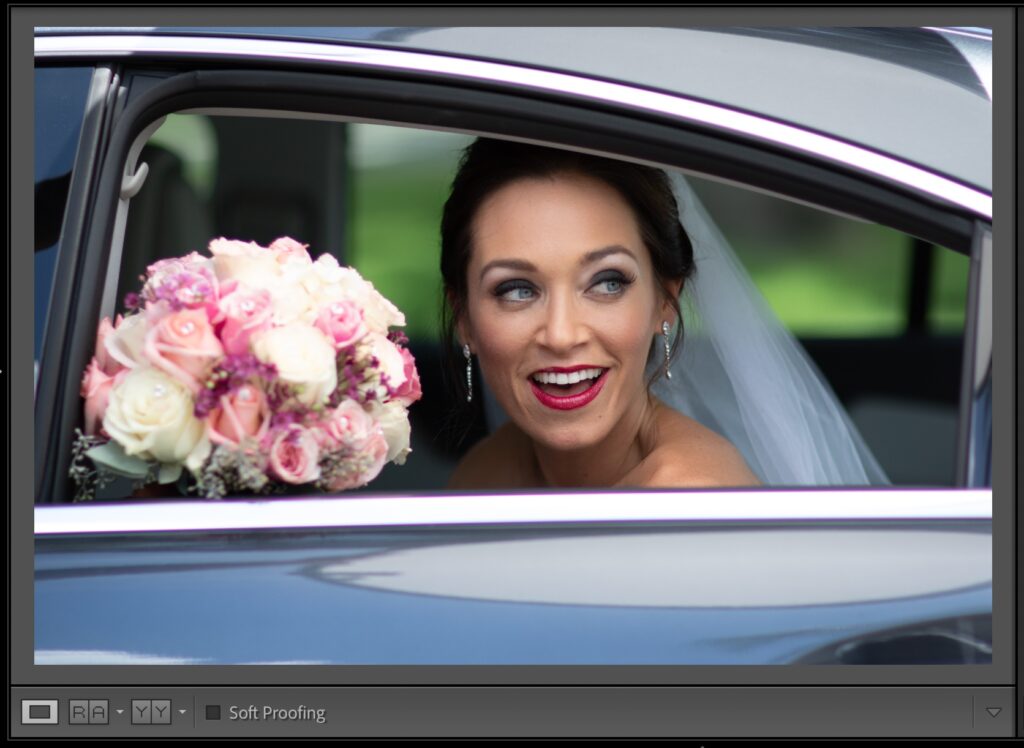
Above: Here’s the original image, and if you look along the edges of the chrome frame of the car window, you can see a purple highlight, almost like we traced those areas with a thin purple magic marker. Let’s zoom in a bit tighter so you can really see it.
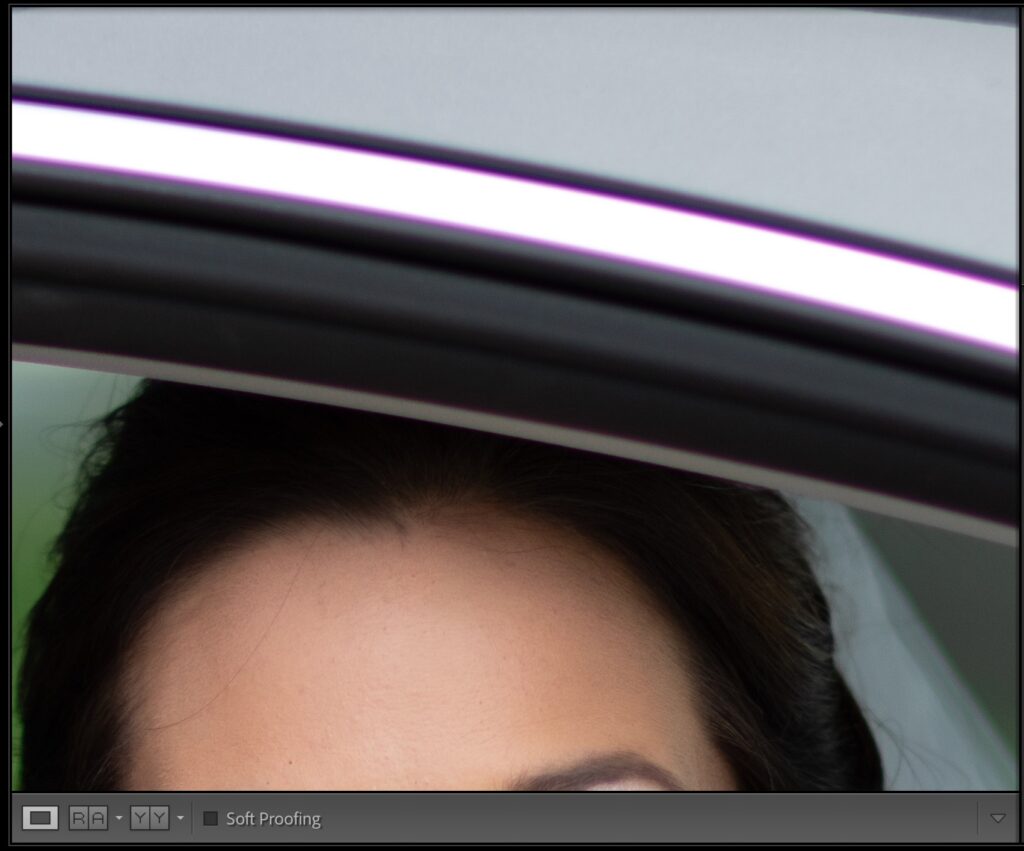
Above: Oh yeah, you can really see it clearly when you view it at 100% size, as seen above. There are a number of different ways to get rid of it, and we’ll start with the easiest method first.
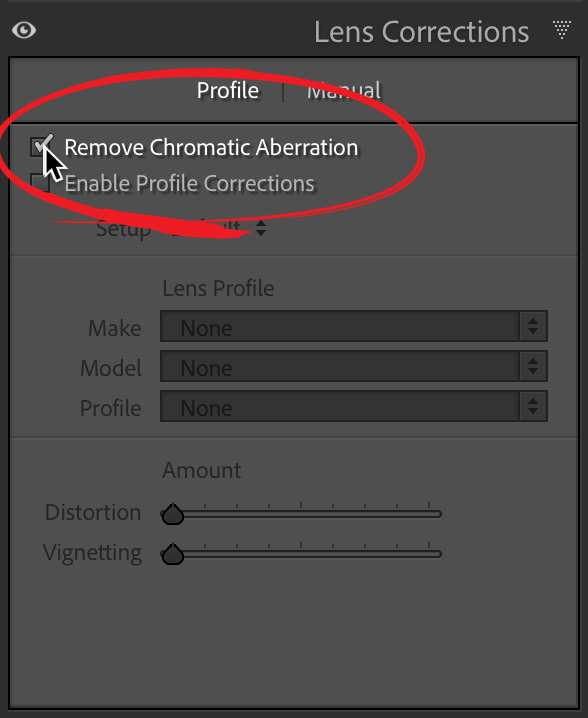
Above: If you took the shot in Raw mode on your camera, start by going to the Lens Correction panel (in LR Classic) or the Optics panel (in LR ‘Cloud’) and turn on the ‘Remove Chromatic Aberration’ checkbox (as shown here). That alone will often do the trick right there. Boom. Done. Sadly, in this case, it barely did anything, but this often does a great job, but when it doesn’t work (like in this case), then we go to our other tools.
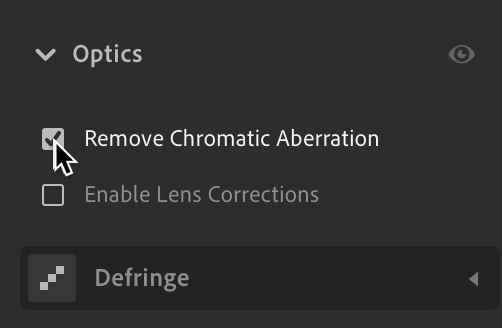
Above: if you’re using the ‘cloud’ version of Lightroom, you’d go to the Optics panel instead, and there you’ll find the ‘Remove Chromatic Aberration’ checkbox (as seen above).
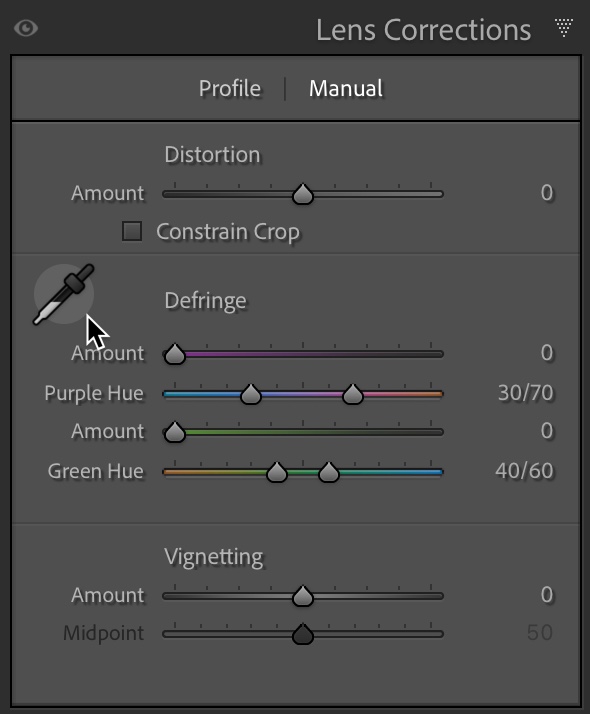
Our next line of defense against this nasty color fringe is to click on the Manual Tab in the Lens Correction panel (in Classic) or click on the word “Defringe” in Lightroom ‘cloud’ to expand the options and that’s where you’ll find the ‘Fringe Selector’ eyedropper (seen above). You use this eyedropper to tell Lightroom exactly which color you want it to remove.
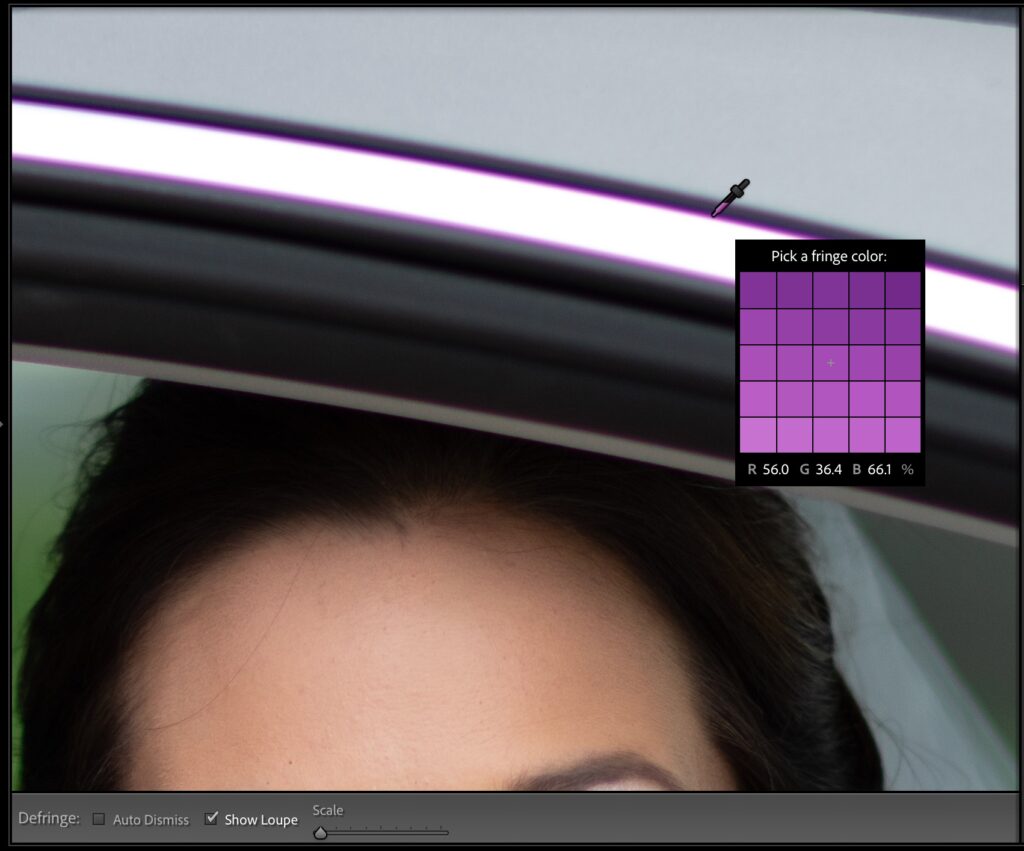
Above: Here, I’m taking the eyedropper and hovering it right on the purple edge fringe. You can see in the pop-up loupe grid that’s attached to the tool just how much purple there is along the edge of this chrome area (that’s obviously not supposed to be there). Click on this color area, which becomes the color Lightroom will neutralize for you.
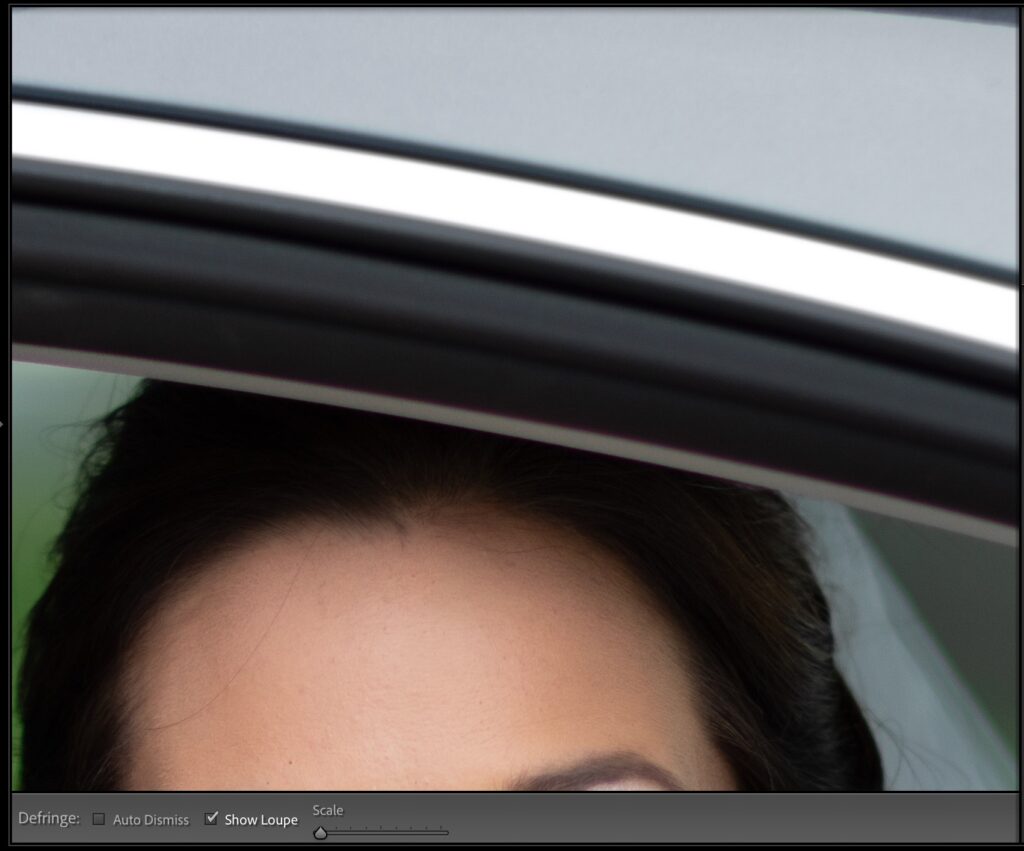
Above: Here’s what it looks like once I click that Fringe Selector eyedropper – the chromatic aberration is gone! You might have to try clicking in a few different areas of purple (or green – just depends on the image) until it gets all the color, but it should only take just a few clicks (so just a few seconds).
The last technique is to do the process manually using the Defringe sliders, and I have a short video (below) that goes over that technique, so give it a quick look (it’s short).
Well, there ya have it. Three ways to get rid of that annoying edge fringe. Hope you found that helpful.
Here’s wishing you a kick-butt Monday!

-Scott
The post Using Lightroom’s Eyedropper To Get Rid of That Nasty Purple/Green Fringe appeared first on Lightroom Killer Tips.
Continue reading...
Above: Here’s the original image, and if you look along the edges of the chrome frame of the car window, you can see a purple highlight, almost like we traced those areas with a thin purple magic marker. Let’s zoom in a bit tighter so you can really see it.
Above: Oh yeah, you can really see it clearly when you view it at 100% size, as seen above. There are a number of different ways to get rid of it, and we’ll start with the easiest method first.
Above: If you took the shot in Raw mode on your camera, start by going to the Lens Correction panel (in LR Classic) or the Optics panel (in LR ‘Cloud’) and turn on the ‘Remove Chromatic Aberration’ checkbox (as shown here). That alone will often do the trick right there. Boom. Done. Sadly, in this case, it barely did anything, but this often does a great job, but when it doesn’t work (like in this case), then we go to our other tools.
Above: if you’re using the ‘cloud’ version of Lightroom, you’d go to the Optics panel instead, and there you’ll find the ‘Remove Chromatic Aberration’ checkbox (as seen above).
Our next line of defense against this nasty color fringe is to click on the Manual Tab in the Lens Correction panel (in Classic) or click on the word “Defringe” in Lightroom ‘cloud’ to expand the options and that’s where you’ll find the ‘Fringe Selector’ eyedropper (seen above). You use this eyedropper to tell Lightroom exactly which color you want it to remove.
Above: Here, I’m taking the eyedropper and hovering it right on the purple edge fringe. You can see in the pop-up loupe grid that’s attached to the tool just how much purple there is along the edge of this chrome area (that’s obviously not supposed to be there). Click on this color area, which becomes the color Lightroom will neutralize for you.
Above: Here’s what it looks like once I click that Fringe Selector eyedropper – the chromatic aberration is gone! You might have to try clicking in a few different areas of purple (or green – just depends on the image) until it gets all the color, but it should only take just a few clicks (so just a few seconds).
The last technique is to do the process manually using the Defringe sliders, and I have a short video (below) that goes over that technique, so give it a quick look (it’s short).
Well, there ya have it. Three ways to get rid of that annoying edge fringe. Hope you found that helpful.
Here’s wishing you a kick-butt Monday!
-Scott
The post Using Lightroom’s Eyedropper To Get Rid of That Nasty Purple/Green Fringe appeared first on Lightroom Killer Tips.
Continue reading...