
It’s a really simple, handy technique when you’ve got an image like the one you see below where the light isn’t balanced – you’ve got areas that dark up top, bottom, and in the corners, and I’m just trying to get some overall balance to the light before I begin editing the image. Here goes:
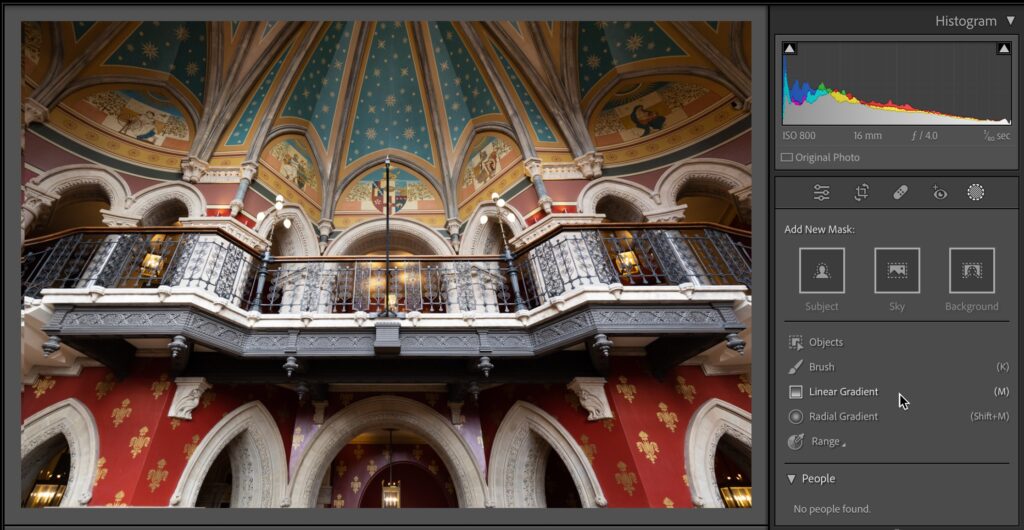
STEP ONE: Here’s the unedited image, besides fixing a Lens Correction problem. Click on the Masking icon and then click on the Linear Gradient tool. This is the one tool we will use to fix all these varying areas of light.
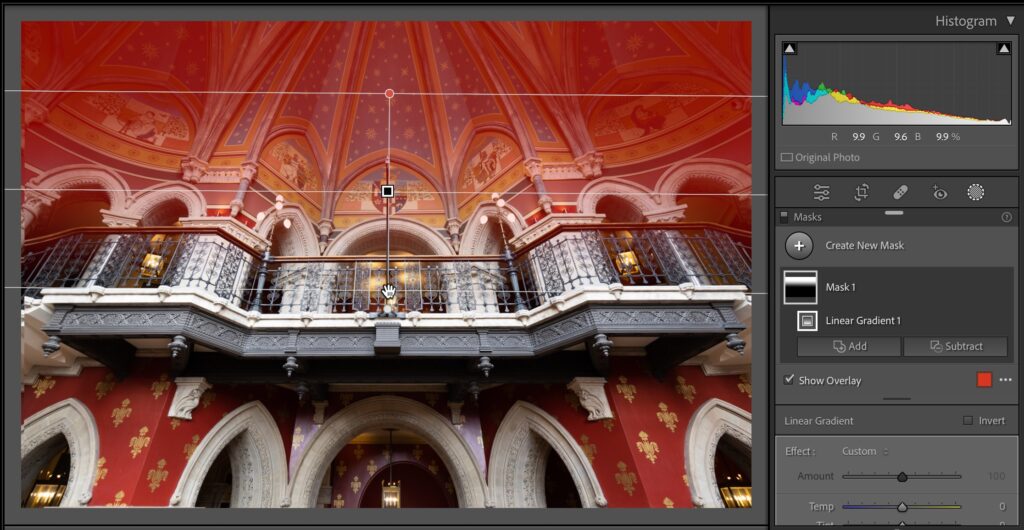
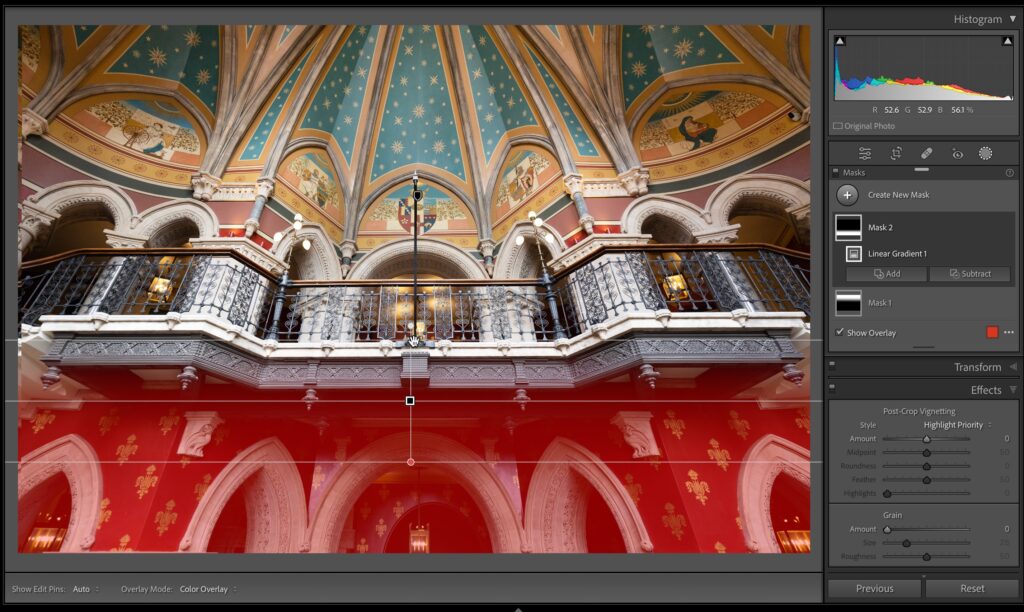
STEP TWO: We’ll start by brightening the ceiling area, so take the click and click it about 1/2 way down the ceiling and drag it down to the railing (the red tint shows you the area that’s masked).
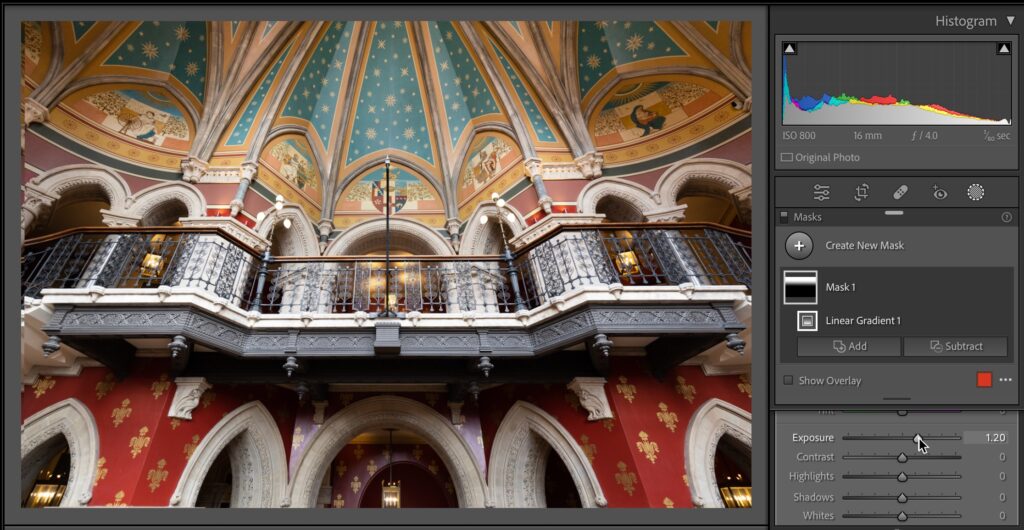
STEP THREE: Scroll down to the Exposure slider and drag it to the right to brighten that top part of the ceiling as shown here.
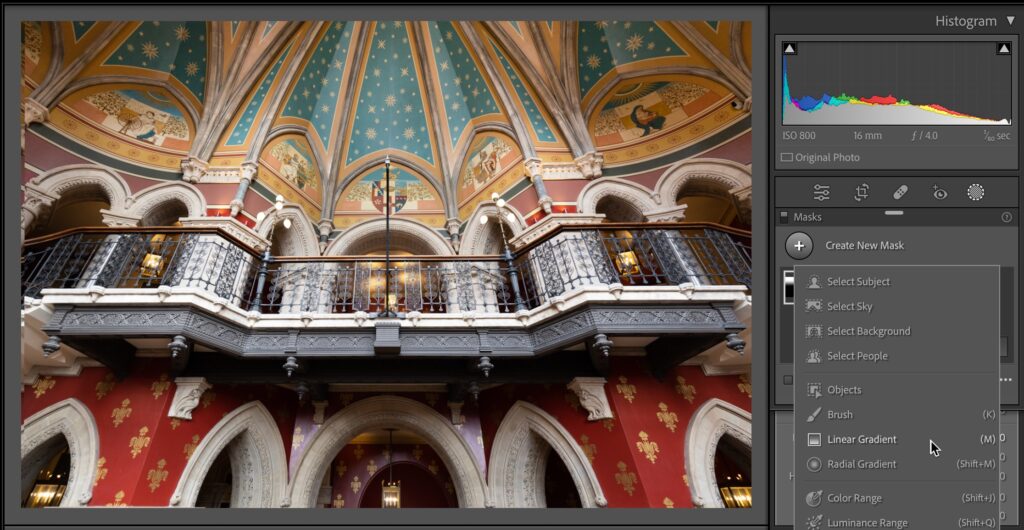
STEP FOUR: Now, in the Masking panel, click the ‘Create New Mask’ button, and in the pop-down list of tools, click on LInear Gradient (as shown here).
STEP FIVE: Now do the same thing again – but drag the gradient from the bottom up to the railing and then increase the exposure until it looks fairly evenly matched with the rest of the image (as shown here).
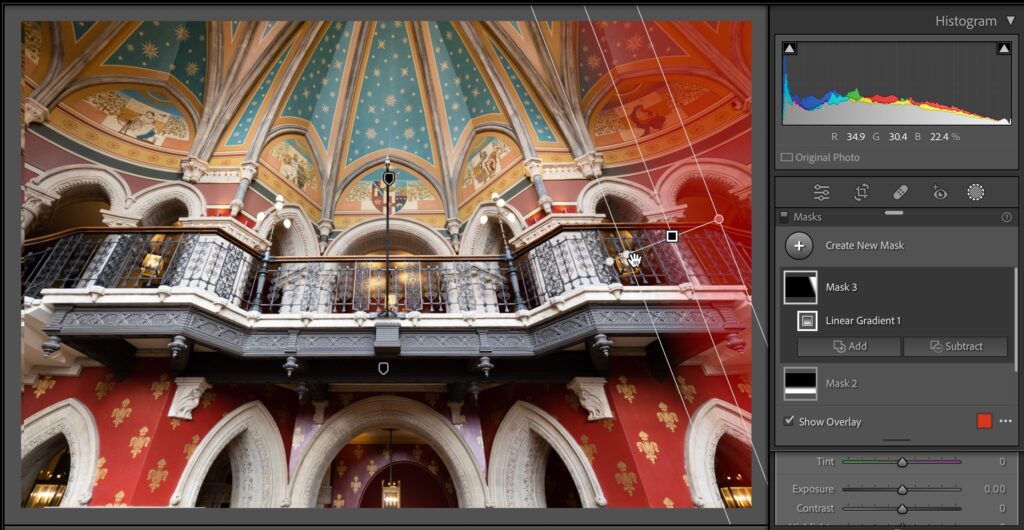
STEP SIX: Same idea, but now let’s do the right side, dragging it at an angle since that seems to be the angle we need to brighten.
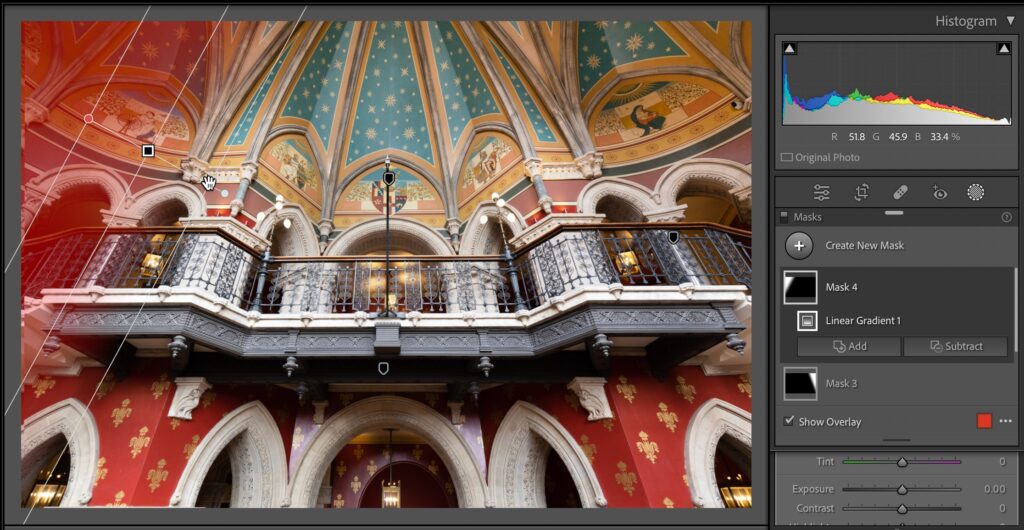
STEP SEVEN: Same thing on the left side with a Linear Gradient.
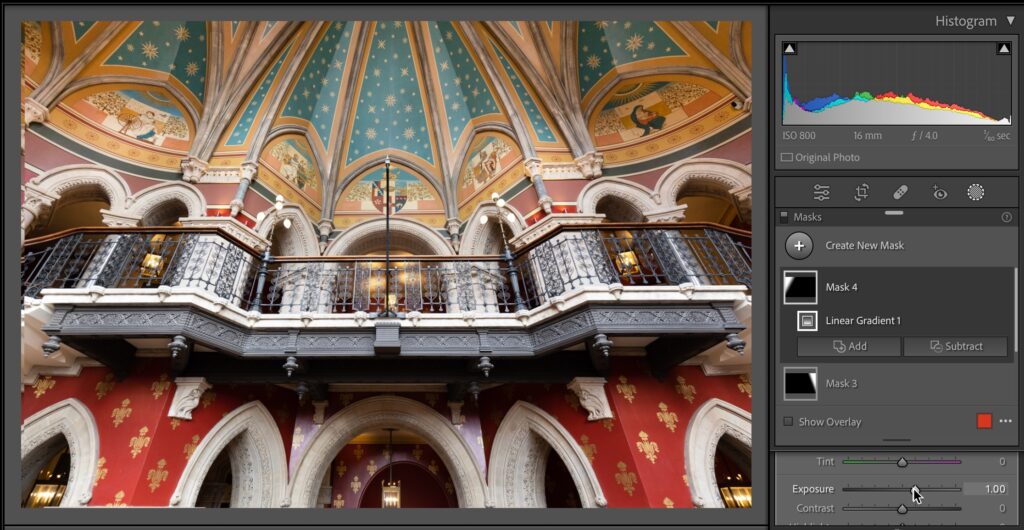
STEP EIGHT: Now brighten the Exposure amount for that top left corner to balance things out. Anyway, you get the idea. There are other ways to achieve this same fix, but today I wanted to show you something I’m doing more and more and give you ideas on how to quickly balanced light in particular areas of your photo without having to brush it all in.

ABOVE: Here’s a before and after, and now you can begin toning the image, adding contrast, opening the shadows, adjusting the whites, blacks, texture, clarity, adding sharpening, and so on, but at least our lighting is more even and balanced as we start that process. Hope you found that helpful.
My Online Gift Guide is Live Today Over At ScottKelby.com
On Friday here, I posted a link to a free downloadable PDF of the December issue of Photoshop User magazine, which includes my Annual Holiday Gear Guide. Well, today, I put all the picks, prices, and links over on my daily blog at scottkelby.com if you didn’t get a chance to download the PDF. Happy shopping.
Have a kick-butt Monday!

-Scott
The post A Simple Lightroom Masking Technique I’m Using A Lot These Days appeared first on Lightroom Killer Tips.
Continue reading...
STEP ONE: Here’s the unedited image, besides fixing a Lens Correction problem. Click on the Masking icon and then click on the Linear Gradient tool. This is the one tool we will use to fix all these varying areas of light.
STEP TWO: We’ll start by brightening the ceiling area, so take the click and click it about 1/2 way down the ceiling and drag it down to the railing (the red tint shows you the area that’s masked).
STEP THREE: Scroll down to the Exposure slider and drag it to the right to brighten that top part of the ceiling as shown here.
STEP FOUR: Now, in the Masking panel, click the ‘Create New Mask’ button, and in the pop-down list of tools, click on LInear Gradient (as shown here).
STEP FIVE: Now do the same thing again – but drag the gradient from the bottom up to the railing and then increase the exposure until it looks fairly evenly matched with the rest of the image (as shown here).
STEP SIX: Same idea, but now let’s do the right side, dragging it at an angle since that seems to be the angle we need to brighten.
STEP SEVEN: Same thing on the left side with a Linear Gradient.
STEP EIGHT: Now brighten the Exposure amount for that top left corner to balance things out. Anyway, you get the idea. There are other ways to achieve this same fix, but today I wanted to show you something I’m doing more and more and give you ideas on how to quickly balanced light in particular areas of your photo without having to brush it all in.
ABOVE: Here’s a before and after, and now you can begin toning the image, adding contrast, opening the shadows, adjusting the whites, blacks, texture, clarity, adding sharpening, and so on, but at least our lighting is more even and balanced as we start that process. Hope you found that helpful.
My Online Gift Guide is Live Today Over At ScottKelby.com
On Friday here, I posted a link to a free downloadable PDF of the December issue of Photoshop User magazine, which includes my Annual Holiday Gear Guide. Well, today, I put all the picks, prices, and links over on my daily blog at scottkelby.com if you didn’t get a chance to download the PDF. Happy shopping.
Have a kick-butt Monday!
-Scott
The post A Simple Lightroom Masking Technique I’m Using A Lot These Days appeared first on Lightroom Killer Tips.
Continue reading...