Hi guohuige,
HDR= High Dynamic Range. The camera has narrower dynamic range compare to our eyes, thus when u shoot photos, you realize that it is either the bright blue sky is blown out or the foreground is underexposed.
So to increase the dynamic range, we use a post processing method called HDR(I) (High Dymanic Range Imaging) to achieve that matter. So What we do is that we take a lot of shots at the same point with different exposures, from the brightest to the darkest area or vice versa.
Following are the steps that i have written in another forum some time ago:
It is very simple to do HDR if you do multiple frames with various exposures.
Let me explain this:
1. Mount the camera on the tripod. 2 reasons: to produce a perfect final image since we are going to merge the various exposures, and to avoid camera shakes for long exposure shots.
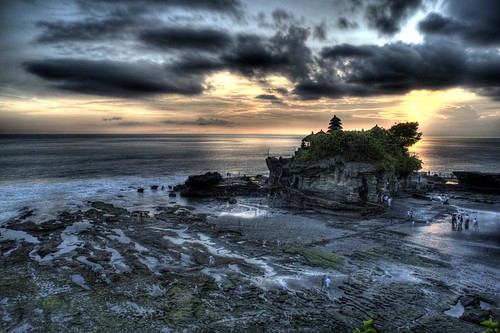
2. Preset WB and take the exposure measurement for the brightest area (in my case, the sun) and the darkest area (the rocks), jot down the readings, e.g. ISO set to 100, f/11, shutter speed reading 1/200" for brightest area, 15" for the darkest area. Take note: use spot metering to get the best reading for this.
3. Small calculation here, but once you are familiar with it, you will be fast. From the longest exposure, increase every shots by 1 stop without changing the ISO and aperture, e.g. 15", 8", 4", 2", 1"... etc. You may go for 1/2 stop too but the thing is, by merging too many shots will increase the risk of getting blur image (camera shakes, accidently change of zooms etc).
4. Then, pack everything and go home when you are happy with the shots, and then transfer all the shots into computer. (Easy isn't it? LOL)
5. Put the photos that you are going to merge into a file and name the folder whatever name you like.
6. Open Photoshop. (Oh come on...)
7. Go to file>automate>Merge to HDR...
8. Browse the folder that you have just created and open. Now, Photoshop will help you to merge the images, it might take a while for the merging process, so you may go to the kitchen and make a cup of tea for yourself and maybe play with your pet or take some photos while waiting.
9. When the shots are merged, there is a window poped up and you can deselect some shots that you do not want to merge with, then click ok, and it will take another while to create the HDR image.
10. When the HDR is created, do not panic. The image is not as great as you aspect, is it? That is because most of our screen are not capable to display the proper colour of HDR.
11. Last but not least, go to filter>photomatix>tone mapping.
12. Adjust the image by slidding the adjustments. Click ok.
13. Go to image>mode and change it back to 8 bit.
14. Save the image.
Hope this does help you to understand how to process the HDR image a bit better.
For the tone mapping, you can go to
http://www.hdrsoft.com/ to download the plugin for free. You can get the full version without paying a single cent and it comes with some irritating watermark untill you pay and register for it.
Regards,
Morven.K