
I got an email notifying me of the release of Topaz Sharpen AI, a program that enhances details and fixes out-of-focus/blurred shots. I initially expected that it was something similar to Adobe Enhance Details, which slightly enhanced the details of some specific shots and didn’t work for many other images. Topaz provided a demo fully-functional for 30 days, so I decided to give it a try.
Honestly speaking, I didn’t expect much. AI is the buzz word these days. Every company claims that their products feature wonderful AI but usually such AIs underperform my expectations.
I tell you the conclusion first so that you don’t have to waste your time. I was very, very impressed with Topaz Labs’ technology. It doesn’t work perfectly well with all images and it has some drawbacks, but the overall technology is really amazing.
Let me show you some images I processed using this software.
Nikon D810E + AF-S Nikkor 28-300m f/3.5-5.6 VR
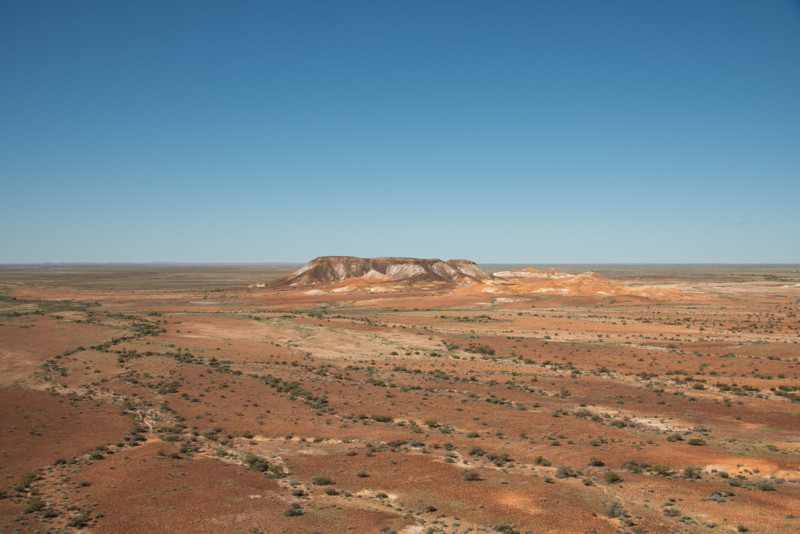
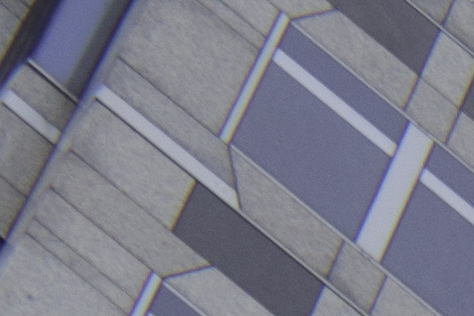
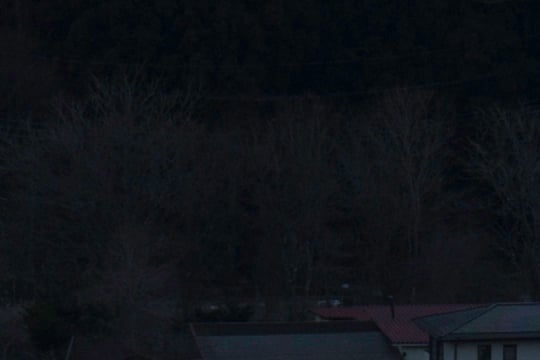
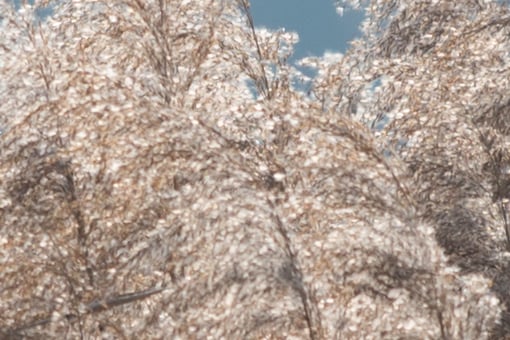
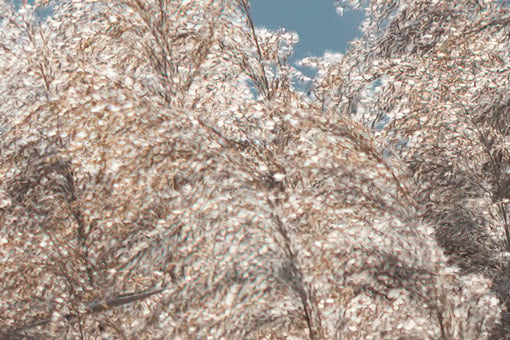
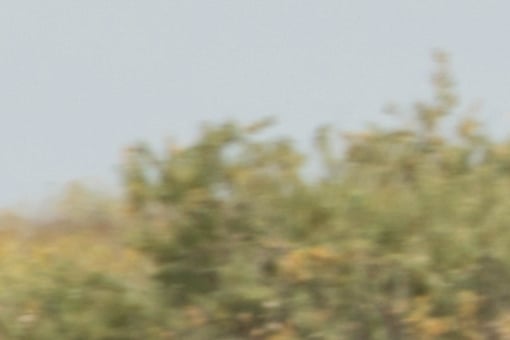
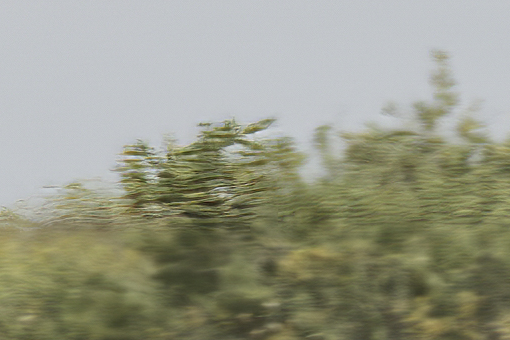
The first example is a landscape photograph I took during my travels in Australia. It was a typical situation for travel photographers: I had to take this photo with my 28-300mm utility zoom lens. There’s no problem with the focus or camera shake, but it was simply that the lens was soft particularly at the edges.
Before at center.
After sharpening at center.

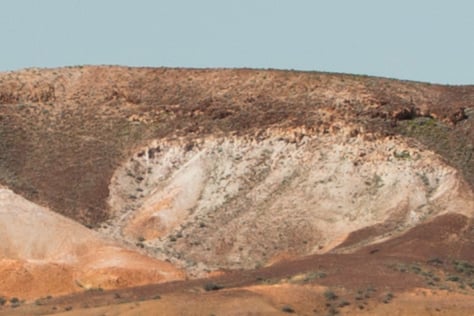
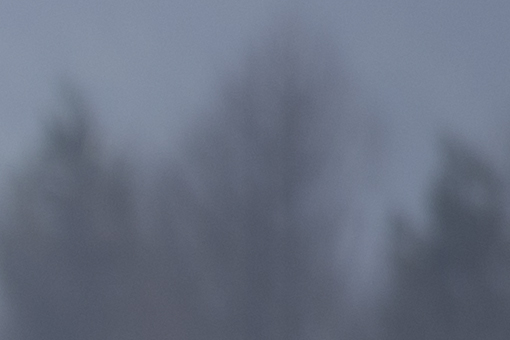
Before at edge.
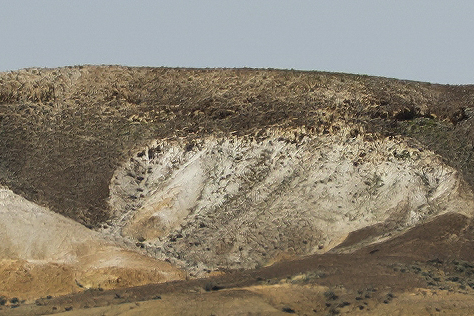
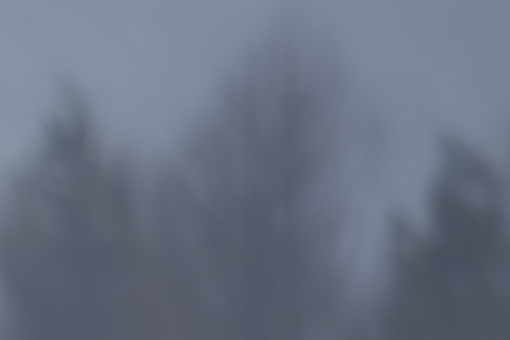
After sharpening at edge.
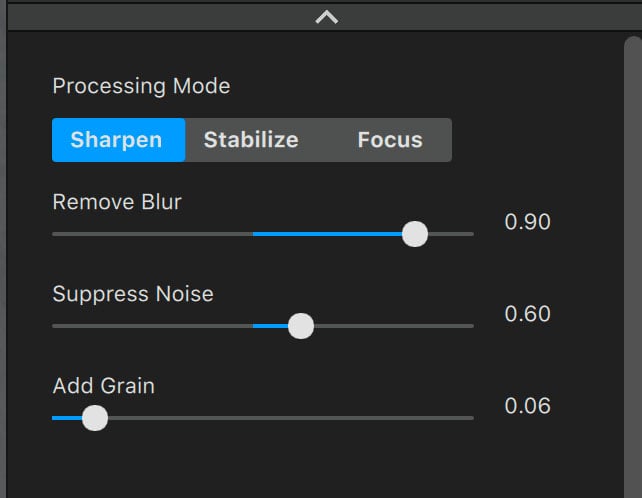
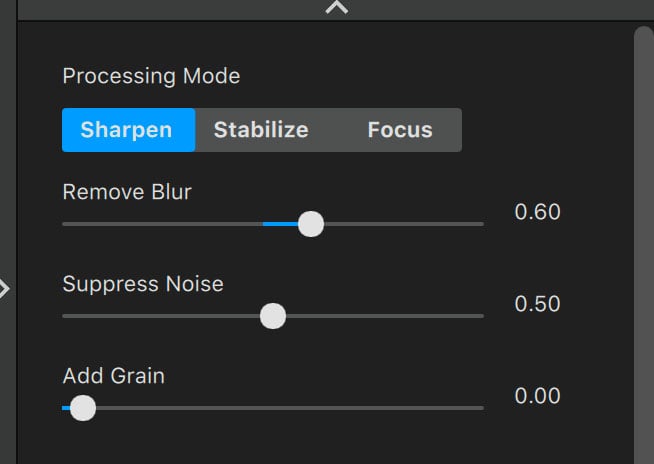
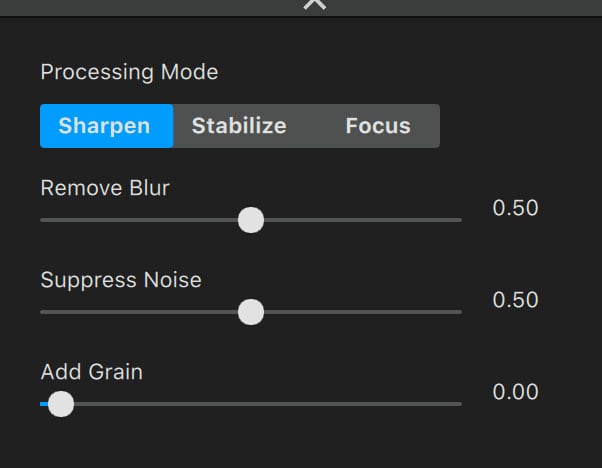
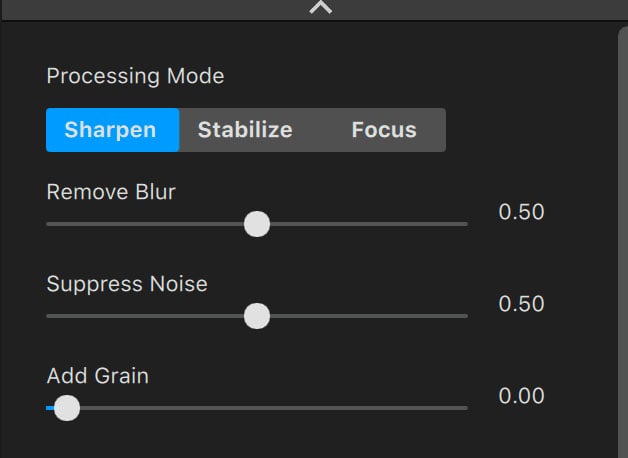
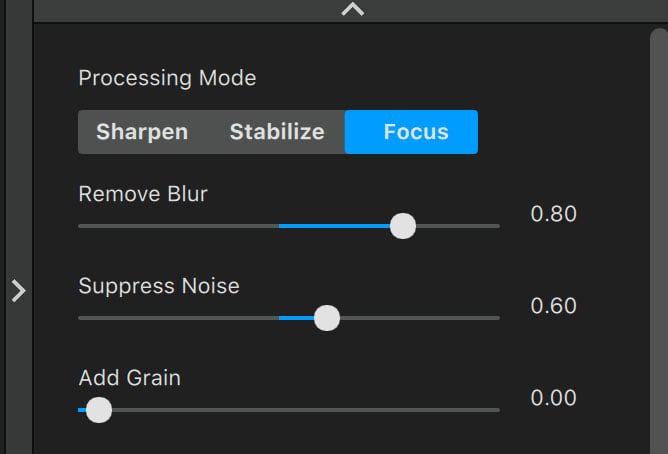
I was blown away. The following settings were applied. If you feel it’s a little too sharp at the center, turn Remove Blur down to, say, 0.40 and blend them together in Photoshop using the circular gradation tool on a layer mask.
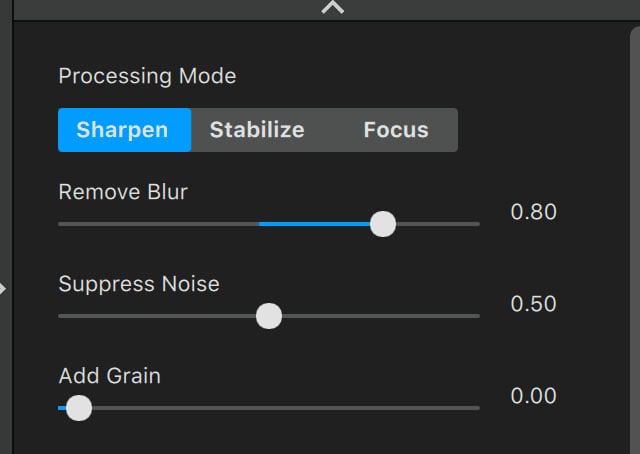
As soon as I started using this software I noticed something unusual — It is really slow! This program is extremely CPU/GPU intensive, so you need to run it on a fast PC. My 27″ Retina iMac is not too slow (Core i7 7700K 4.2GHz with Radeon Pro 8GB and 40GB of RAM), but it runs really slow on my computer. If you turn off Automatically Update Preview switch at the right bottom of the window, it runs smoothly but you need to check out the preview to make appropriate settings. The workaround I found was to keep the preview size as small as possible — then it ran a little faster. Still slow but somewhat bearable.

Olympus OM-D E-M5 with 14-150mm F4-5.6
Let’s move on to the next example. This photo was again taken with a utility zoom lens. I took this shot when I lived near the building (Tokyo Metropolitan Government Building) several years ago. The original image was slightly out of focus. Perhaps I should’ve fixed the purple fringe in Lightroom in advance. But the Sharpen AI enhanced the details dramatically and also removed the purple fringe to some degree.
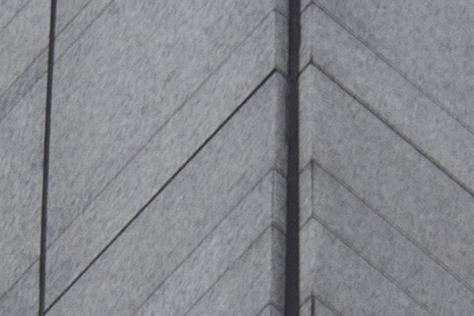
Before at center.
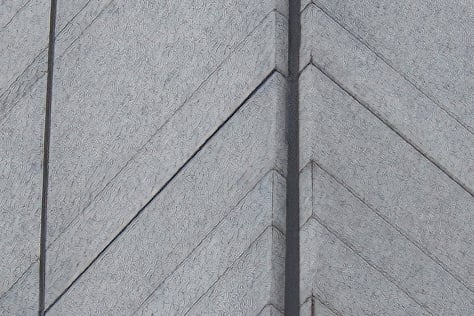
After sharpening at center.
Before at edge.

After sharpening at edge.
So far this program is really amazing. But it doesn’t always work perfectly well.
Nikon D800E + SIGMA 50mm F1.4 ART
This shot was taken with the Sigma Art 50mm f/1.4, so it’s actually very sharp and doesn’t really require any further sharpening, but I tested it, too.

Before around the center.
After sharpening around the center.
Before at the trees in the shadows (brightened to make them more visible).
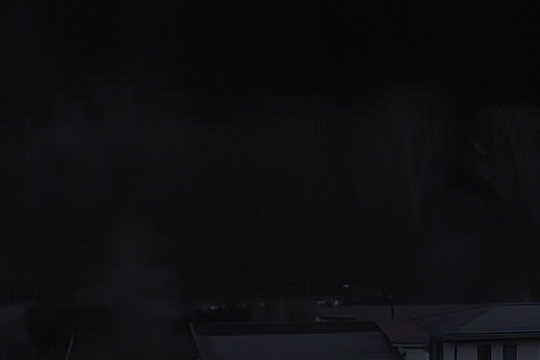
After sharpening at the trees in the shadows (brightened to make them more visible).
The AI successfully sharpened the image except for the trees hidden in the shadow. The original was much better in this particular area. So you need to know how to blend two images using a layer mask in Photoshop to fully appreciate this software.
Nikon D800E+Nikkor 70-200mm f/4G ED VR
How does it work on photos with a shallow depth of field? I tested the AI with the above example shot.
Before around the center.
After sharpening around the center.
Before in the defocused area.
After sharpening in the defocused area.
To my surprise, it sharpened the focused part and also smoothened (or reduced the noise at) the defocused part.
The focused and defocused areas were easily distinguishable in the above example. Let’s try it with another sample in which the amount of bokeh varies within a single subject.
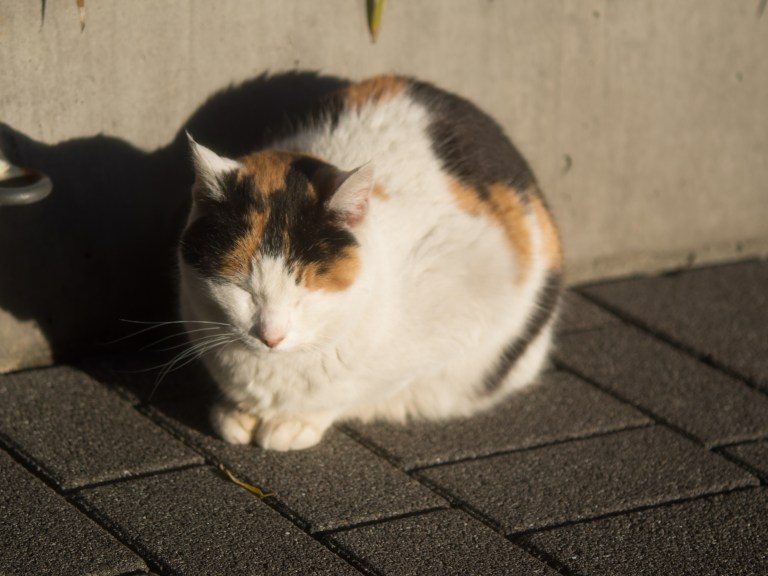
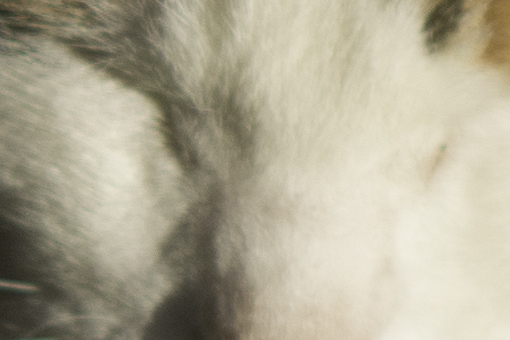
Olympus E-M5 + a MF lens (but I don’t remember the name.)
You might wonder why I couldn’t focus on a cat who stayed still. Well, I manually focused using an old lens… It’s a shame to show you such a badly taken photo, but it is a good example for the review.

Before.
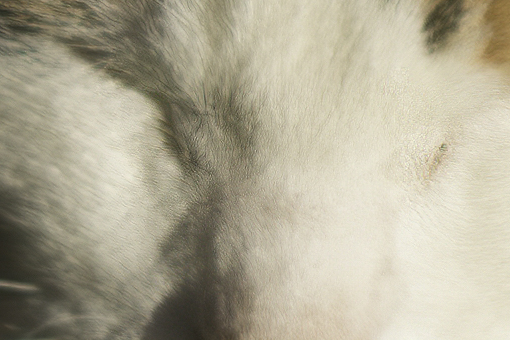
After sharpening.
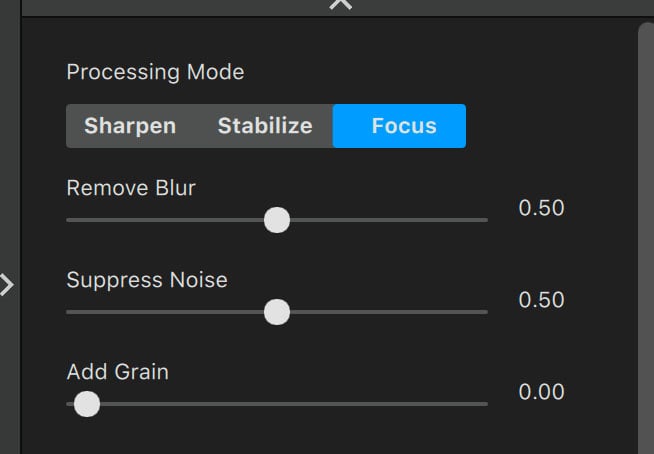
These settings couldn’t fix the focus. So let’s try another algorithm.
Before.

After sharpening.
A little better. But not very natural. Maybe you can blend it with the original to make it look as if the focus is on the nose of the cat. I need to test more photographs to draw a conclusion but I guess that the AI is not very good at handling this sort of photographs, that is, the amount of bokeh varies dramatically within a single subject.

Nikon D800E + Nikkor 28-300mm f/3.5-5.6G ED VR
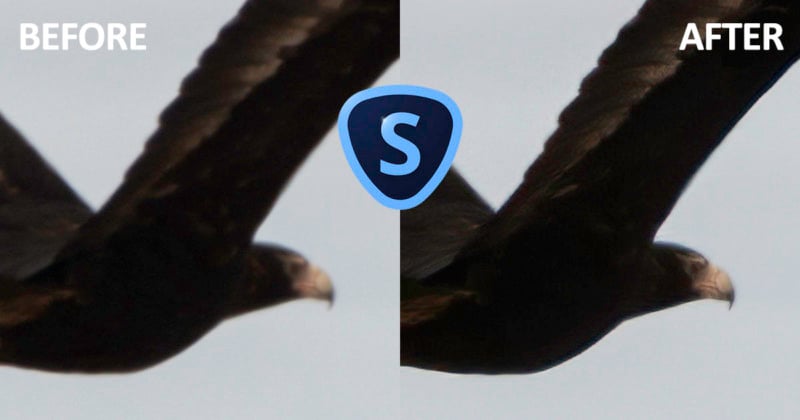
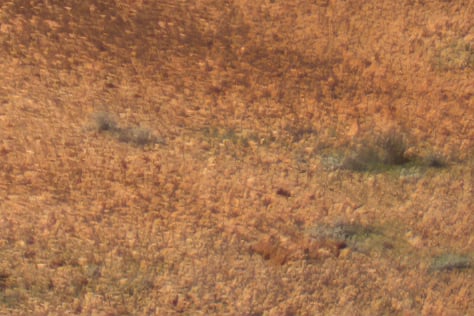
The last example is a photo of an eagle I took in Australia with the 28-300mm utility zoom. I spotted an eagle while driving in the outback. I quickly pulled over the car and took this shot but unfortunately the camera couldn’t AF well.
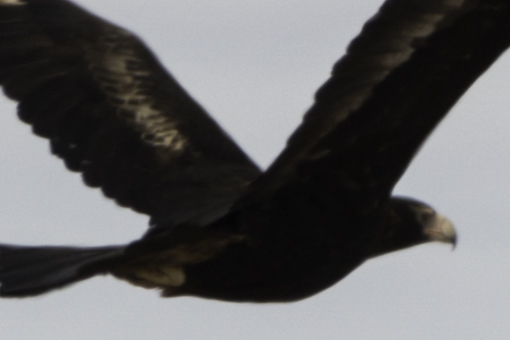
Before.
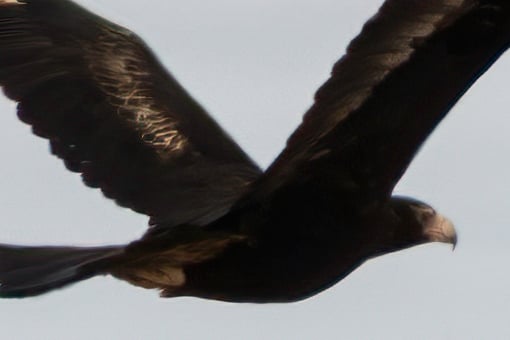
After sharpening.
Wow! I was utterly gobsmacked at the result. It’s magic, isn’t it!?
Before.
After sharpening.
But it also sharpened defocused areas in an unnatural way as well. So I’d need to blend the sharpened image with the original in Photoshop. I’m not going to explain how to blend them in Photoshop in this article, as it is already too long and I want to focus on the AI.
The Bottom Line
This product doesn’t work perfectly for every photo but it works wonders on many photos. I highly recommend Topaz Sharpen AI if you have a fast computer. I bought it. I would be delighted if I could use PayPal though.
About the author: Yuga Kurita is a professional photographer based in Japan. The opinions expressed in this article are solely those of the author. You can find more of Kurita’s work on his website, Facebook, Twitter, Flickr, 500px, and Instagram. This article was also published here.
Continue reading...