
Hi, everybody – I’m back from my holiday break (really enjoyed it, and the football gods were not awesome to me, as Alabama is now out of the National Championship found, and my Bucs stunk it up last Sunday and this Sunday is our last chance to make the playoffs). Now, it’s a new year, full of new opportunities and possibilities, so let’s get right to it.
If, like me, you like to embed your copyright and contact info directly into your images (handy in case you share images on Instagram, FB, X [formerly Twitter], etc.), then it’s time to update your Lightroom Classic copyright info template for 2023 for the new images you take and import this year. It’s really simple but not super obvious, so here we go:
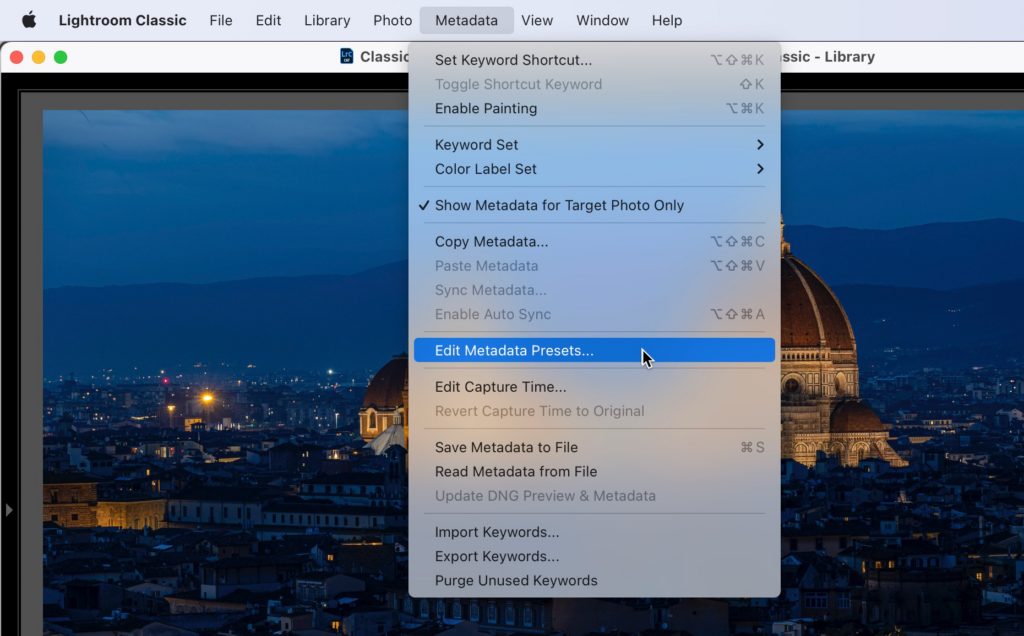
STEP ONE: Go to the Library Module; go under the Metadata menu up top and choose Edit Metadata Presets as shown above (NOTE: if you don’t already have an existing Copyright template in place, you use this same menu to create one from scratch, so either way you would choose this Edit Metadata Presets to get started).
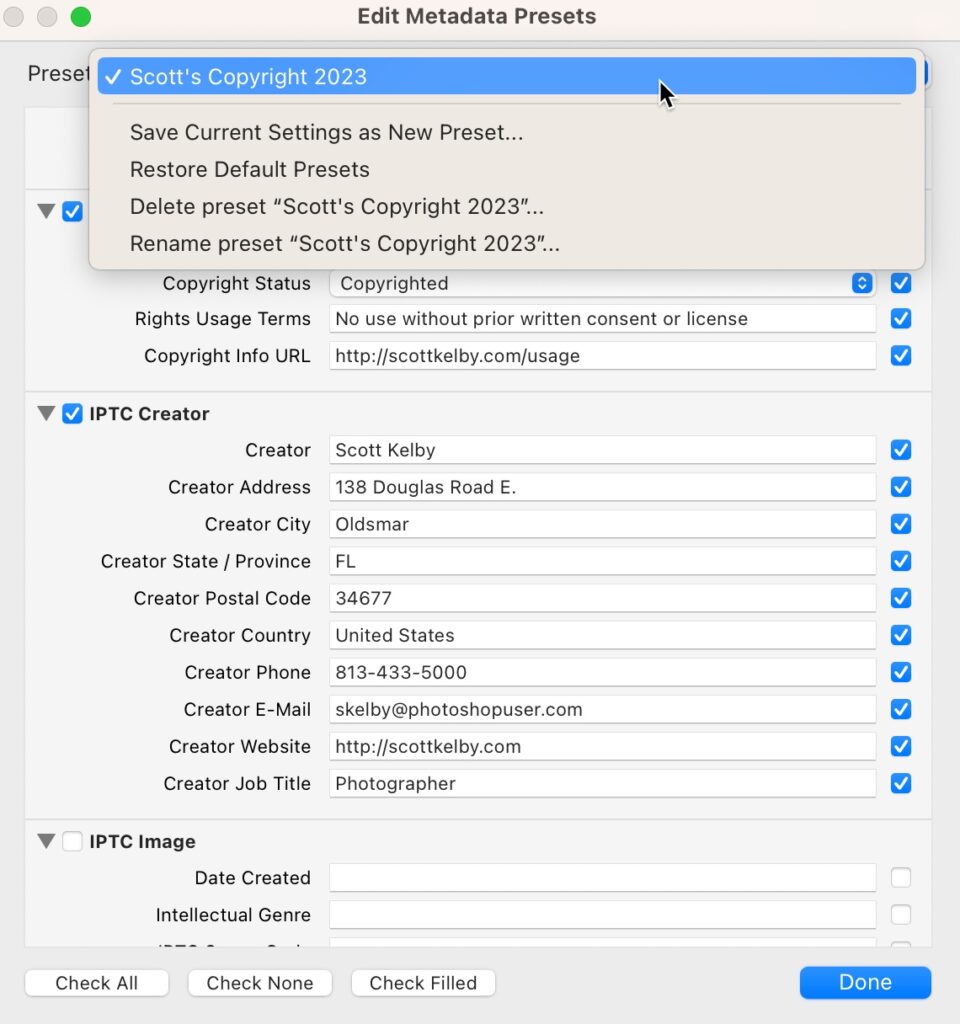
STEP TWO: When the Edit Metadata Presets window appears (shown above), choose the name of the preset you want to edit, and it will display your copyright template info (as seen). In my case, I’m editing last year’s Copyright preset, but if you don’t already have one, scroll down to the IPTC Copyright section and start typing your info there and the IPTC Creator section below it, as I have above.
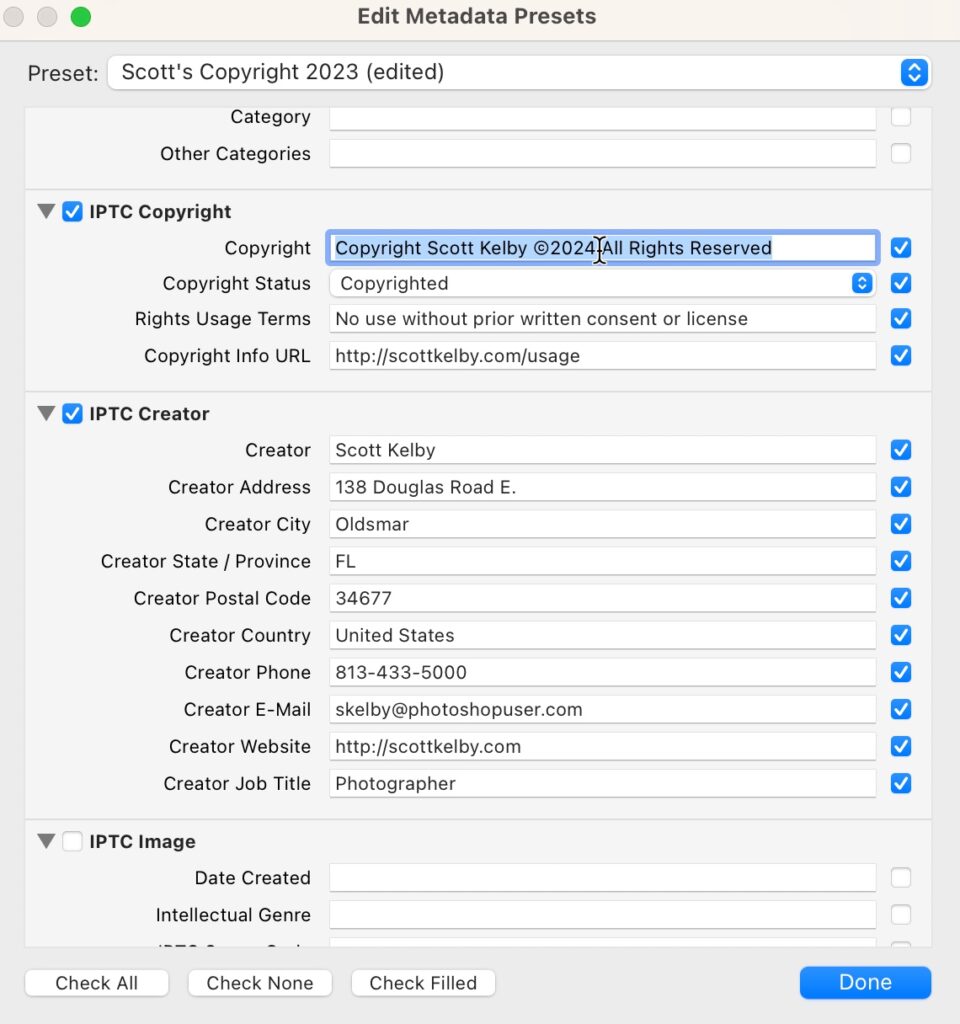
STEP THREE: Go to the IPTC Copyright section, click on the field to the right of Copyright (as shown above), then just type in 2024 right over where it previously said 2023. If you’re creating your first Copyright template, just go ahead and type in 2024 and your name in the Copyright field, and then under Copyright Status, choose “Copyrighted” from the pop-up menu.
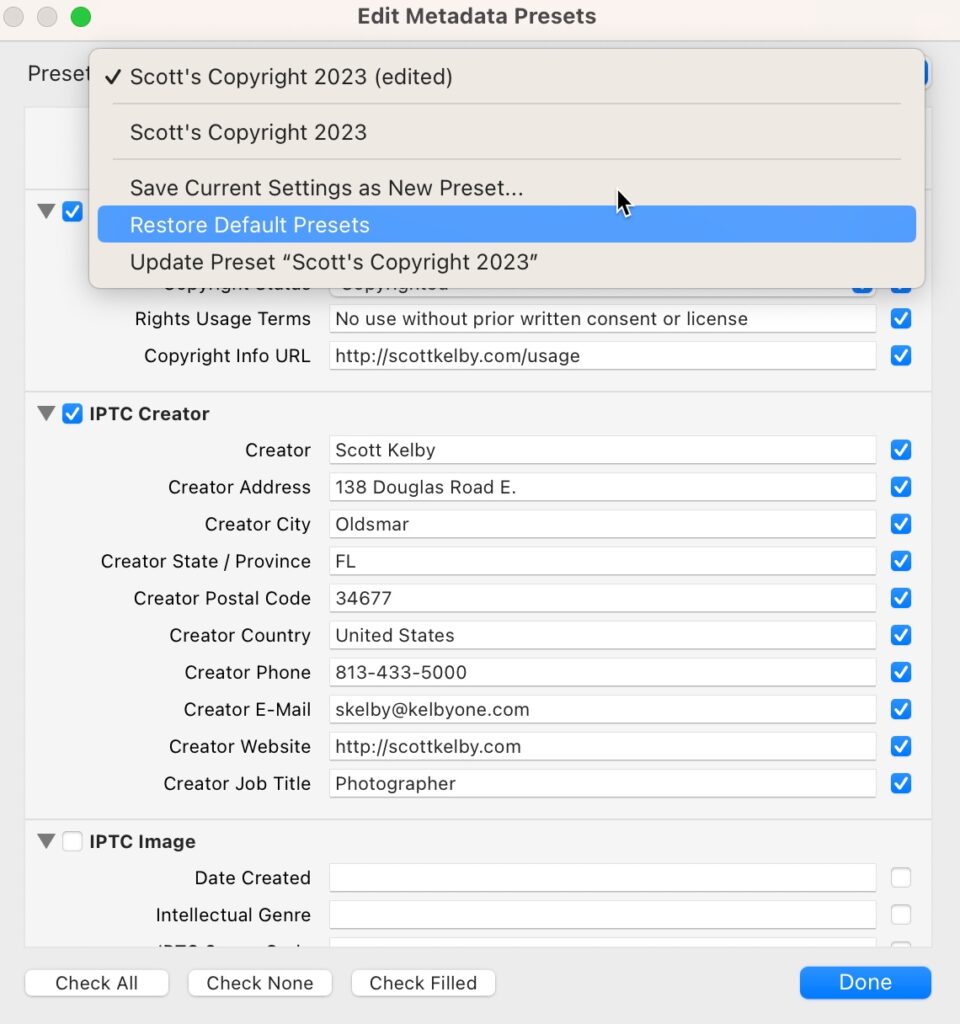
STEP FOUR: Once you’ve updated the date, it’s time to save your new preset by going to the Preset pop-up menu at the top of the window and choosing “Save Current Settings as New Preset,” as shown above.
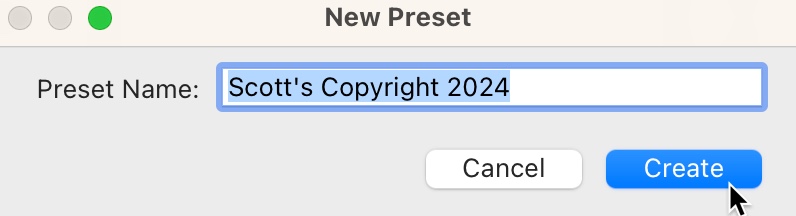
STEP FIVE: This brings up a small dialog where you can enter the name for your New Preset (as seen above).
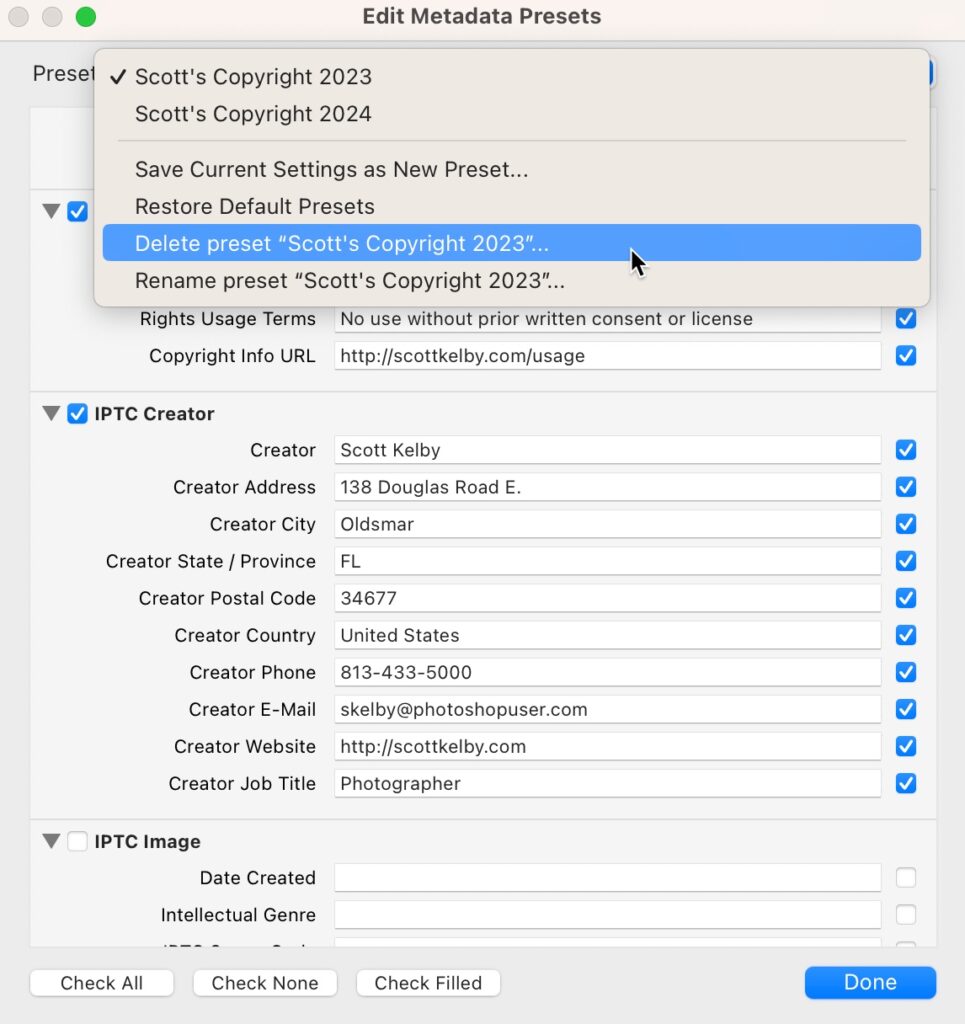
STEP SIX: If you don’t have any old 2022 images you haven’t yet imported into Lightroom, you can choose to delete last year’s preset if you want (you won’t be using it again if you’ve already imported all your images from last year), so if you want to delete it (totally up to you — you don’t have to – you can keep multiple year’s templates, no sweat), first choose the old 2022 Preset from the pop-up menu; then go to the same pop-up menu again but this time choose Delete Preset “Scott’s Copyright 2022” (or whatever you named it), then click the Done button.

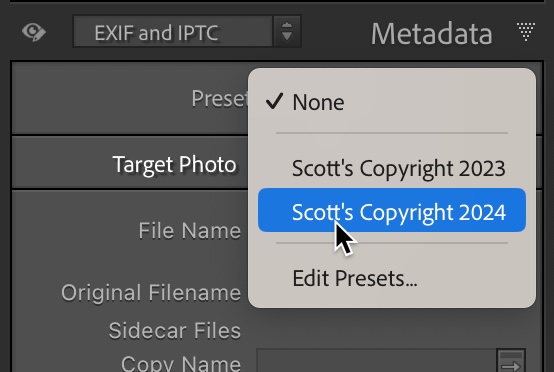
STEP SEVEN: APPLYING YOUR NEW COPYRIGHT PRESET: There are two ways (OK, probably more) to apply these presets. However, my favorite is to embed this copyright data into your images right during the Import process. In Lightroom Classic’s Import window, in the “Apply During Import” panel (seen above right), where it says “Metadata,” choose your Copyright preset from that pop-up menu. As your images are imported, your copyright status and contact info are automatically embedded into each photo. The second method is for images you’ve taken this year and already imported into Lightroom.
The post It’s Time To Update Your Copyright Info Inside Lightroom For 2024 appeared first on Lightroom Killer Tips.
Continue reading...
If, like me, you like to embed your copyright and contact info directly into your images (handy in case you share images on Instagram, FB, X [formerly Twitter], etc.), then it’s time to update your Lightroom Classic copyright info template for 2023 for the new images you take and import this year. It’s really simple but not super obvious, so here we go:
STEP ONE: Go to the Library Module; go under the Metadata menu up top and choose Edit Metadata Presets as shown above (NOTE: if you don’t already have an existing Copyright template in place, you use this same menu to create one from scratch, so either way you would choose this Edit Metadata Presets to get started).
STEP TWO: When the Edit Metadata Presets window appears (shown above), choose the name of the preset you want to edit, and it will display your copyright template info (as seen). In my case, I’m editing last year’s Copyright preset, but if you don’t already have one, scroll down to the IPTC Copyright section and start typing your info there and the IPTC Creator section below it, as I have above.
STEP THREE: Go to the IPTC Copyright section, click on the field to the right of Copyright (as shown above), then just type in 2024 right over where it previously said 2023. If you’re creating your first Copyright template, just go ahead and type in 2024 and your name in the Copyright field, and then under Copyright Status, choose “Copyrighted” from the pop-up menu.
STEP FOUR: Once you’ve updated the date, it’s time to save your new preset by going to the Preset pop-up menu at the top of the window and choosing “Save Current Settings as New Preset,” as shown above.
STEP FIVE: This brings up a small dialog where you can enter the name for your New Preset (as seen above).
STEP SIX: If you don’t have any old 2022 images you haven’t yet imported into Lightroom, you can choose to delete last year’s preset if you want (you won’t be using it again if you’ve already imported all your images from last year), so if you want to delete it (totally up to you — you don’t have to – you can keep multiple year’s templates, no sweat), first choose the old 2022 Preset from the pop-up menu; then go to the same pop-up menu again but this time choose Delete Preset “Scott’s Copyright 2022” (or whatever you named it), then click the Done button.
STEP SEVEN: APPLYING YOUR NEW COPYRIGHT PRESET: There are two ways (OK, probably more) to apply these presets. However, my favorite is to embed this copyright data into your images right during the Import process. In Lightroom Classic’s Import window, in the “Apply During Import” panel (seen above right), where it says “Metadata,” choose your Copyright preset from that pop-up menu. As your images are imported, your copyright status and contact info are automatically embedded into each photo. The second method is for images you’ve taken this year and already imported into Lightroom.
The post It’s Time To Update Your Copyright Info Inside Lightroom For 2024 appeared first on Lightroom Killer Tips.
Continue reading...