
Solargraphies (pinhole images on photographic paper that capture months of the sun arching across the horizon) were a thing starting sometime in the 2000s. When this caught on broadly in the early 2010s, it got a lot of people excited for film again.
Quite a few people apparently started dropping cans with paper and pinholes in woods and the public urban space and I very much like this idea.
Solargraphy.com by Tarja Trygg is collecting hundreds of wonderful examples.
While pinhole cameras built from beer cans and sewer plumbing tubes have a very appealing DIY character, you can even buy them off-the-shelf now. Offering pre-assembled kits makes solargraphy way more accessible and having easy-to-build hardware is certainly something this project lacks.
I really like film (or paper in this instance), but I got rid of all my analog equipment. So, how about doing the same type of photography but without film?
Theory
The problem: It’s easy to create digital long exposures. Reduce the sensors’ exposure to light and let it run for a few seconds. If you want to go longer you will realize that after a few seconds it will get horribly noisy.
The next step up in the game is taking many single exposures and averaging them. This way an arbitrarily long exposure can be simulated quite well in software. When using a weighted average based on exposure value from the single images, even day-long exposures are possible. Nice!
Except… that won’t work for solargraphy images. While the sun burns into the film and marks it permanently, the extremely bright spot/streak of the sun is averaged away and won’t be visible in the digital ultra-long exposure. Darn…
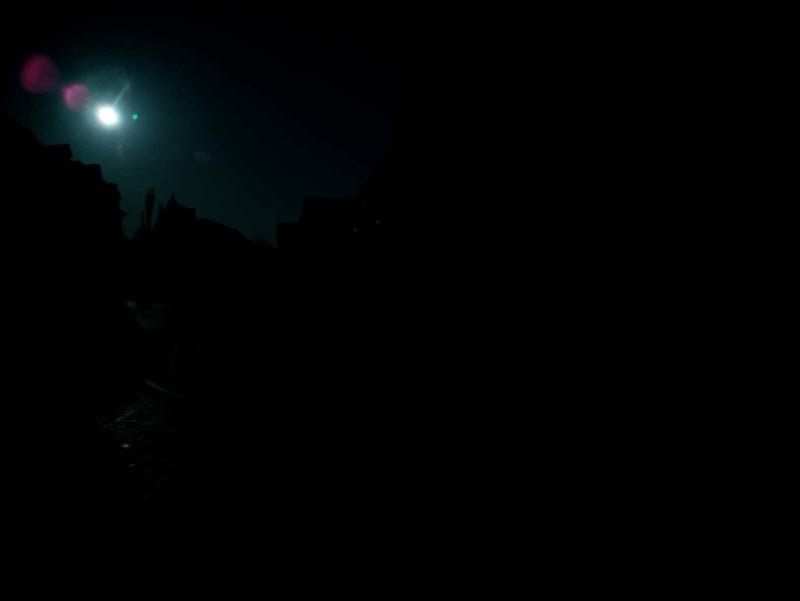
24 hour digital long exposure:
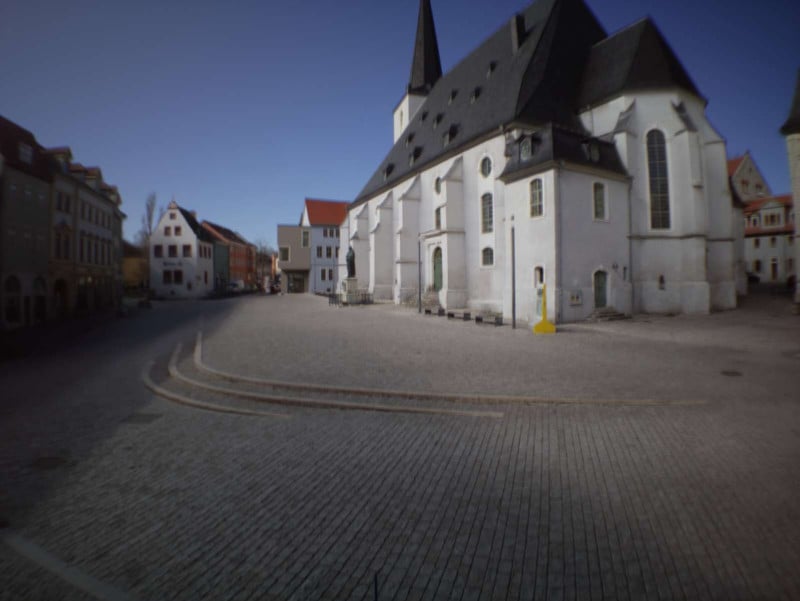
The result of only averaging:
So, how can we solve this problem? While taking single exposures we need to keep track of the spots of the film that would be “burned” or solarized. For every image we take (with the correct exposure), we take another image right away with the least amount of light possible hitting the sensor. We assume that every bit of light that would have hit the sensor in our second, much darker exposure would have been sufficiently bright to permanently mark the film.
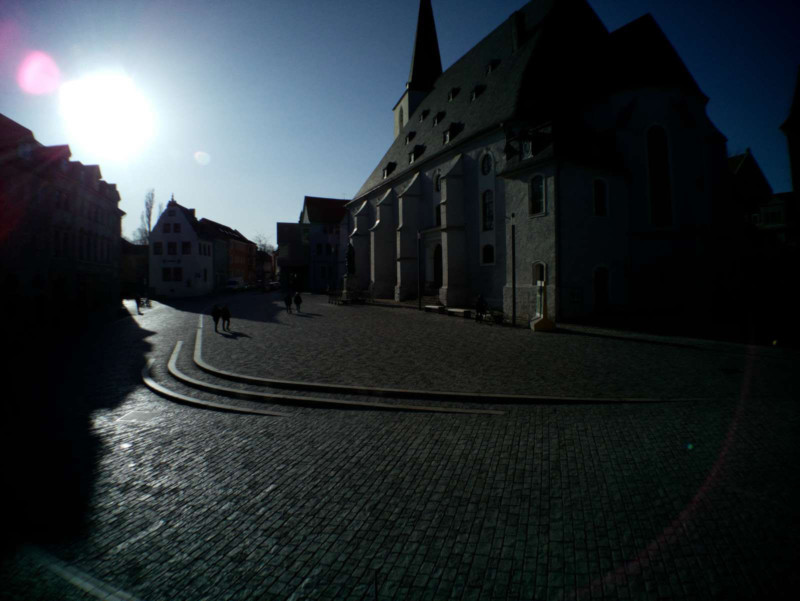
There is an easy way to move the window of min/max possibly capturable EV values by the camera: a neutral-density filter. That reduces the amount of light that hits the sensor considerably, so the camera won’t be able to capture images in the dusk or dawn or the night, but that’s not a problem in our case since these images wouldn’t be relevant for a multi-day long exposure anyway (compared to the bright daytime their impact on the overall image is negligible). When using an ND64 filter (64 or 2 to the power of 6) it takes away about 6 EV (ND filters are never precise) and thus gives us 26 as the max EV value. How does that look?
Correctly exposed image (EV: 11)
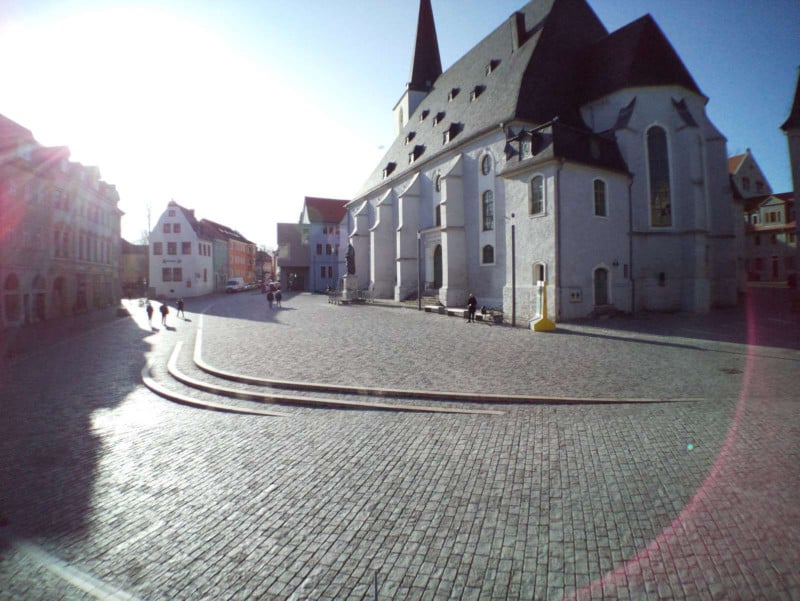
Slightly darker (EV: 14)
Close to what most DSLRs achieve out of the box (EV: 19)
Aaaand here we go (EV: 26)

Does that suffice? I would say, yes.
Software
So, how do we process this? Take a correctly exposed photo every X seconds and a second photo at EV 26 right away. From all the first photos the long exposure image is calculated by doing a weighted average based on metadata. We can calculate the EV value from the EXIF data of the image, apply an offset to the value, and use 2 to the power of the offsetted EV value as our weight for averaging pixel values.
For the set of second images we can’t do that, we would average out all burned image sections/pixels. There we just overlay every image and keep the brightest pixels of all images.
Afterwards we take the long exposure image and burn all the bright pixels with the data from our sun overlay:
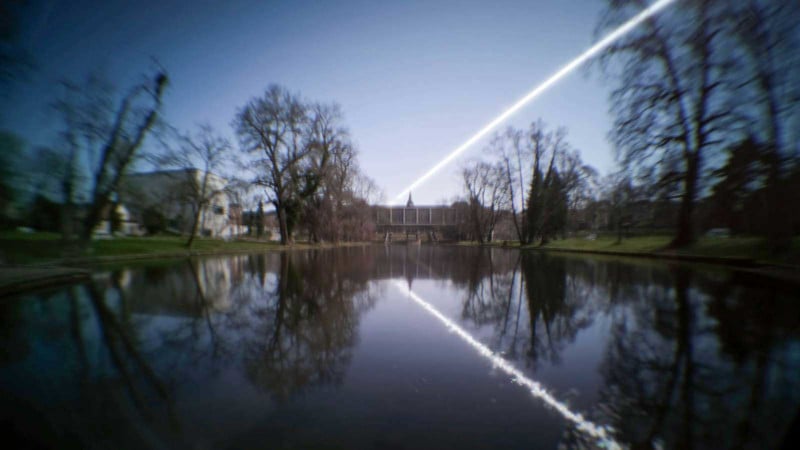
Terrific! But how many images are required and how fast do we need to take them?
Interval duration depends on the focal length (the wider the image, the smaller the sun, the longer the time in between images may last). In my case for a wide-angle image (about 24mm) 60s seem to be the minimum and 45s would be preferable. If the interval exceeds 60s, the arc of the sun is reduced to overlaying circles and finally just something like a string of pearls. One way to cheat is by applying a bit of gaussian smoothing on the sun overlay image to help break up the hard edges and smooth out the sun circles.
90 second interval:
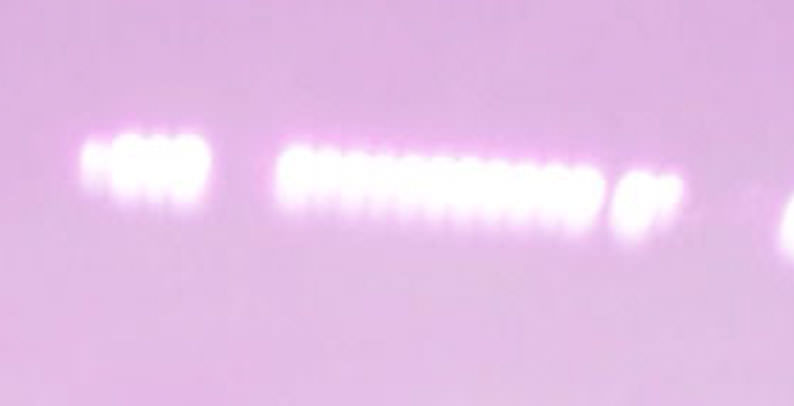
Gaps are caused by a partially clouded sky which blocked the sun
The number of images for the long exposure depends on the amount of movement but a number of 60 to 90 images works well even for tiny details.
Hardware
We now have a feasible way of creating a digital solargraphy. Except, we need to actually take/make one. How to get a (relatively) disposable camera out there that may be snatched away by pesky birds or even peskier public servants at any moment? Some solargraphy enthusiasts report 30 to 50 percent loss of cameras when placing them out in the wild for half a year (winter to summer solstice, i.e. highest to lowest point of the sun).
I won’t do six months, but being prepared for losing a camera or two might be a good idea. The smallest and least expensive camera I (you?) can build is basically a Raspberry Pi Zero with a Pi Camera Module. That’s featuring a whopping 8 megapixels but I guess that’s ok — we don’t want this for ultra-sharp glossy fine-art prints.
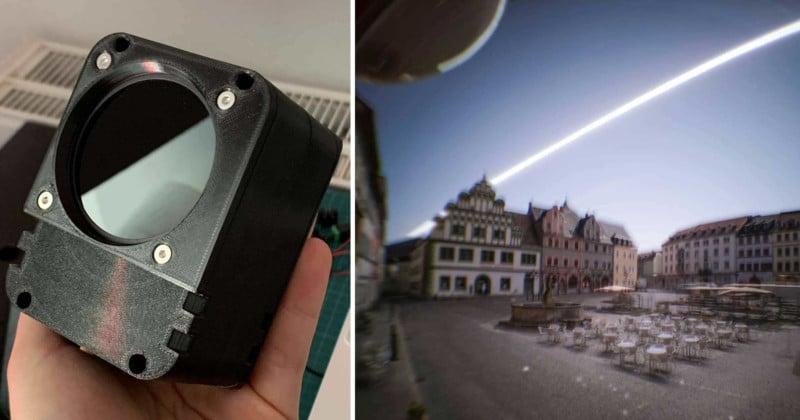
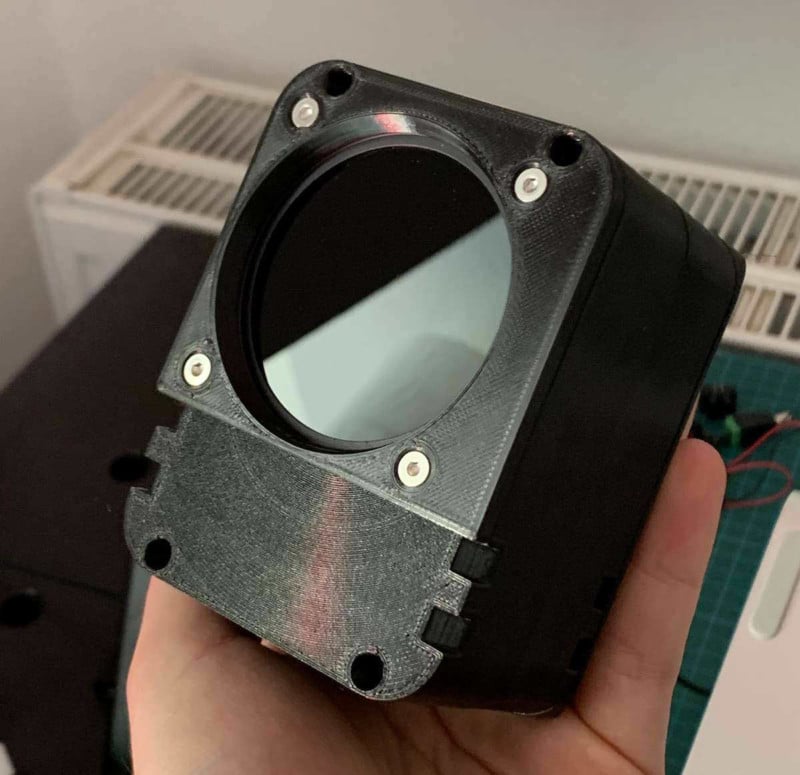
Combined with some electronics for turning it on and off to take a picture-pair at given intervals, a battery, a smartphone attachment lens, and some horribly strong neodymium-magnets, we wrap this in a 3D-printed enclosure.
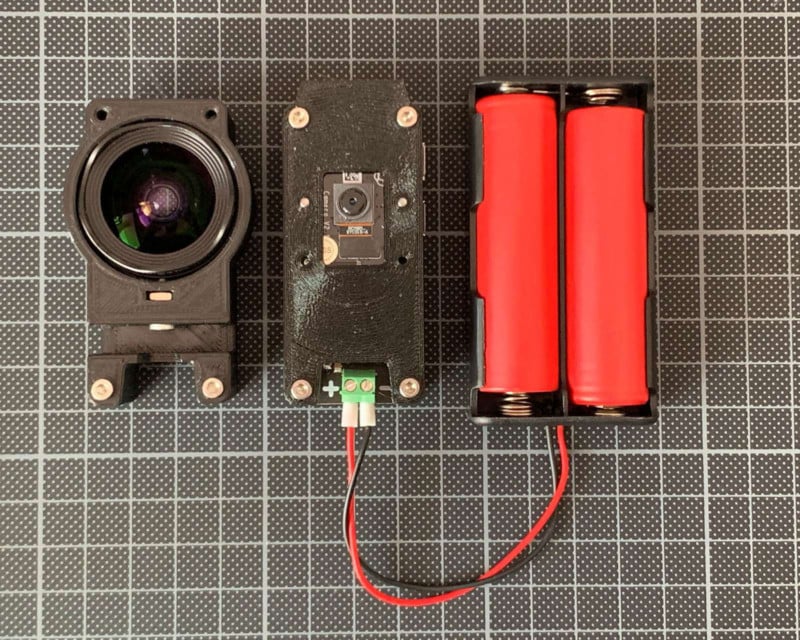
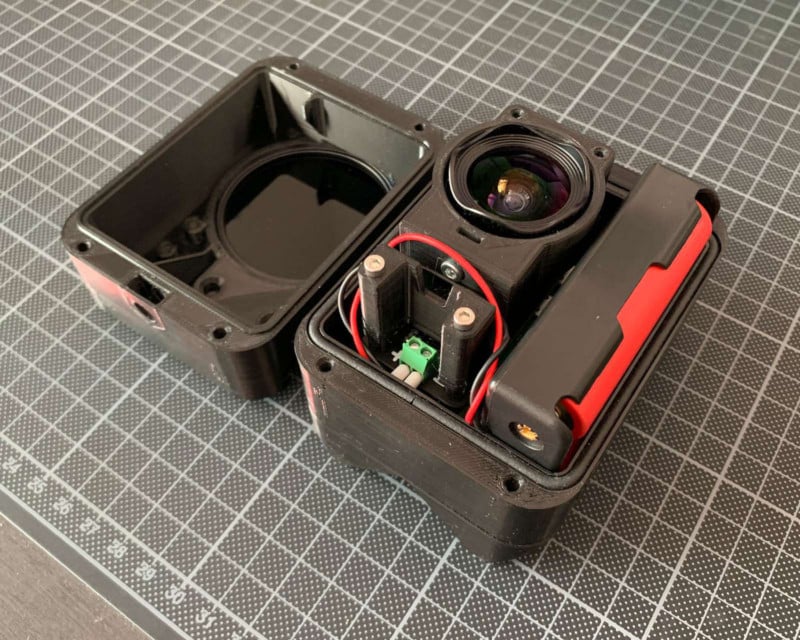
A Raspberry Pi Hat featuring a SAMD21 microcontroller (the Arduino Zero chip) draws power from two 18650 batteries and switches the Pi on every 60s (if it’s bright outside) or at slower intervals if the camera reports less light. The Pi boots, takes a few images, and powers off again. The system is powered by the batteries for 2.5 days, generating about 10gb of data per day.
In order to be fast enough to boot the system, measure the light, take several images, save them and power off in less than 60s the pi runs buildroot, a minimal Linux distro instead of the bloated Raspbian.
Getting the 3d printed box weatherproof is the hardest challenge when building this. I’ve had good results with a seal of 3mm very soft EPDM rubber string in a 3mm cavity.
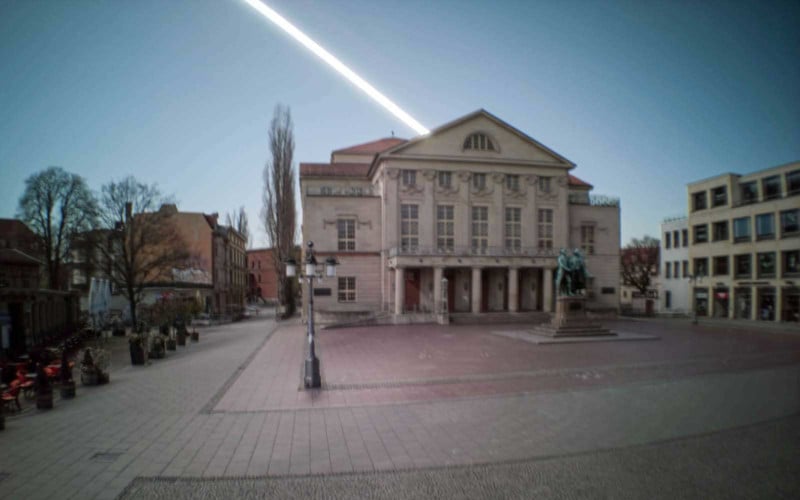
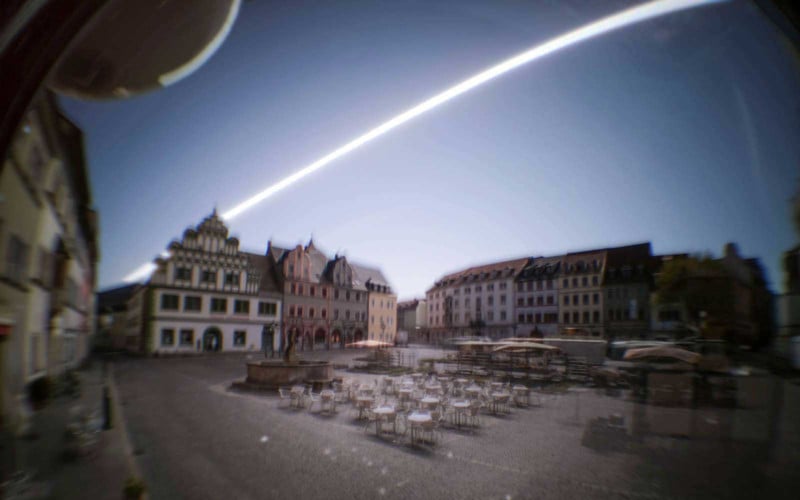
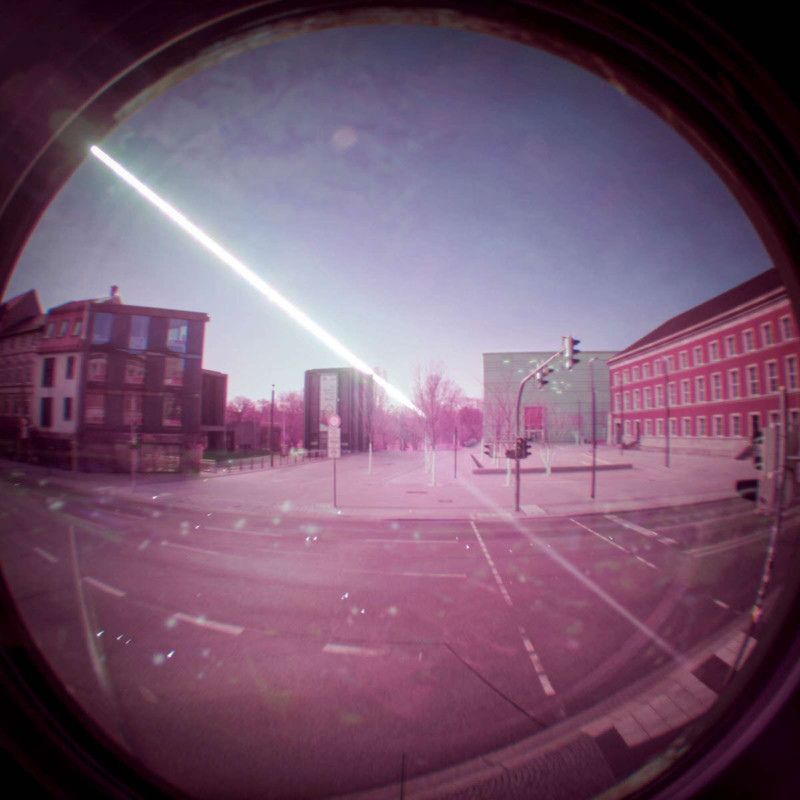
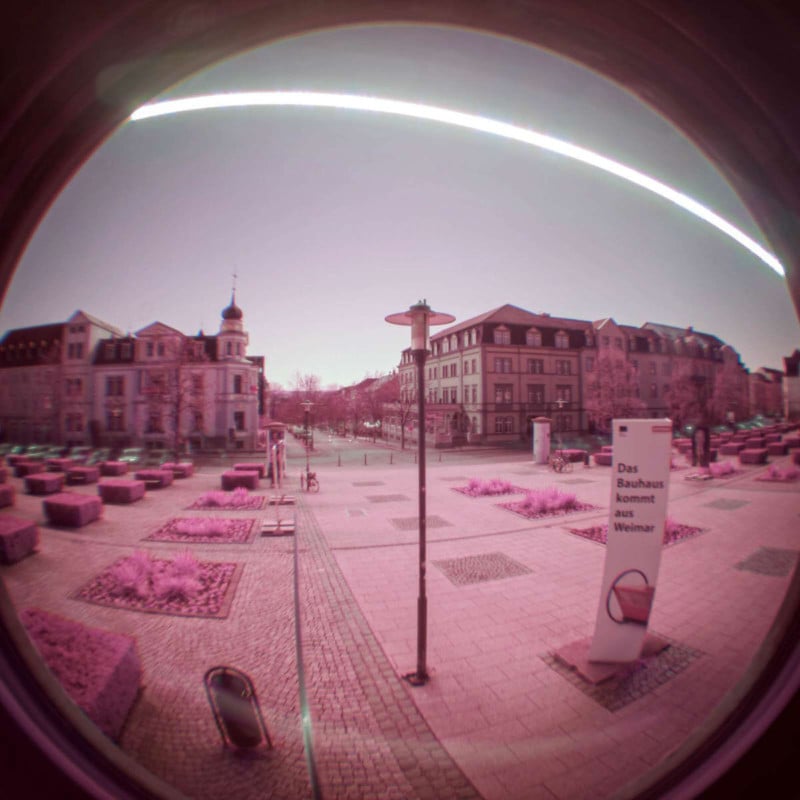
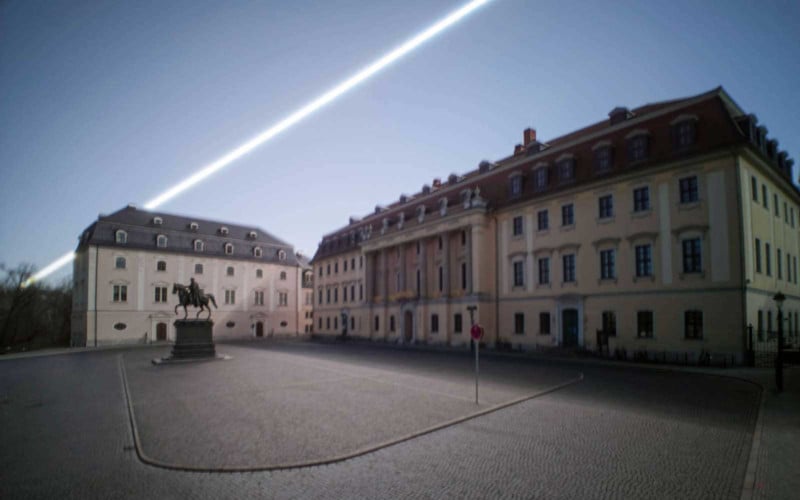
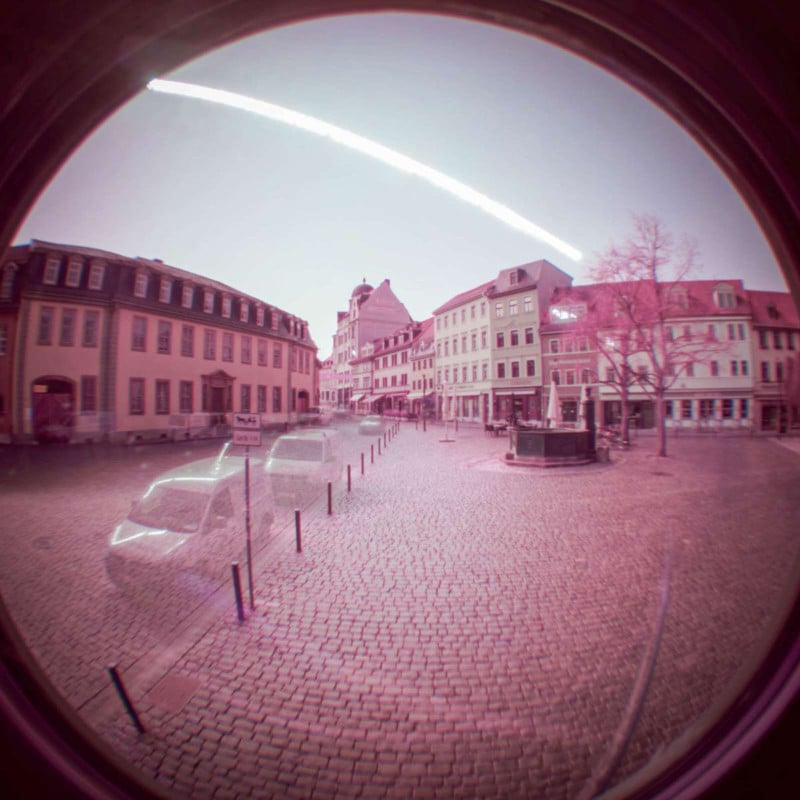
Results
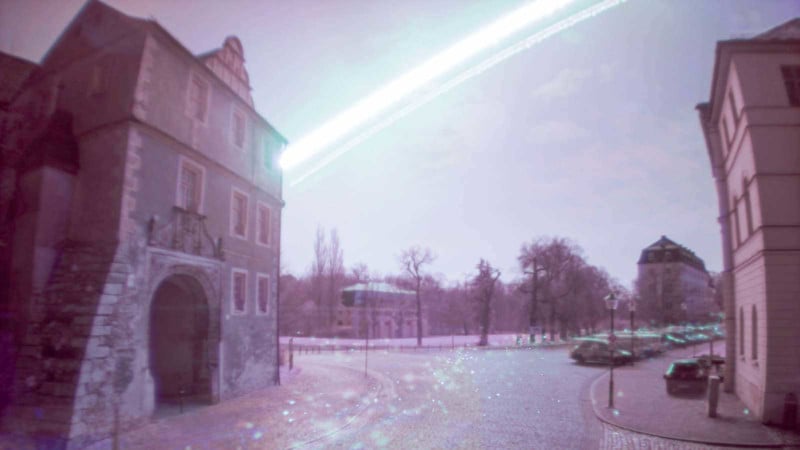
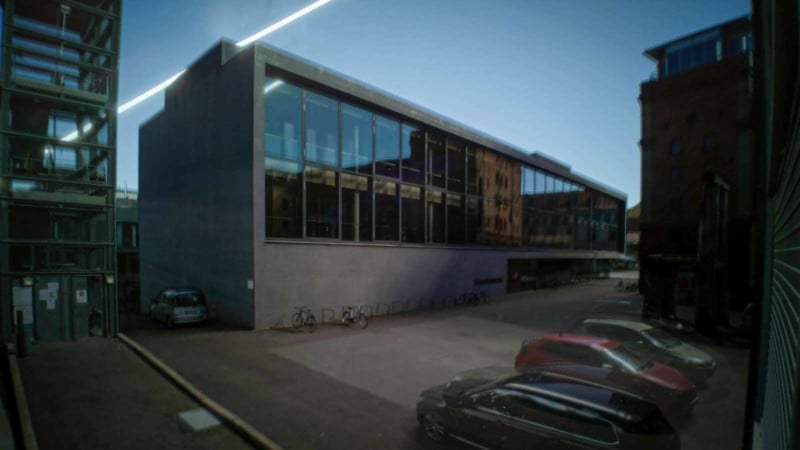
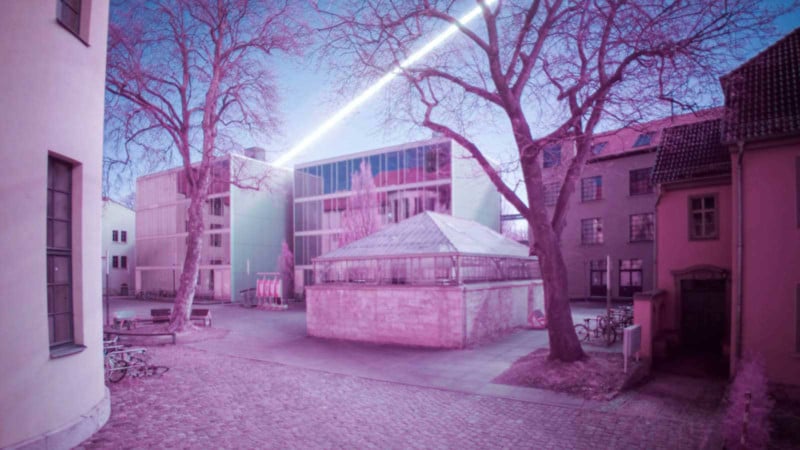
Here are examples from Weimar:
Caveats
To determine burned parts/pixels I use a one-shot approach. Either exposure on a single image did suffice to permanently leave a mark or it didn’t. No cumulative measure is used in any way. If there are traffic and cars in the image, this results in a low-fidelity reproduction of the behavior of film exposures.
While reflections by glass and metal of the cars would result in a flurry cloud of tiny specks of burn-ins over a long amount of time on film, the punctual noise of only a few dozen or a hundred digital exposures using the one-shot method is less appealing to the eye. A good example of how this looks on a film image is this photo by photographer Michael Wesely. But: that’s something for another day.
Resources
If you want to do this too, some assembly required. Here are some resources:
The software I use for stacking, averaging, and peaking is on GitHub but please be advised: it is not exactly plug-and-play.
Eagle board files and schematics for the 2S Lipo Battery Raspberry Pi Hat can be found here.
Fusion360 files for the watertight enclosure can be downloaded here.
About the author: Christopher Getschmann is a photography enthusiast based in Germany who works with long exposures and night photography. The opinions expressed in this article are solely those of the author. You can find more of Getschmann’s work on his website, Flickr, and 500px. This article was also published here.
Continue reading...