
Here are a few tips to help you improve, or maybe get started with, drink photography. Drinks can be quite tricky: you have unpredictable liquids and glasses with reflections, so these tips may come in handy. Just remember, like all of my advice, these aren’t die-hard rules, but instead they are just a few things that you can choose to consider with your photography.
Tip 1: Have a Plan
My first tip for drinks photography is to have a plan. When photographing drinks, you’re not going to want them to sit there for a while as your prepare your scene. If you do, ice will melt, beer will look flat, condensation will drip off and most drinks just don’t sit for long and stay looking fresh. Having a plan in mind will help you speed up the whole shoot, giving you more time to focus on getting that perfect image with your drink looking its best.
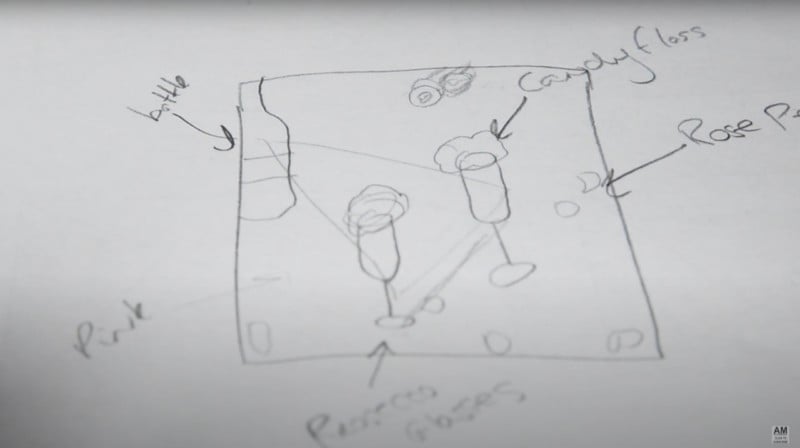
When I plan out my shoots, I think about what props I’ll use, which backgrounds, and how I will have my lights. I will also draw a sketch out of any compositions I have in mind. Don’t worry about making these drawings too detailed or artistic, I am not a great drawer at all — it’s only for my use they certainly aren’t going to be hanging in a gallery.
Tip 2: Clean Your Glass and Use Gloves
This one may seem obvious, but it’s really easy to just assume a glass is clean if you take it out of your cabinet. What isn’t so obvious to your eyes but will be really obvious in the photo is how much lint and small bits may be on the glass. To save you a lot of time editing out in Photoshop, give your glasses a good clean with a micro-fiber or lint-free cloth beforehand.
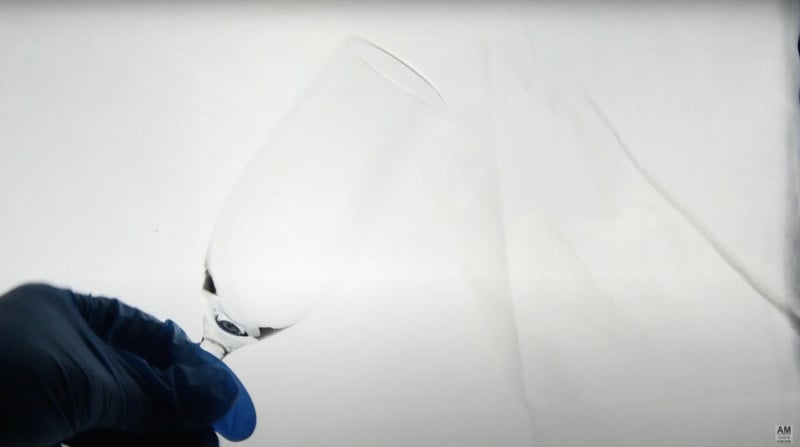
Holding up to a light can help see any possible bits or smudges. Also, I recommend using gloves when handling your glassware as the last thing you want on your nicely polished glass is a fingerprint.
Tip 3: Use the Correct Glass
When shooting drinks, there is usually a typical glass for each drink: a mojito is served in a tall glass, an old-fashioned in a rock glass, for example. It is important to use the correct glass for drinks because it helps identify the drink. If you have clear liquid in a martini glass, it instantly looks like a martini, even though the liquid could be anything. Not only this, but if you don’t I am sure you’ll have bartenders on social media telling you, you’ve used the wrong glass — It’s important to them.
Tip 4: Add Texture
With most drinks, they tend to be quite smooth and you find they can feel a little textureless. Not all drinks, obviously, but for example, a cappuccino has a lovely frothy texture on top. To add texture to the image, we use garnish and props. Just make sure they’re relevant to the image since the point of props is to add to an image, not to distract from the main subject. A garnish is a great way of adding some interest to your drink, and most will usually be served with one, so it makes sense and will add that texture we are looking for. This can be anything from a mint leaf, to some sugar around the edge of a glass. Make sure whatever you use, makes sense with your drink — For example, mint and lime for a mojito.
Tip 5: Back Light Your Drinks
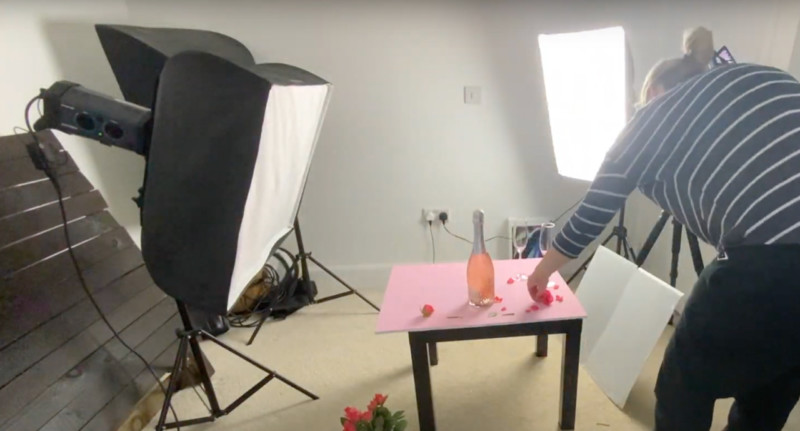
This tip will not work for all drink shoots, but a great way to light your drinks, especially if they are a clearer liquid, is to light them from behind. This can give drinks a lovely glow and helps with the pesky reflections you can get when shooting drinks.
To backlight your image, you just need to place your light directly opposite your camera, and then your subject between it. Then the light will shine right through the drinks giving it that lovely glow look. This won’t be suitable for all drinks; drinks that are thicker may cast too much shadow on the front of the image, so a side light may be needed. If you are having problems with reflections, you can adda a reflector to the front of the image to bounce a bit more light back in.
Watch the video above to see me put these tips in action during a Rose Prosecco shoot, or check out my channel for more food and drink photography videos.
About the author: Amie Prescott is a professional photographer, and food photography combines two of her favorite things: food and photography. Prescott put a good spin on lockdown by using the bad situation to create YouTube videos in an effort to help people looking to learn food photography.
Continue reading...
Tip 1: Have a Plan
My first tip for drinks photography is to have a plan. When photographing drinks, you’re not going to want them to sit there for a while as your prepare your scene. If you do, ice will melt, beer will look flat, condensation will drip off and most drinks just don’t sit for long and stay looking fresh. Having a plan in mind will help you speed up the whole shoot, giving you more time to focus on getting that perfect image with your drink looking its best.
When I plan out my shoots, I think about what props I’ll use, which backgrounds, and how I will have my lights. I will also draw a sketch out of any compositions I have in mind. Don’t worry about making these drawings too detailed or artistic, I am not a great drawer at all — it’s only for my use they certainly aren’t going to be hanging in a gallery.
Tip 2: Clean Your Glass and Use Gloves
This one may seem obvious, but it’s really easy to just assume a glass is clean if you take it out of your cabinet. What isn’t so obvious to your eyes but will be really obvious in the photo is how much lint and small bits may be on the glass. To save you a lot of time editing out in Photoshop, give your glasses a good clean with a micro-fiber or lint-free cloth beforehand.
Holding up to a light can help see any possible bits or smudges. Also, I recommend using gloves when handling your glassware as the last thing you want on your nicely polished glass is a fingerprint.
Tip 3: Use the Correct Glass
When shooting drinks, there is usually a typical glass for each drink: a mojito is served in a tall glass, an old-fashioned in a rock glass, for example. It is important to use the correct glass for drinks because it helps identify the drink. If you have clear liquid in a martini glass, it instantly looks like a martini, even though the liquid could be anything. Not only this, but if you don’t I am sure you’ll have bartenders on social media telling you, you’ve used the wrong glass — It’s important to them.
Tip 4: Add Texture
With most drinks, they tend to be quite smooth and you find they can feel a little textureless. Not all drinks, obviously, but for example, a cappuccino has a lovely frothy texture on top. To add texture to the image, we use garnish and props. Just make sure they’re relevant to the image since the point of props is to add to an image, not to distract from the main subject. A garnish is a great way of adding some interest to your drink, and most will usually be served with one, so it makes sense and will add that texture we are looking for. This can be anything from a mint leaf, to some sugar around the edge of a glass. Make sure whatever you use, makes sense with your drink — For example, mint and lime for a mojito.
Tip 5: Back Light Your Drinks
This tip will not work for all drink shoots, but a great way to light your drinks, especially if they are a clearer liquid, is to light them from behind. This can give drinks a lovely glow and helps with the pesky reflections you can get when shooting drinks.
To backlight your image, you just need to place your light directly opposite your camera, and then your subject between it. Then the light will shine right through the drinks giving it that lovely glow look. This won’t be suitable for all drinks; drinks that are thicker may cast too much shadow on the front of the image, so a side light may be needed. If you are having problems with reflections, you can adda a reflector to the front of the image to bounce a bit more light back in.
Watch the video above to see me put these tips in action during a Rose Prosecco shoot, or check out my channel for more food and drink photography videos.
About the author: Amie Prescott is a professional photographer, and food photography combines two of her favorite things: food and photography. Prescott put a good spin on lockdown by using the bad situation to create YouTube videos in an effort to help people looking to learn food photography.
Continue reading...