You are using an out of date browser. It may not display this or other websites correctly.
You should upgrade or use an alternative browser.
You should upgrade or use an alternative browser.
Darkroom sessions
- Thread starter Verticoastro
- Start date
Verticoastro
Senior Member
Practice is the most important thing but the NAFA course was focusing on the practice (as of do this do that, repeat a few times) but doesn't teach why to do things (the thinking process) at all (and thus most students won't be able to proceed alone), let alone theory (process control, chemistry... Etc) or more advanced topics. I think could have been more efficient but I guess for most students it's just one of the modules, don't care so much.
What would be nice is a second step: lots of practice, weekly assignment to do on your own, critique and tips to improve. Could also get in theory a bit, but that can be done alone from books.
I agreed too... Most of my peers when on to digital and I'm the only few who still shooting BW and doing everything analog. I'm a part time student at NAFA in Basic Photography. The course is about 6 month. I totally enjoy the BW lesson more then digital after completed the course. Of course after the course, those little details are from the masters that I had met during the darkroom sessions. they give me lot of advices on developing and techniques. I have show them my work to get critics from them too...
Verticoastro
Senior Member
Verticoastro
Senior Member
Verticoastro
Senior Member
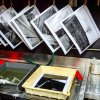
Dark Room Session- Enlarging 4x5 negatives to 12x16" Ilford MGIV RC papers. Also, printing previous family portrait that require to further enlarge from to 12x16" prints and some landscape portfolio.


Still have 12 pieces of 4x5 film need to develop from the last weekend portrait shoot.

Also, developed some paper positives from the recent Large format outing...


Still have 12 pieces of 4x5 film need to develop from the last weekend portrait shoot.

Also, developed some paper positives from the recent Large format outing...
Verticoastro
Senior Member
Verticoastro
Senior Member
Verticoastro
Senior Member
I saw his exhibitions too, very impressive... My friend told me that those are digital prints not analog prints. I would want to go bigger prints ... For now, all my personal prints will be 12x16" for now.
For 20x24" and onwards, I need to check with Analog film lab and also a system to file large prints...
For 20x24" and onwards, I need to check with Analog film lab and also a system to file large prints...
Verticoastro
Senior Member
Verticoastro
Senior Member
Verticoastro
Senior Member
That looks like a RH Designs timer, is it?
Verticoastro
Senior Member
That looks like a RH Designs timer, is it?
I not too sure about the brand.
Verticoastro
Senior Member
Verticoastro
Senior Member
zk-diq
Senior Member
Many things to play, you can control contrast via CC filter if you are using ilford paper, you can dodge and burn, or make shadow mask/highlight mask, expose your image within tonal range, bigger the negative better and easier to go about.
you can tone your print, add texture with halftone screen, sabattier effect, solarization, posterisation, litho derivation, multiple image control, Bas relief print,selective development.
almost all effect you see in photoshop is from analog way.
you can tone your print, add texture with halftone screen, sabattier effect, solarization, posterisation, litho derivation, multiple image control, Bas relief print,selective development.
almost all effect you see in photoshop is from analog way.
Last edited:
Similar threads
- Replies
- 0
- Views
- 63
- Replies
- 0
- Views
- 74
- Replies
- 0
- Views
- 97
- Replies
- 0
- Views
- 151
- Replies
- 0
- Views
- 117


