RSSNewsFeeder
Member
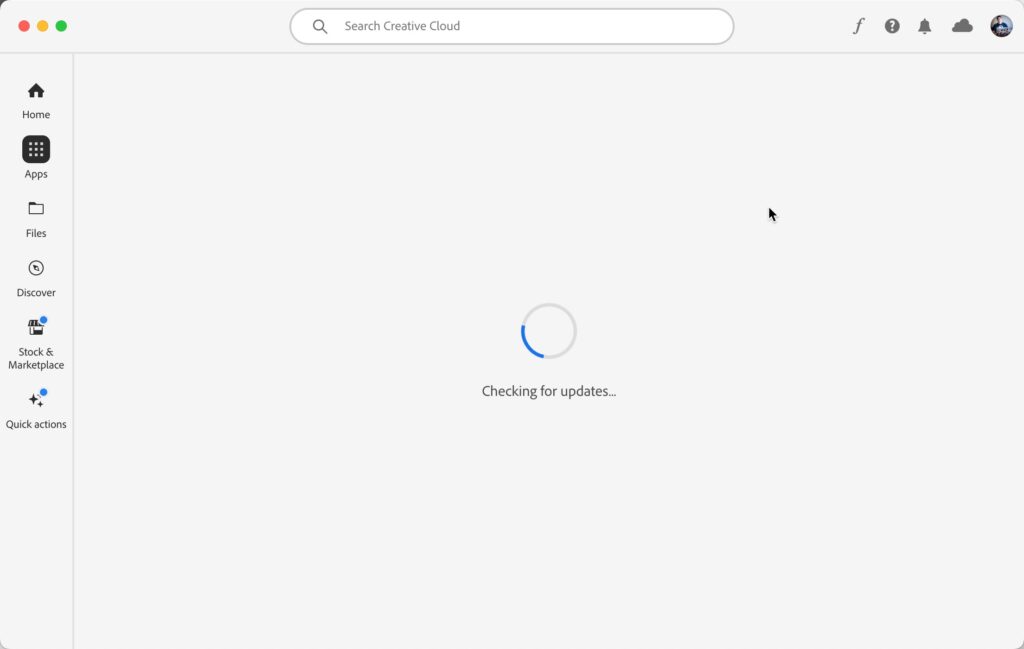
Today is the first day of Adobe MAX and with that, the release of latest updates across Adobe’s suite of programs! Here we’ll focus on a rundown of what’s new in Lightroom Classic, Lightroom, and Camera Raw (we’ll dive deeper into each feature in future posts). Key new features are available across all programs, but exceptions will be noted. For all programs, the update at this time of year also comes with an updated version number, so Lightroom Classic is now version 13, Camera Raw is version 16, Lightroom for Mac/Win is version 7, and Lightroom on mobile is version 9. Also, it is worth noting that lightroom.adobe.com has been updated as well. Check your Adobe Application Manager for updates, and keep in mind that Adobe releases the updates in waves based on geography, so if you don’t see the update available yet for you, just wait, it will come along soon (be sure to click the Check for Updates button). With these updates we also get support for new cameras and lenses.
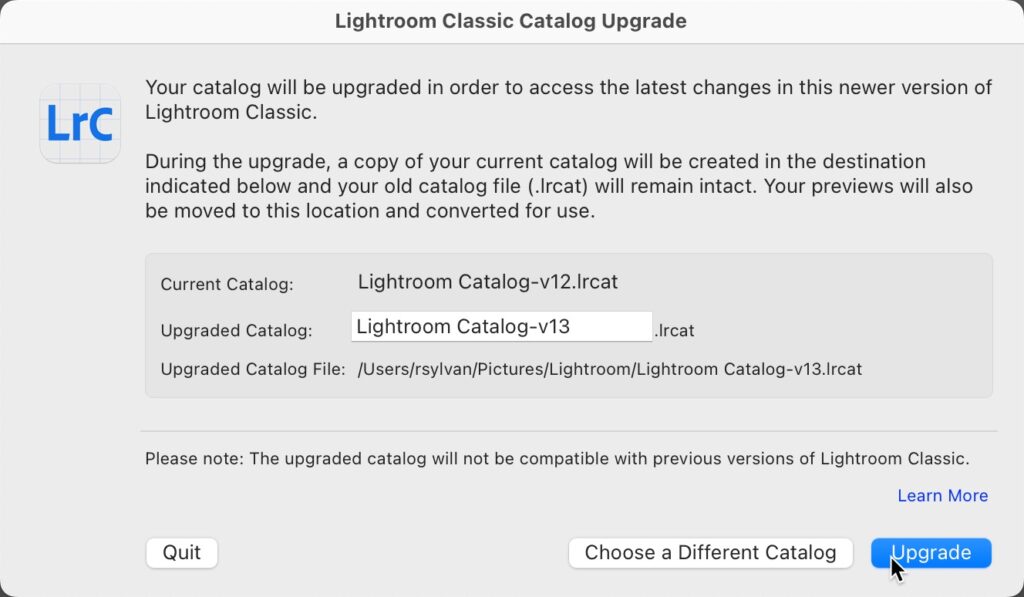
When you launch the new version of Lightroom Classic it will walk you through the process of updating a copy of your current catalog to work with the new version. The copy is updated leaving your original catalog unchanged, so if you have a problem with the update you can easily go back to the state just after updating. Assuming all goes well, and you move forward in the new version, be sure to eventually delete that old catalog from the previous version as it will just take up space.
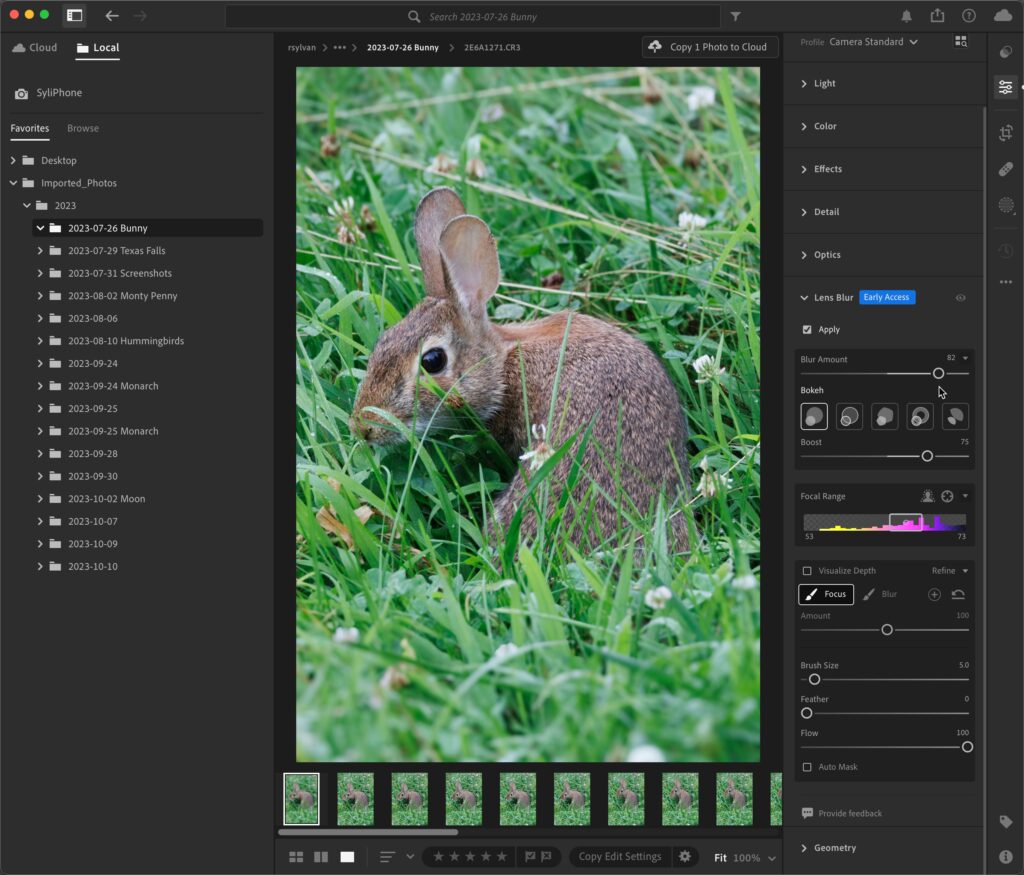
An Early Release version of a new panel, called Lens Blur has arrived. Early Access means it is still a work in progress. No, it is not as good as achieving shallow depth of field in camera, but I think it is pretty good for improving what was done in camera with a few clicks and slider moves. I look forward to seeing this feature improve.
We’ve gained even more control over the colors in our photo with the new Point Color feature. We’ll take a deeper dive into this soon, but for now start to explore how this works by expanding the (renamed from HSL/Color) Color Mixer panel, clicking the eye dropper tool, and sampling the color you want to edit.
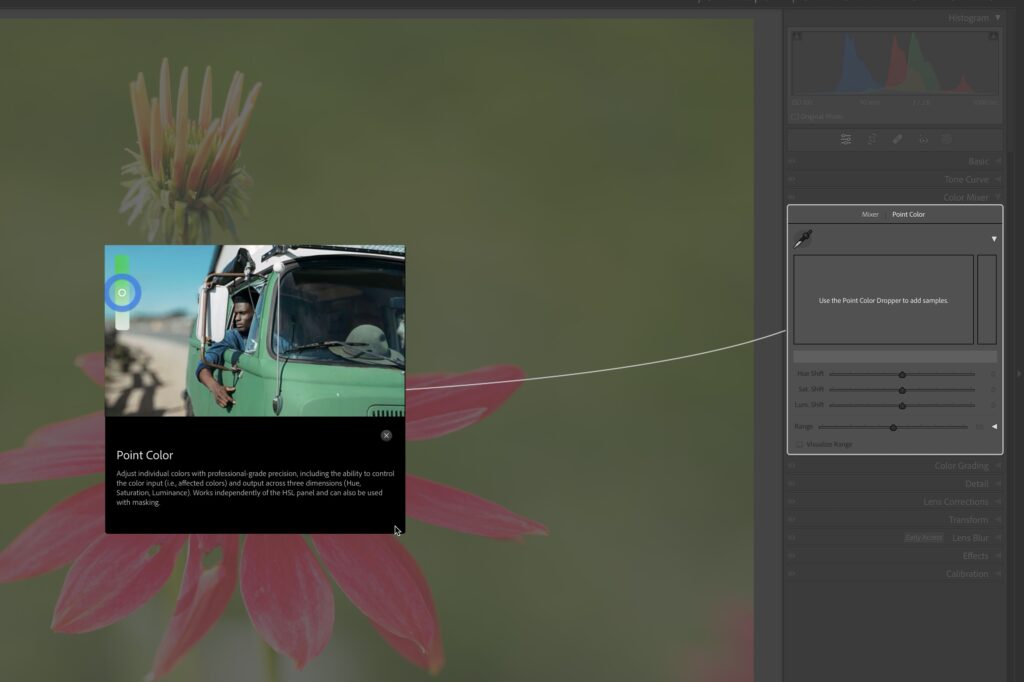
With a color sampled the panel comes to life and you can begin adjusting the hue, saturation, and luminance with far greater control than we’ve ever had before.
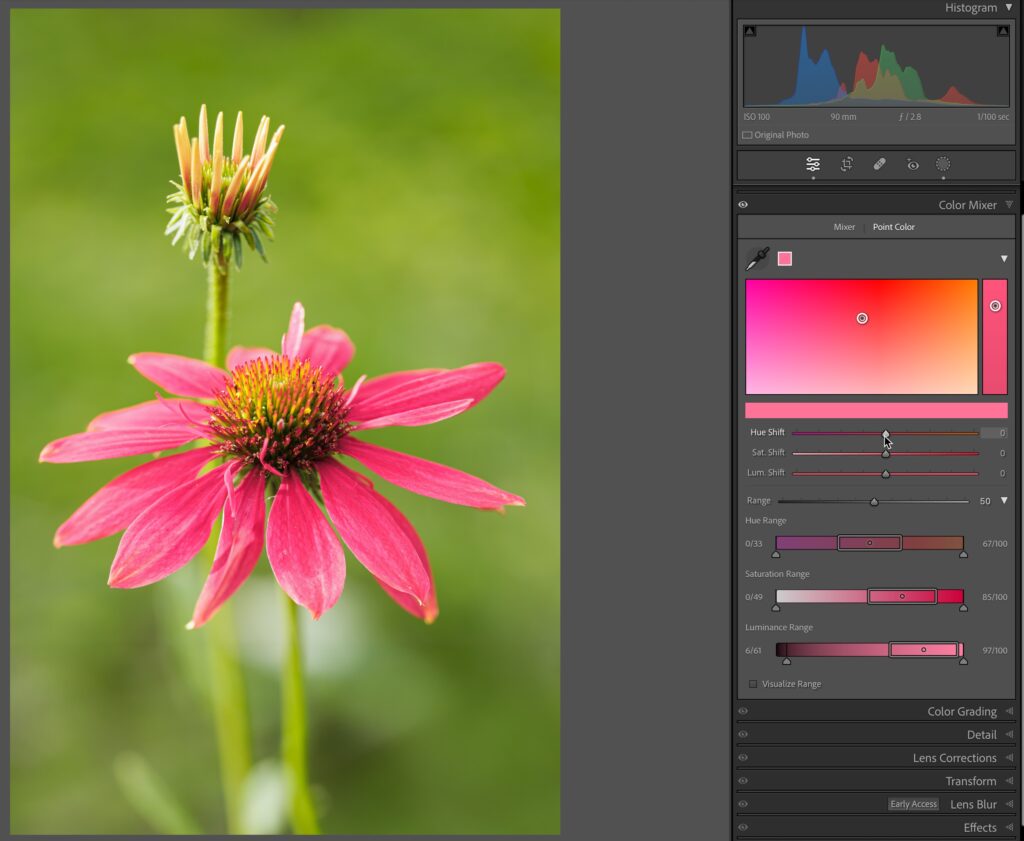
Click the Mixer tab to access the HSL controls we’ve had for years.
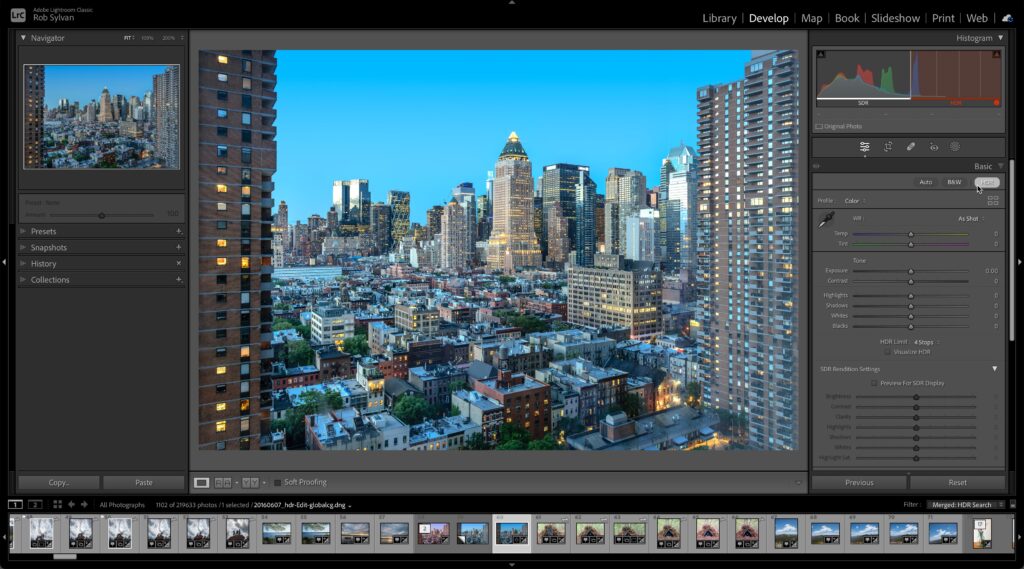
We’ve been creating and editing high dynamic range (HDR) images for a long time, but as HDR displays become more accessible we’ve needed better tools for editing HDR images to be displayed their best on HDR monitors. The new HDR Edit and output features are designed to do just that. There’s a lot more to say and explore with this feature, so look for a follow up post in the near future devoted to just this. For now, read what the ACR team has to say about it.
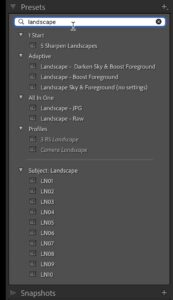
If you’re like me and have a growing number of Develop presets sitting in your Presets panel, then this small update may be most welcome. Just like we have the ability to filter the Folders and Collections panels, we now have that same functionality in the Presets panel. Simply start typing in the search field at the top of the panel and only preset groups and presets that match the text will appear. Useful naming of your presets just became more important.
And no update would be complete without some boosts to performance in LrC, most notably when reading and writing to XMP, converting to DNG, moving folders on your drive, and loading of photos in Develop. There is one very significant update in Lightroom for Mac/Windows that even Lightroom Classic users will want to check out.
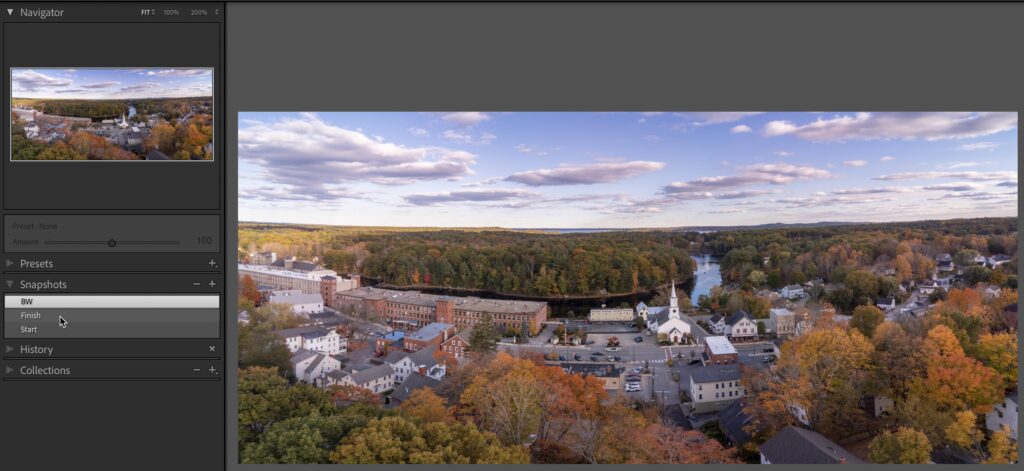
Just like we’ve been able to quickly preview the effect of a preset by moving the cursor over the desired preset, we can now similarly preview snapshots and history steps by moving the cursor over the desired snapshot or history step.
I’m very excited to see how this feature will evolve, but with this update we now have the ability to access and edit photos stored on our local hard drives without first importing them into Lr. Clicking the Local tab gives you file browser access to your drives where you can navigate to a folder of photos, browse those photos and edit them at will without ever seeing the import dialog and without having to upload those photos to the Adobe cloud. This is a real change in thinking for this cloud-based app! Edits are stored locally.
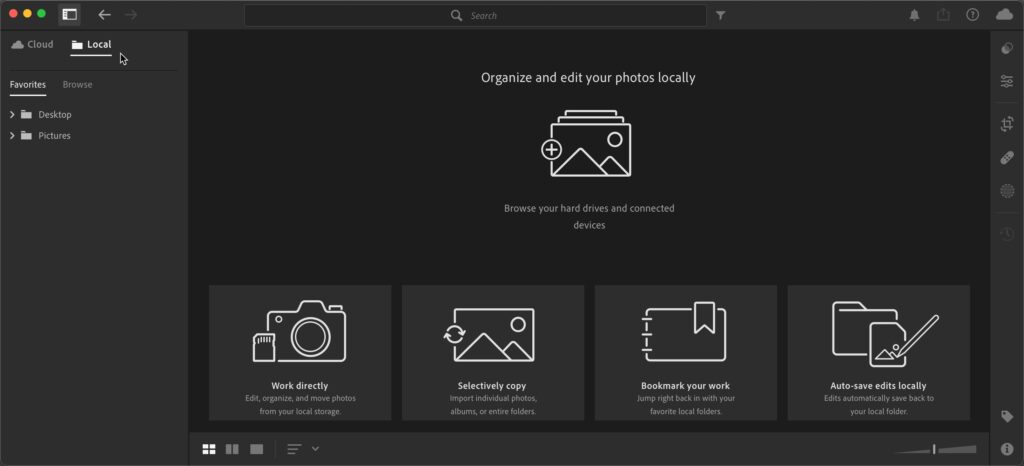
Keep in mind that photos edited locally can always be imported and synced if you wish (so you can access them on other devices running synced Lr apps), but you do not have to do this. We even have the ability to rename local folders and move photos between folders.
There may not be any features that feel as game changing as Masking or Denoise, but there’s still a lot of cool and interesting functionality to learn and see how to best incorporate into our existing and possibly new workflows. Stay tuned!
The post Adobe MAX Updates appeared first on Lightroom Killer Tips.
Continue reading...
When you launch the new version of Lightroom Classic it will walk you through the process of updating a copy of your current catalog to work with the new version. The copy is updated leaving your original catalog unchanged, so if you have a problem with the update you can easily go back to the state just after updating. Assuming all goes well, and you move forward in the new version, be sure to eventually delete that old catalog from the previous version as it will just take up space.
Lens Blur
An Early Release version of a new panel, called Lens Blur has arrived. Early Access means it is still a work in progress. No, it is not as good as achieving shallow depth of field in camera, but I think it is pretty good for improving what was done in camera with a few clicks and slider moves. I look forward to seeing this feature improve.
Point Color
We’ve gained even more control over the colors in our photo with the new Point Color feature. We’ll take a deeper dive into this soon, but for now start to explore how this works by expanding the (renamed from HSL/Color) Color Mixer panel, clicking the eye dropper tool, and sampling the color you want to edit.
With a color sampled the panel comes to life and you can begin adjusting the hue, saturation, and luminance with far greater control than we’ve ever had before.
Click the Mixer tab to access the HSL controls we’ve had for years.
HDR Edit and Output
We’ve been creating and editing high dynamic range (HDR) images for a long time, but as HDR displays become more accessible we’ve needed better tools for editing HDR images to be displayed their best on HDR monitors. The new HDR Edit and output features are designed to do just that. There’s a lot more to say and explore with this feature, so look for a follow up post in the near future devoted to just this. For now, read what the ACR team has to say about it.
Filter Develop Presets (LrC)
If you’re like me and have a growing number of Develop presets sitting in your Presets panel, then this small update may be most welcome. Just like we have the ability to filter the Folders and Collections panels, we now have that same functionality in the Presets panel. Simply start typing in the search field at the top of the panel and only preset groups and presets that match the text will appear. Useful naming of your presets just became more important.
And no update would be complete without some boosts to performance in LrC, most notably when reading and writing to XMP, converting to DNG, moving folders on your drive, and loading of photos in Develop. There is one very significant update in Lightroom for Mac/Windows that even Lightroom Classic users will want to check out.
Preview in History and Snapshots (LrC)
Just like we’ve been able to quickly preview the effect of a preset by moving the cursor over the desired preset, we can now similarly preview snapshots and history steps by moving the cursor over the desired snapshot or history step.
Local Tab (Lr for Mac/Win)
I’m very excited to see how this feature will evolve, but with this update we now have the ability to access and edit photos stored on our local hard drives without first importing them into Lr. Clicking the Local tab gives you file browser access to your drives where you can navigate to a folder of photos, browse those photos and edit them at will without ever seeing the import dialog and without having to upload those photos to the Adobe cloud. This is a real change in thinking for this cloud-based app! Edits are stored locally.
Keep in mind that photos edited locally can always be imported and synced if you wish (so you can access them on other devices running synced Lr apps), but you do not have to do this. We even have the ability to rename local folders and move photos between folders.
There may not be any features that feel as game changing as Masking or Denoise, but there’s still a lot of cool and interesting functionality to learn and see how to best incorporate into our existing and possibly new workflows. Stay tuned!
The post Adobe MAX Updates appeared first on Lightroom Killer Tips.
Continue reading...