
Throughout the year, we leave the comfort of our studios and venture out to shoot on location. And there’s no better time for outdoor photo shoots than the long days of summer.
Before any professional outdoor photo shoot, you will need to source the best location for the project. Location scouting involves evaluating possible areas for the shoot, understanding how the space matches your needs, and documenting all the details.
As a producer, I’ve scouted locations throughout the U.S. for a variety of fashion photo shoots. While not all clients or photo subjects are the same, these five guidelines can act as tips to help you evaluate any photo shoot location.
1. Understand the Location’s Light
It doesn’t matter if your photo shoot subject is a high school senior, a fashion model, or a table setting; light is your most important element.
“Success of a location isn’t shooting in beautiful light, it’s making the light work at the time you need it,” said Michael Voltattorni, a fashion photographer based in Chicago. With over 20 years in the photography industry, Voltattorni has shot on location for many advertising clients and fashion companies.
“Early and late in the day is when I plan the big shots,” Voltattorni added. “I take advantage of bigger backgrounds in the morning when the light is my favorite and the models’ makeup is freshest. In the middle of the day, I try to shoot more controlled and tight shots because the light is highest and hard. Toward the end of the day, I shoot things that look best in the golden evening light. It’s all about how you maximize your time with the light.”
When scouting areas for an outdoor photo shoot, take the time to consider how the light will change throughout the day as the sun shifts.
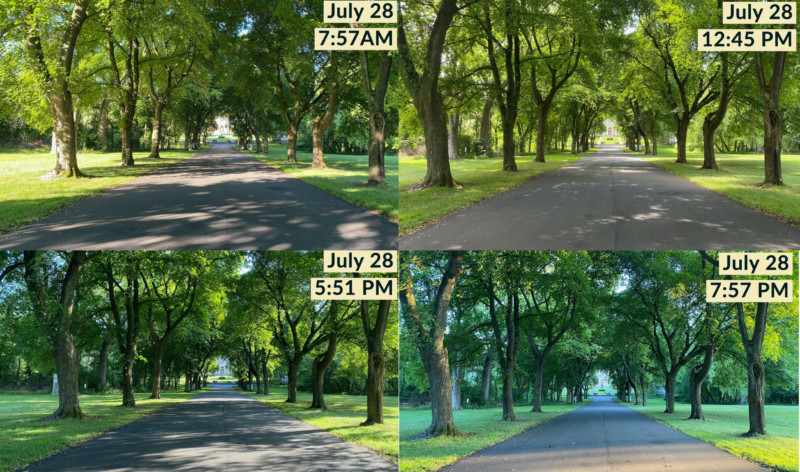
Take photos to document how various areas are naturally lit while you’re scouting. Based on those, you can predict how the light will change during the day of your shoot. It’s good to know if the light will turn more harsh overhead or become blocked by tree coverage or tall buildings.
Later you can use these images as reference points to create the order of your shots for the day, using the changing light as a basis. Many photographers that I work with will use apps like Sun Seeker to plan the order of their shoot day down to the hour.
For more information on understanding how light influences outdoor shots, you should explore Barry O Carroll’s article ‘An Introduction to Light in Outdoor Photography’ published in June.
2. Plan Your Outdoor Photo Shoot Equipment Kit
Moving from your studio to the outdoors means that you have to be flexible. You’re leaving behind the ability to access all of your equipment, grip, and electricity. While you’re walking through the location, begin to plan the photo shoot equipment that you’ll need to bring for the specific location.
If there are tall buildings or dense trees, you will need to bring reflectors. If there are open spaces with cement, you’ll need scrims to flag. Let the location guide what specific tools and equipment you’ll need to bring to get the most out of your time shooting there.
“I have 4 cases of standard location gear always packed and ready to go so that I only need to add about 20% to my kit based on the location,” says Voltattorni. “I always have a grip kit, reflector discs, sunbuster umbrellas, scrims and power source lights. Once I see a location, I’ll add things like black fabric to cover the ground so grass doesn’t reflect green on models’ clothing or a Wind Killer, if we’re on a beach, to block wind and sand from a model’s face.”
3. Document Your Observations and Information
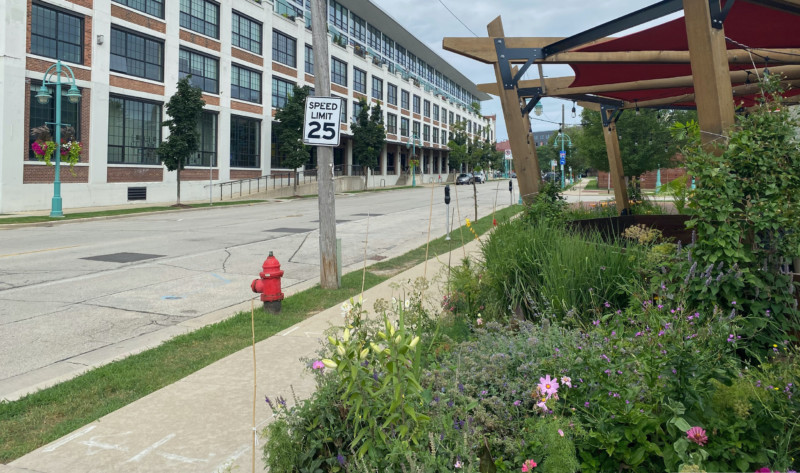
In addition to photos of spaces that you like for a shot, consider the logistical aspects of the location as well. Think of logistical aspects like immovable physical elements such as signs, poles, planters or permanent fixtures. Logistical elements can also be things like challenging walking areas.
No stranger to exotic locations, photographer Brian Sassman has shot around the world in places like Haiti, Mexico, Guatemala, and Rwanda. Sassman’s client list ranges from fashion retailers like Macy’s and Bloomingdale’s to publications like Elle and Grazia.
“The location should make you feel good to be there. It should be inspiring to be there for everybody. Then you have to think of the actual space,” says Sassman. “Scouting in New Mexico, I followed a trail through a canyon that narrowed down to a bottleneck. It was beautiful. But how do you get a model there without her hair wilting and makeup sliding off? You have to look for something accessible for everyone and reachable for a crew. Not just you and the model.”
Photo by Brian Sassman
Considering the accessibility of the space can save hours on the shoot date. A visually compelling location will be a frustrating challenge if it’s inaccessible for equipment, wardrobe and crew. Try to always be thinking logistically, as well as creatively, about your location during your scout.
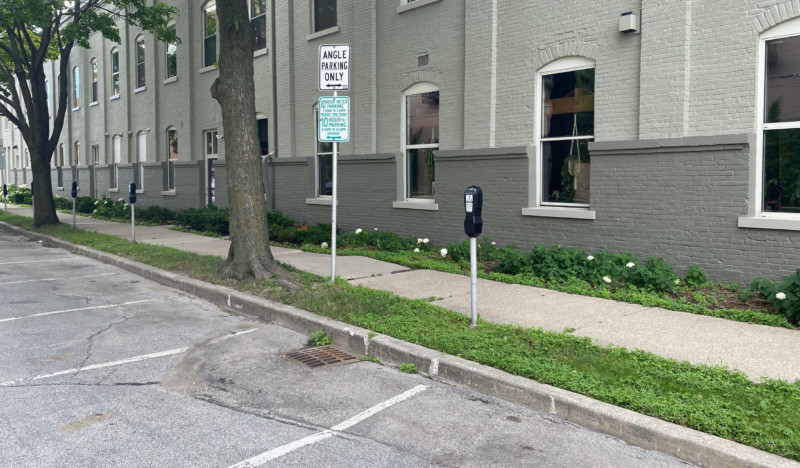
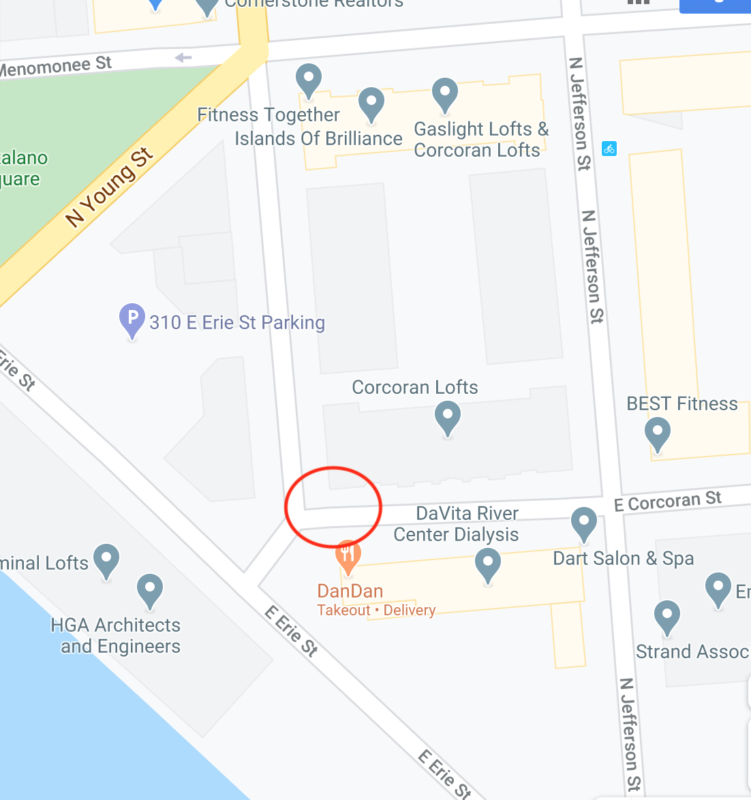
If the location doesn’t have a parking lot, I take a photo of the closest area for parking. This will help communicate parking to the rest of the crew or clients on the shoot day who will be bringing merchandise, equipment, wardrobe, and catering. Along with a photo of the parking area, I document with a snip from a map source and identify the parking area with a red circle.
These logistical elements will help you create a strategy and communicate key production elements to the rest of your photo team for the day of your shoot.
Next, put your camera away.
Take some time to write down all the information that can’t be captured by your camera. First record the basic information such as an address, date, and time that you visited the location. Next write down your real-time observations such as:
- Are there crowds or pedestrians walking around?
- What’s the general temperature of the area?
- Is there sand or water nearby that could damage a camera?
- Are there structural elements that block light?
- Where is the closest restroom?
- Is there a representative or contact person?
- Where could a subject or model change their wardrobe?
- Is there a work space for a hair & makeup artist?
- Are there restricted areas or spaces to avoid?
- Is there any artwork that would require additional permission?
The details that you document will help you plan your entire photo production from the daily schedule to what you pack.
4. Match the Location to Your Story
Each photo we create has a story that it’s communicating.
The location of your photo shoot should match all the other style elements surrounding your model or subject. I consider the shoot location a secondary subject in the photo like a supporting character to the composition that adds a special texture to the overall story.
“Whether it’s a commercial story or editorial story, ask ‘does the shot tie into the rest of the story’?” explains Sassman. “It can’t just be one epic shot. They all have to live with each other and make sense. The location has to present that sort of congruency.”

Photo by Brian Sassman
“A lot of clients will shoot in the same locations. So I assess what they’ve done before and look for something different or special,” he continues. “I look behind things or look for what’s beside what’s already been shot. Explore the location. It can be a whole new project if you make it feel different.”

Photo by Brian Sassman
Often we are tasked by clients to find a location with very specific characteristics. Occasionally, we don’t get more than a handful of cliche words from a client like “chic” or “modern” or the dreaded “approachable”, to describe the location that they want. With just a handful of fairly generic adjectives, it can be challenging to put the physical elements together for a client.
As visual artists, we communicate best through imagery. Before I begin exploring any location options for a client, I ask them to create a one-page mood board of images (sometimes called tears or swipes) to help them communicate what they’re imagining.
The mood board images can be physical components like brick walls, walkways or fencing. They can also be organic pieces like trees and flowers that a client wants in the background. Sometimes mood boards are more conceptual like color palettes or desired light elements as well.
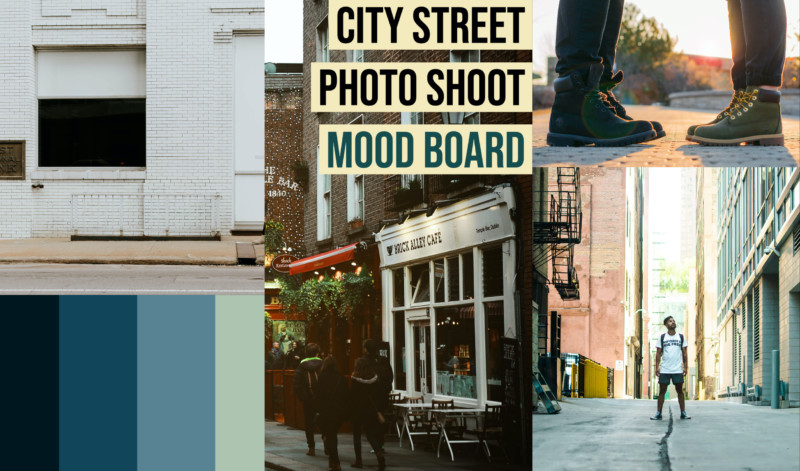
Any imagery from the client will help you to evaluate the elements of a location to decide if it matches the desired style of your client. A mood board will help guide your scouting and communicate the elements of the visual story.
Creating a mood board can also be a helpful exercise before scouting for personal projects.
5. Get Location Permission – Not Forgiveness
There is always someone to get permission from for a photo shoot regardless if a location is residential, commercial, or government-owned.
Permission for residential locations is straight-forward because it’s private property. There have been countless times that I have knocked on front doors to introduce myself and ask homeowners about using their property for a photo shoot. Most homeowners warm up to the idea once you articulate the details of your planned photo shoot.
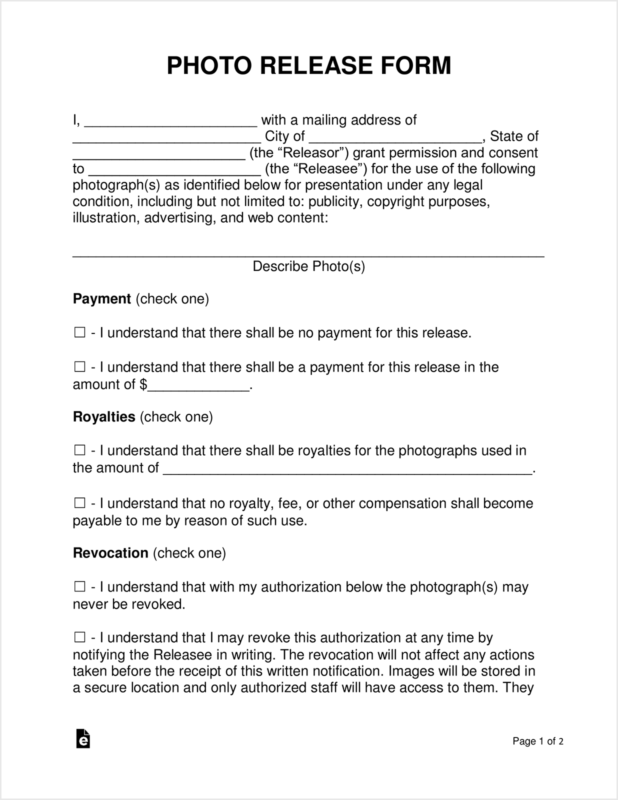
Once I establish a rapport with a homeowner and they’ve given verbal permission to use their property as a location, I leave them with a blank Photo Release Form.
Anytime that I’m scouting I bring blank Photo Release Forms. This is a simple one-page document that states you can use images of their property in your photos for editorial and commercial usage. Websites like eforms.com provide guidance on creating a basic Photo Release Form.
When I return for the photo shoot, I collect the signed form as permission to use the location.
Commercial properties like businesses are more of a challenge to get photography permission. For large companies, there’s usually a formal request process that is submitted to a corporate office for approval.
Smaller independent businesses tend to be more approachable. Often as payment for using their business as a photo shoot location, I offer to provide them with some photos taken on the day of the shoot. These images can be your outtakes or shots of the space taken during downtime. This provides the owner with professional photos to market their business and you with the location for your shoot.
When I leave the Photo Release Form for the business owner to sign, I include the trade of photography as ‘rental payment’ for using their space as a location.
Government-owned spaces are public areas like sidewalks, streets, beaches, public buildings, and parks. The permissions vary from city to city to use public areas for photography but usually require a permit filled out at a local municipality. Check the website of the location’s municipality or give them a call. Unless you’re in a high film production city like New York City or Miami, it’s most efficient to talk through what permit you need with a local representative.
It can be tempting to bypass getting permission and hoping to avail detection or deciding to shoot until someone stops you. This is not worth it. Some of my colleagues have worked on photo shoots that were shut down by the local police department, or had their cameras seized because the photographer was taking photos in areas without a permit or didn’t have permission from the property owner.
Taking a permission shortcut isn’t worth the risk to you financially and won’t look good to clients and your crew.
Conclusion
After you get into this practice of thoughtfully scouting locations, you should put them into scouting documents to save. These can be fairly simple forms that record all the information you’ve learned and the images you’ve taken from each location. Soon you’ll have a resource library of scouted photo shoot locations to use for future jobs.
It takes energy and time to scout locations, and we all know that time is money. There are clients that pay for the additional time that it takes to scout and there are clients that do not. I can’t speak to if or when clients should pay for location scouting.
I consider scouting locations thoroughly as an investment in the photo services that I provide. Scouting sets you up for success by allowing you to create a strategy for the day of the shoot. You can predict the lighting to create the schedule of shots, plan for challenging elements, and establish permissions for using the space. These elements are invaluable to your crew, talent, and clients. By creating a strategy and being prepared, you’re able to provide everyone with the best professional experience.
About the author: Matt McFall is a creative producer and contributing writer based in Milwaukee, WI. You can find more of his work on his website and keep up with him on Instagram.
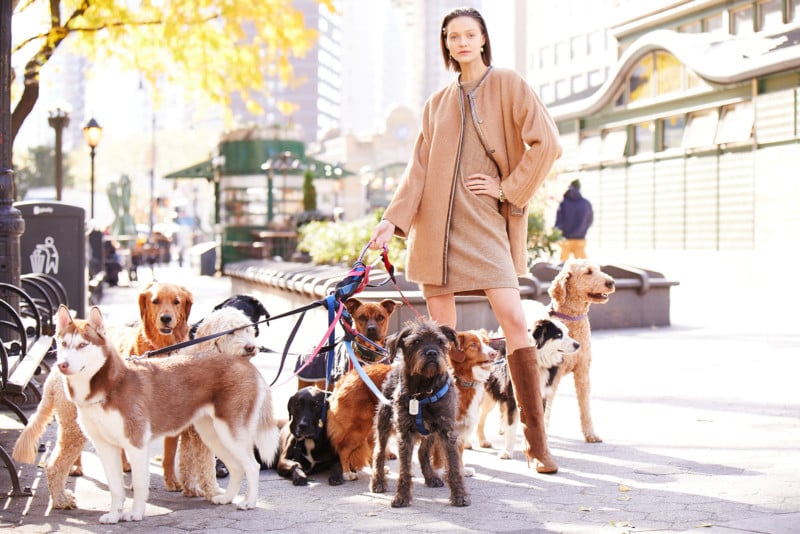
Image credits: Header photo by Brian Sassman and used with permission.
Continue reading...