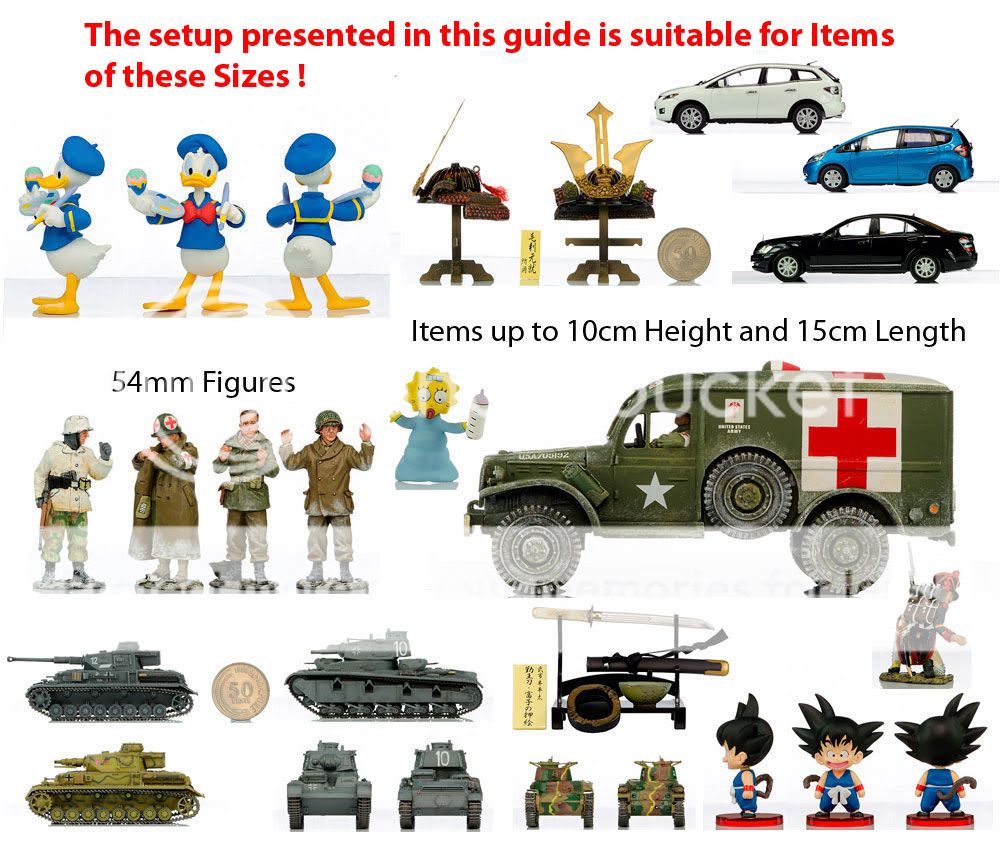
I am starting this thread so I could expand and add my amatuer tips to share on Toy Photography (largely 54mm in height) as I go along time to time.
The Product Shots will continue be posted in My Try @ Product Photography - Toys and Collectables
NOTICE: If you see this image
 in some of the older posts means I had used up the 10GB bandwidth for this month. I'm sorry these pictures can no longer be viewed until next month where the counter will be reset to zero and the pictures would then appear again. Enjoy !
Here it goes...
Part 1 - Decide What You Want to Shoot (see thread below)
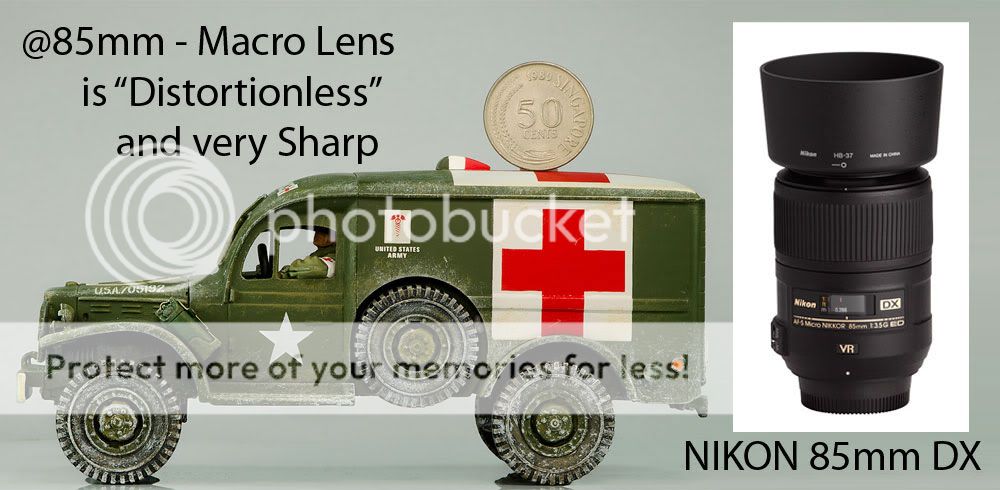
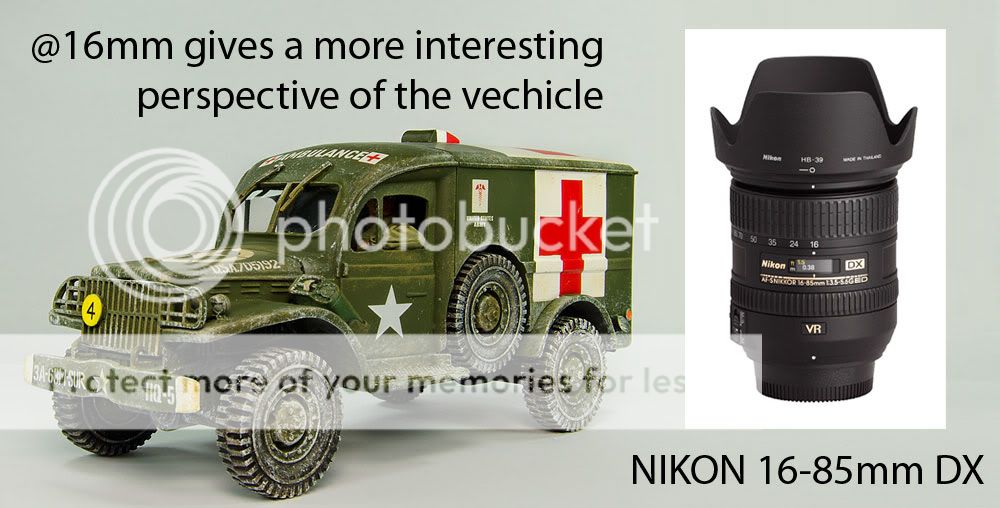
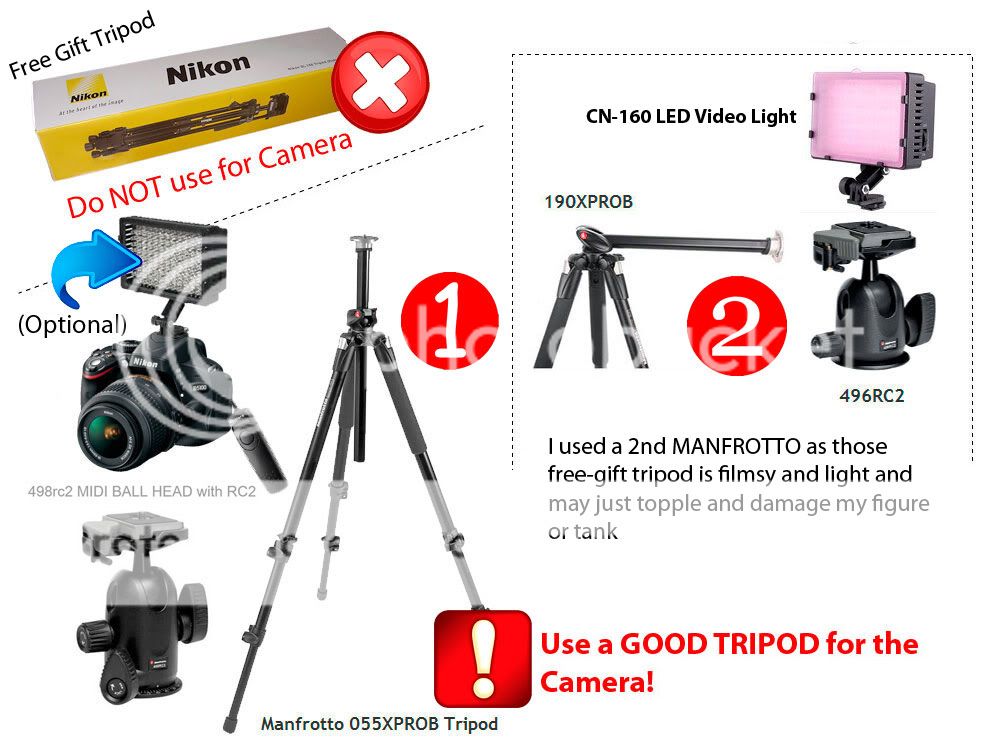
Part 2 - The Camera and Accessories
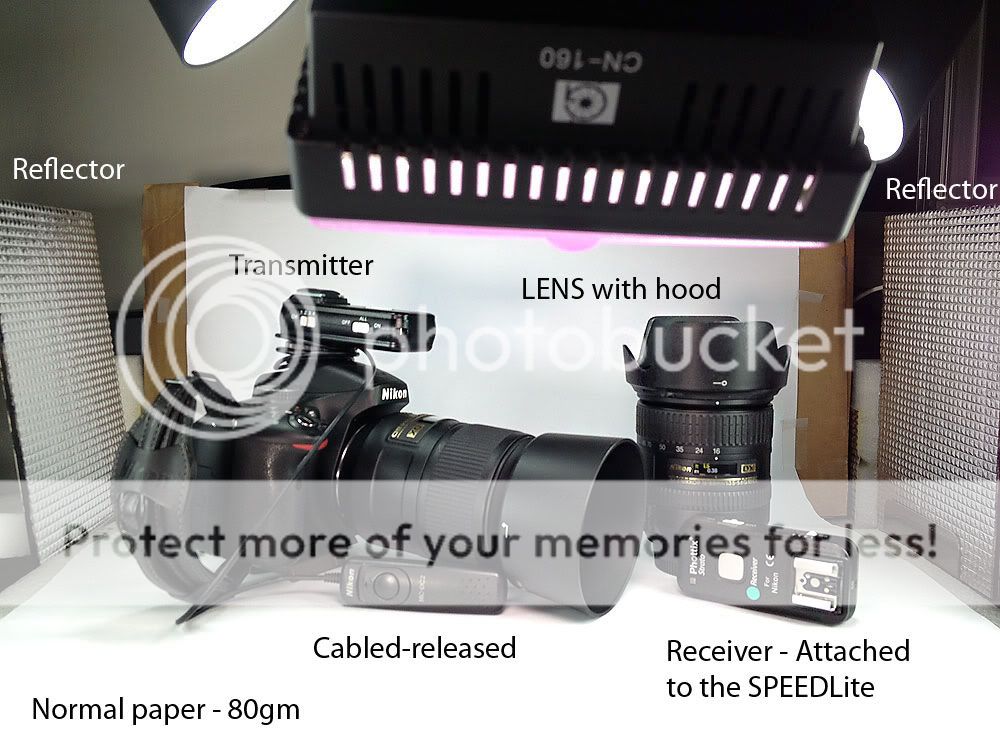
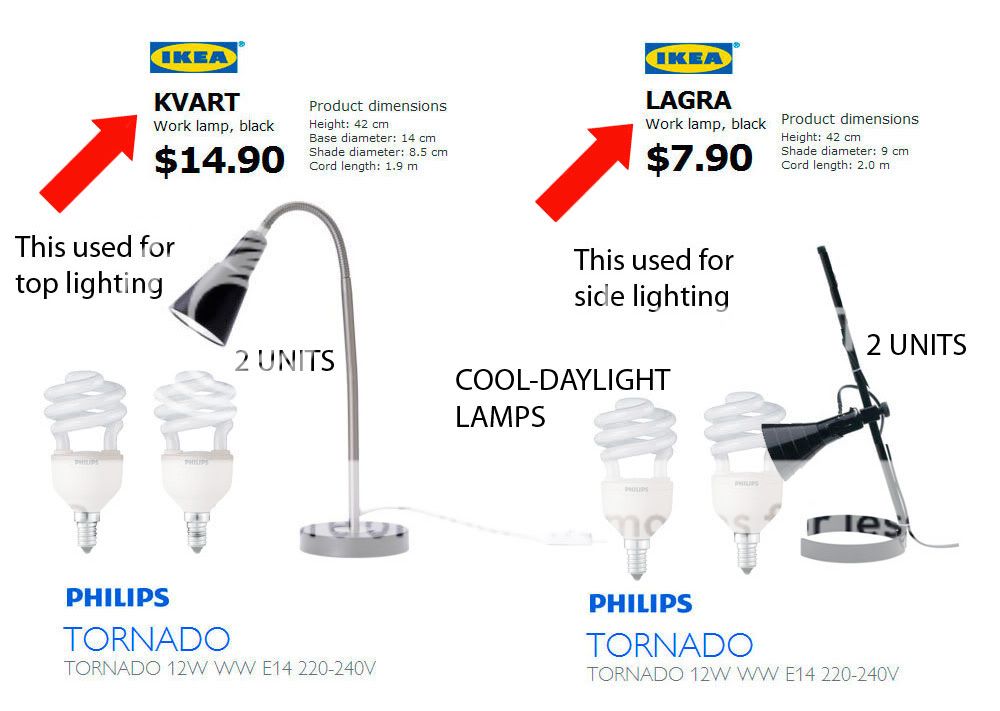
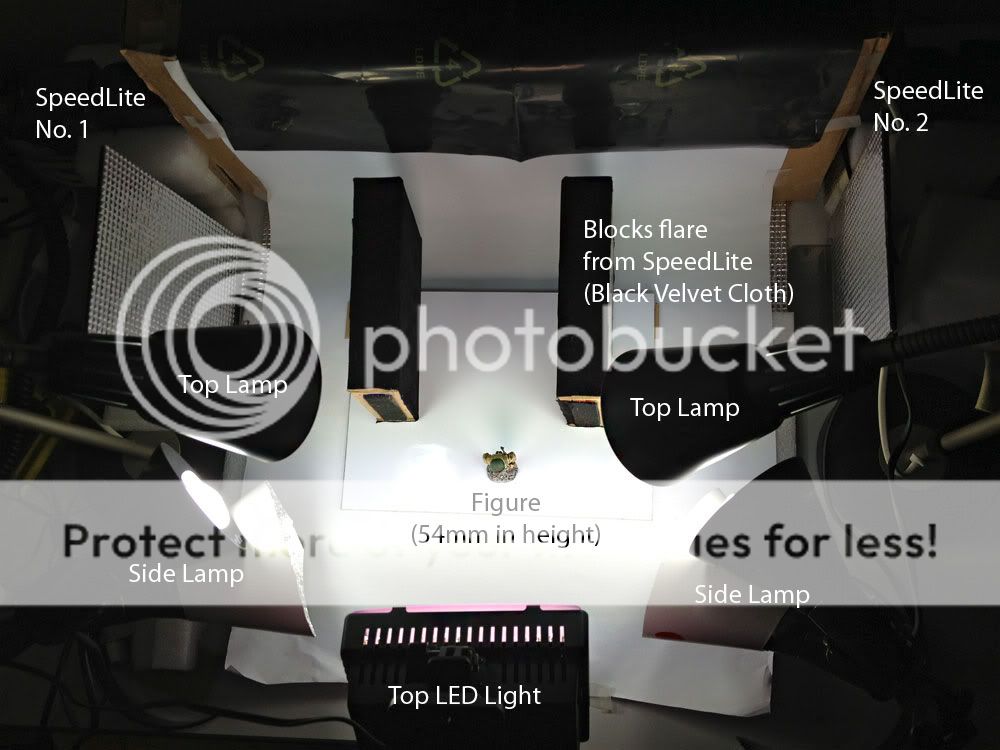
Part 3 - The Lightings and Support
Part 4 - Behind the Scenes
Optional Gadgets
TIPS - Focus Stacking
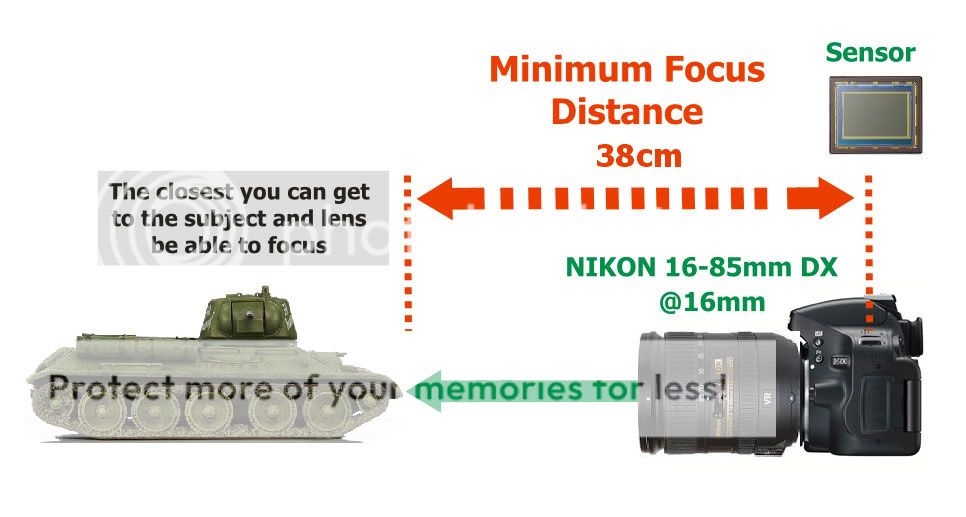
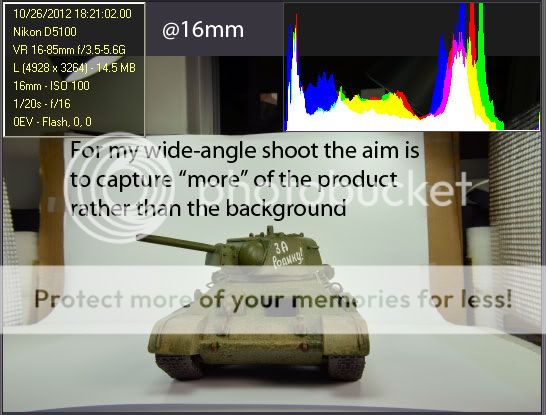
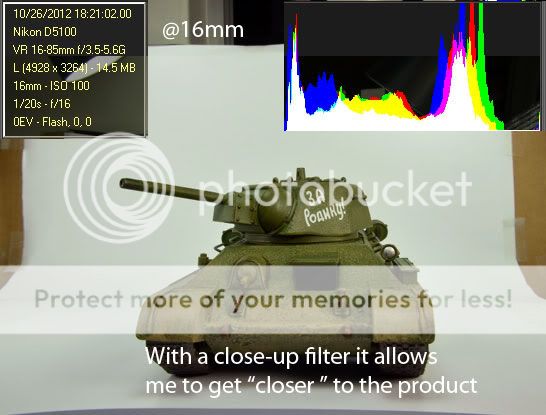
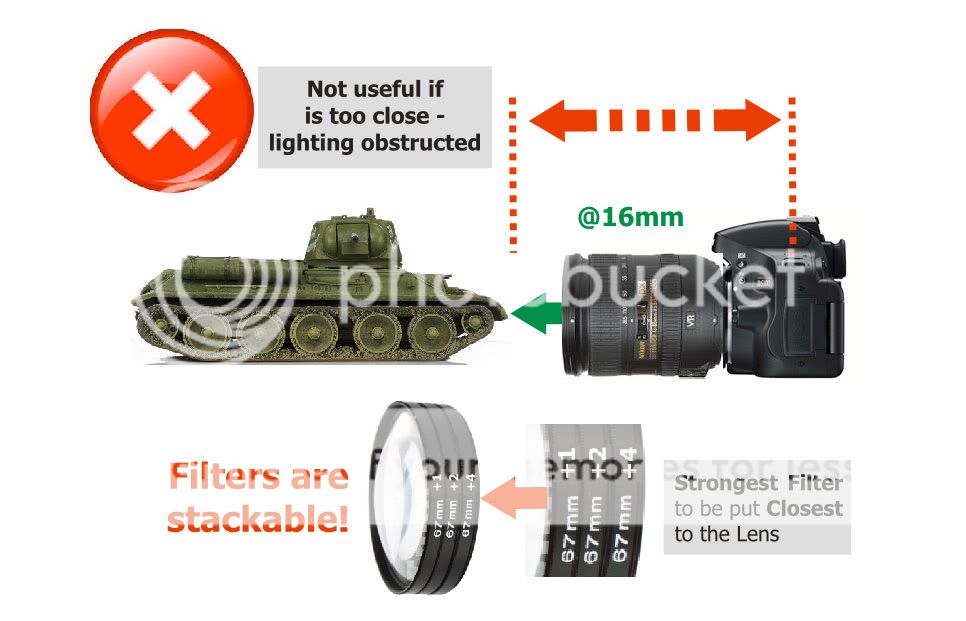
TIPS - Using Close Up Filters - How they Come Handy in Close-Up Shoots
TIPS - Image Stacking
TIPS - Color Space Which to Use ? Adobe1988 or sRGB?
TIPS - Calibrating Your Computer Monitor
TIPS - Using Reflectors
TIPS - Get a SECOND Hygrometer !
TIPS - Light Sources - Understanding the Fundamentals
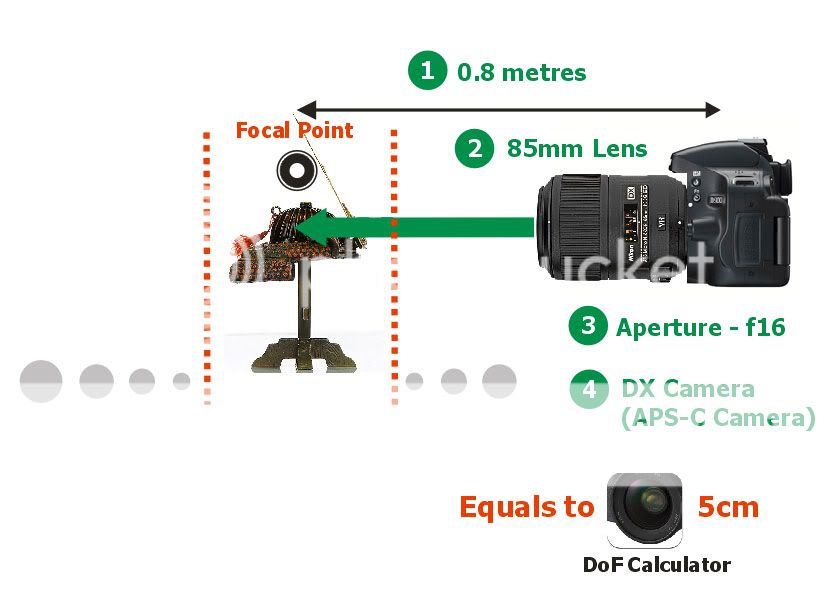
TIPS - Shoot at Lens Optimum Apertures !
TIPS - White Balance in Product Photography - Get it Always Uniform
TIPS - Post-Processing Anime Figures
TIPS - No Monitor Calibration Tool - Use this Manual Tuning Steps, It May Just Work !
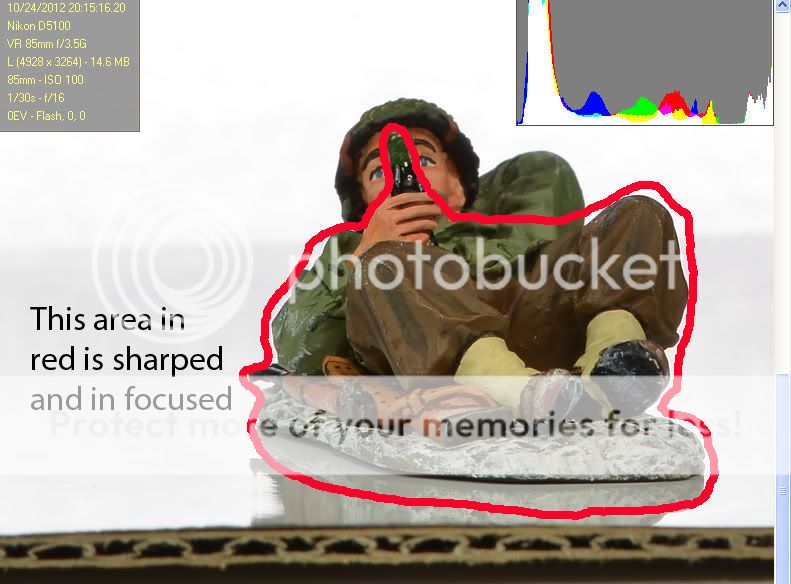
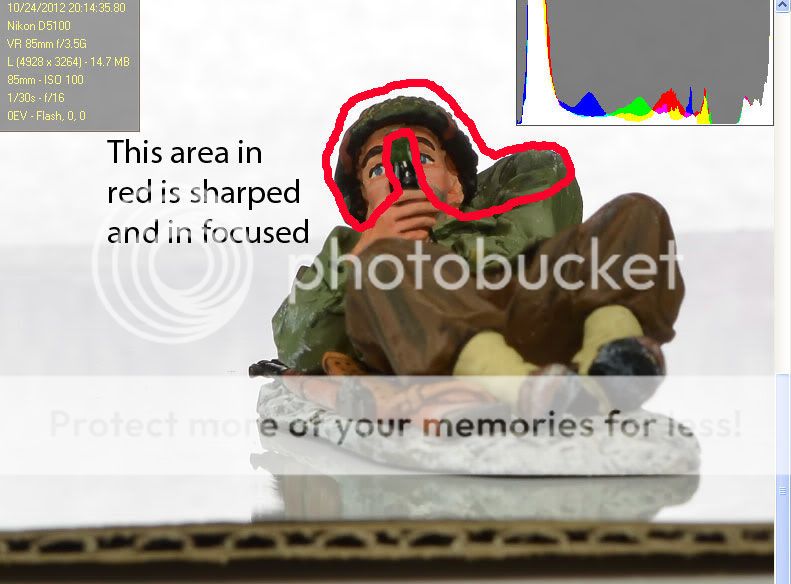
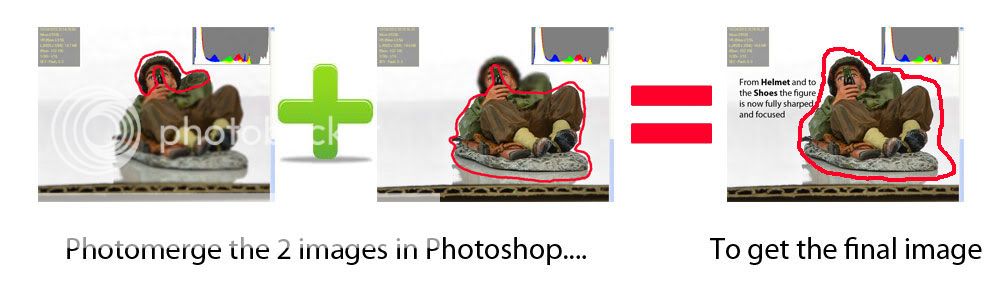
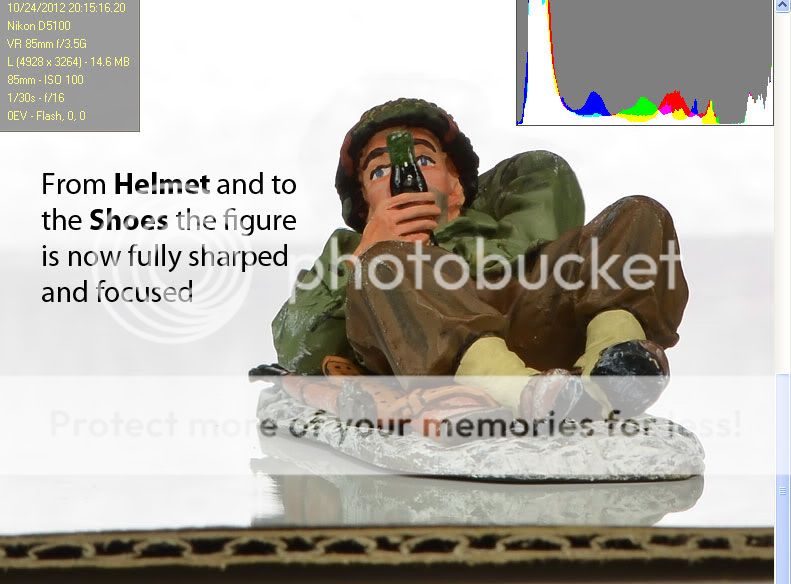
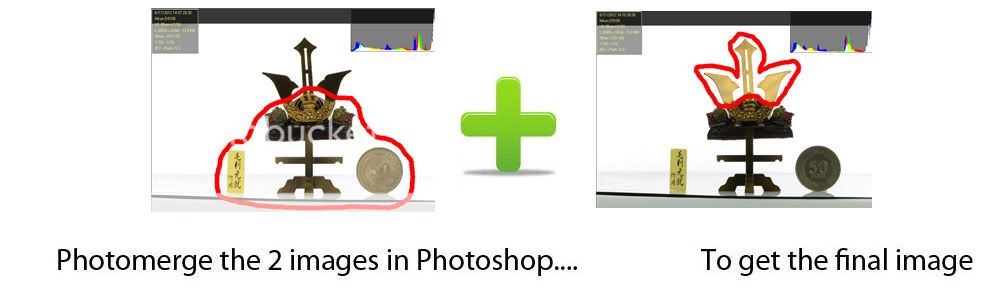
TIPS - Photoshop Layering - Combining Layers to Get the Final Picture
TIPS - Windows 7 Color Management Interfering with the Calibration Software After the Computer Recovers from Sleep or Hibernate Mode
TIPS - How to Determine the Total Number of Shutter Count on Your Camera Using Photoshop
TIPS - Shooting Top-Down - Top View (Part 1)
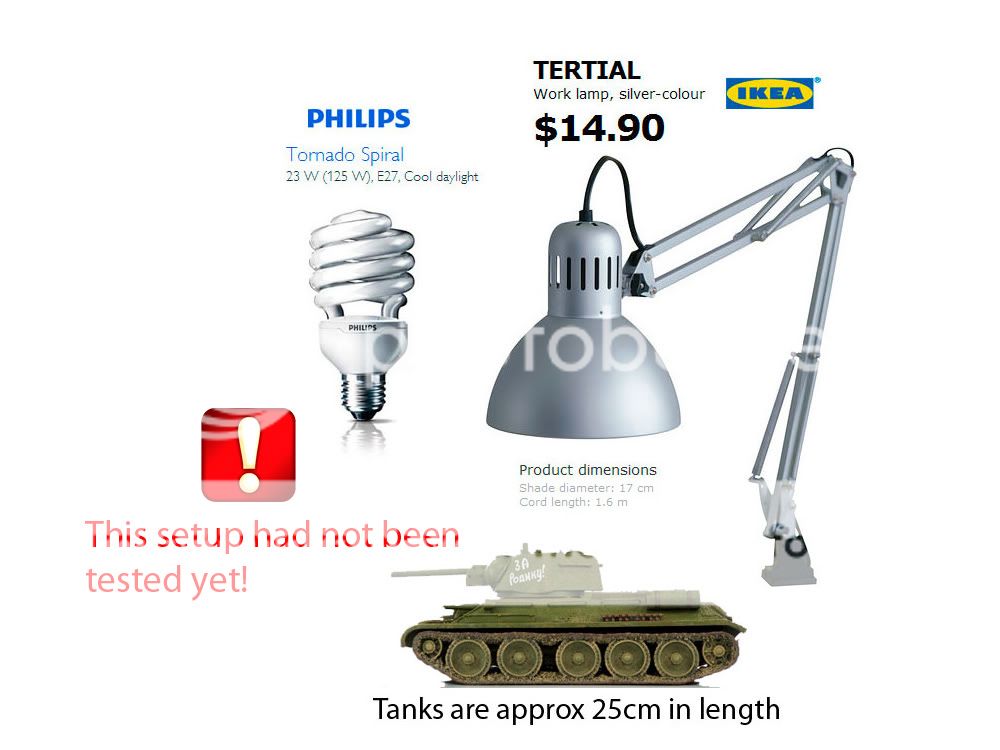
TIPS - Does the PHILIPS BULBS Flicker?
TIPS - NIKON DG-2 EyePiece Magnifier - Does it Work ?
TIPS - How to Focus Miniatures WITHOUT Using the NIKON DG-2
TIPS - Shooting Top-Down - Top View (Part 2)
TIPS - A Simpler Way to Shooting Top View of Toy Models
TIPS - The Lightings - Switching to LED Light Bulbs
TIPS - Post Processing Metallic Painted Model Cars
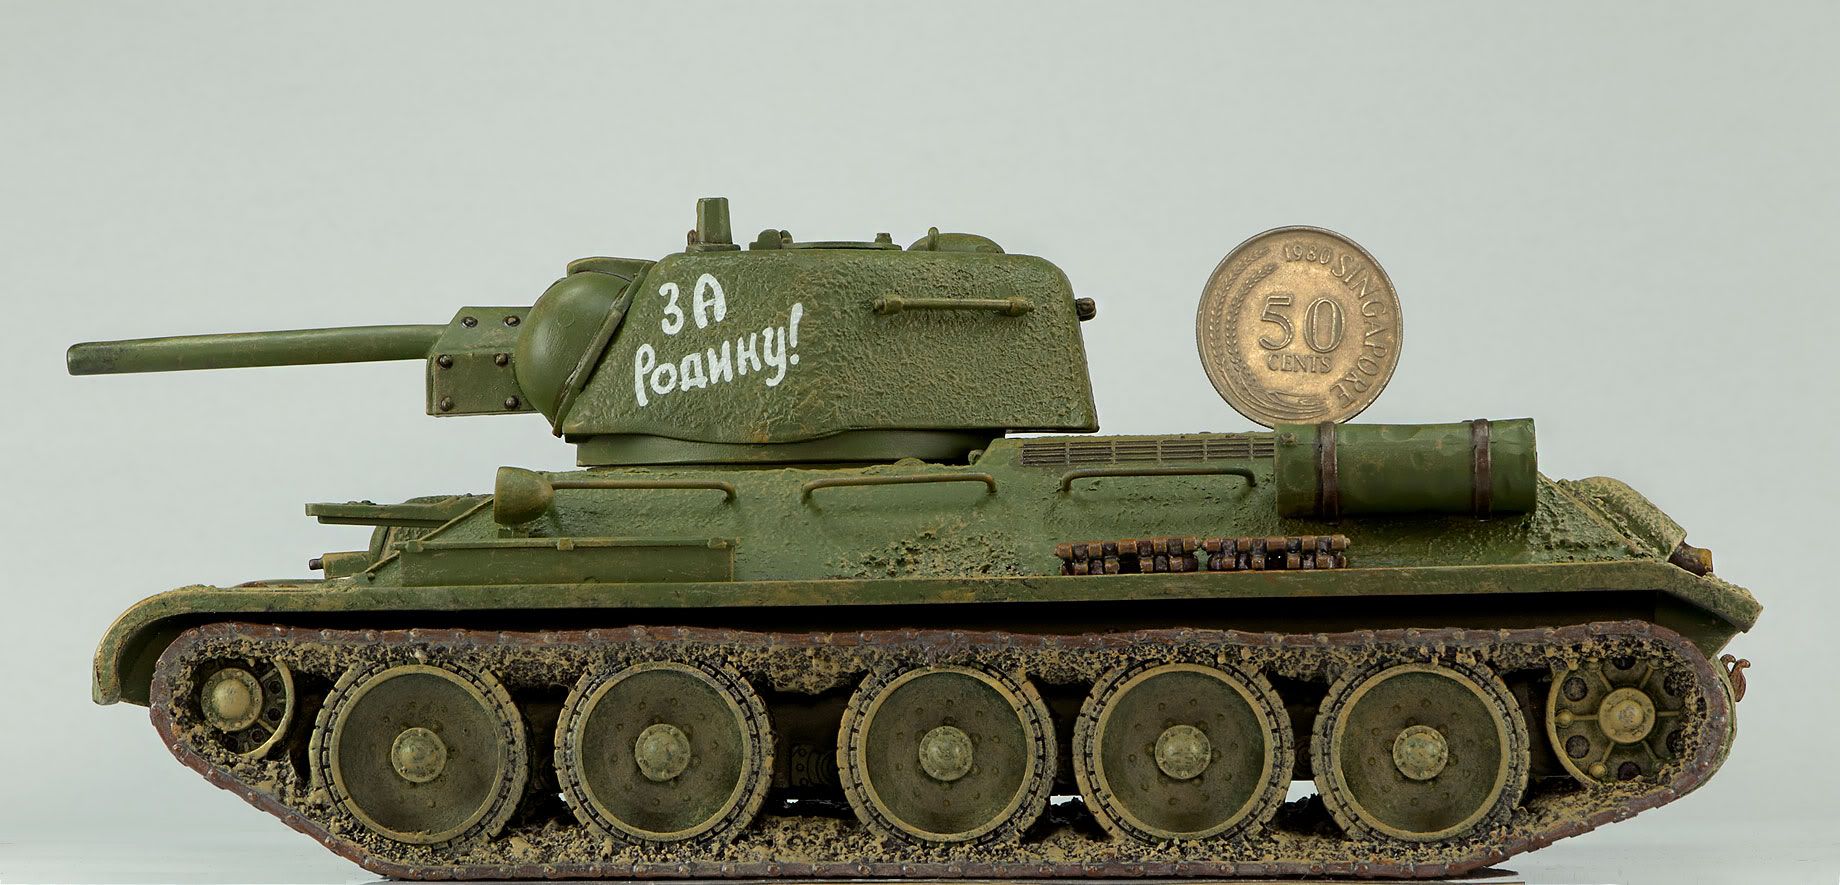
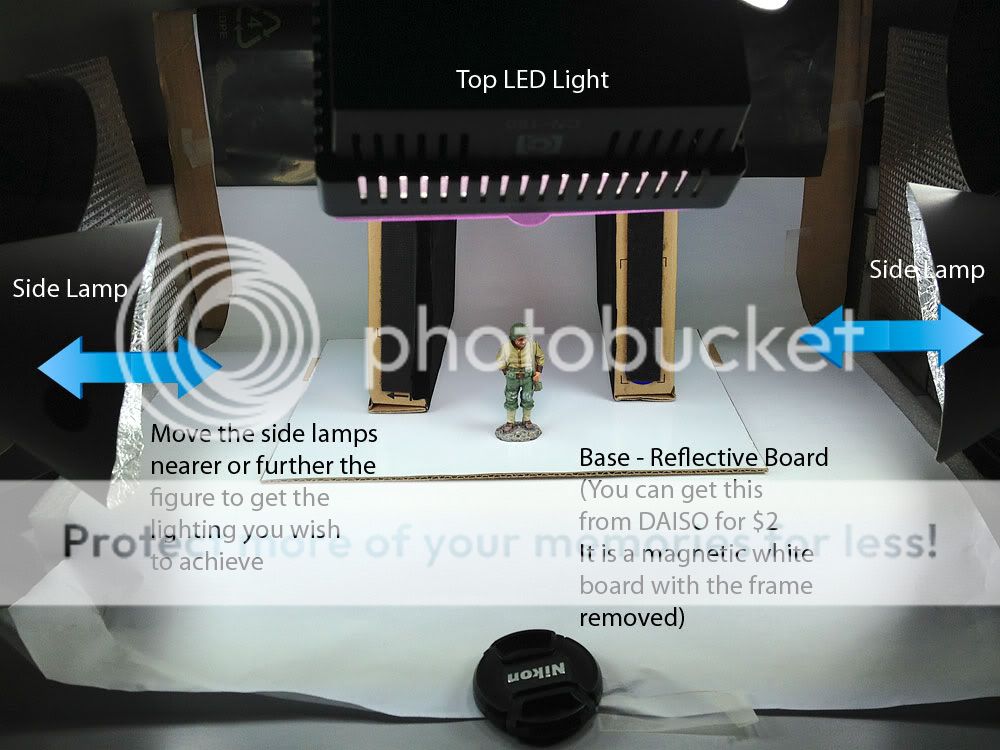
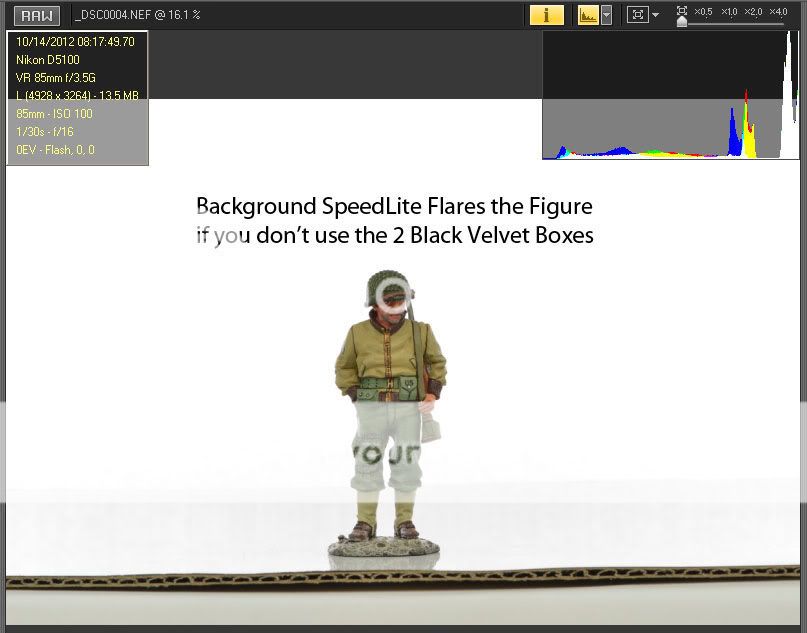
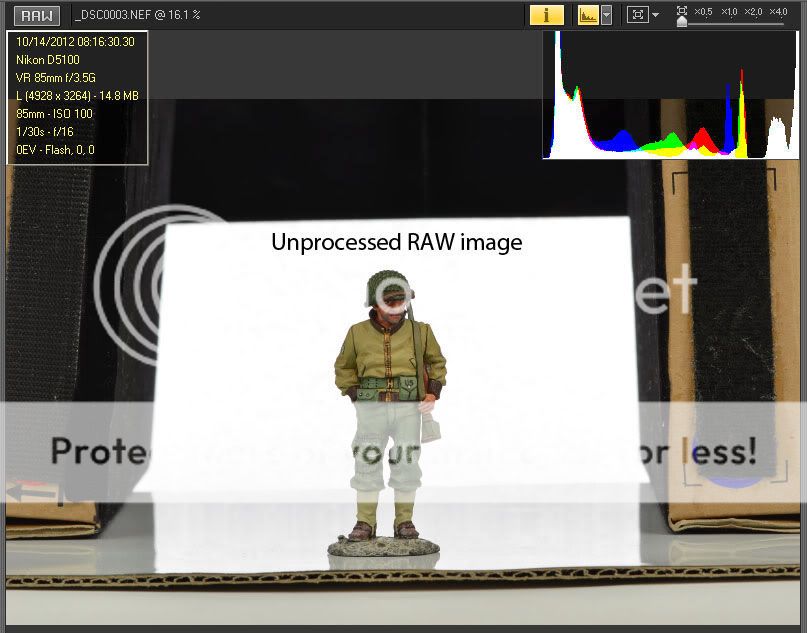
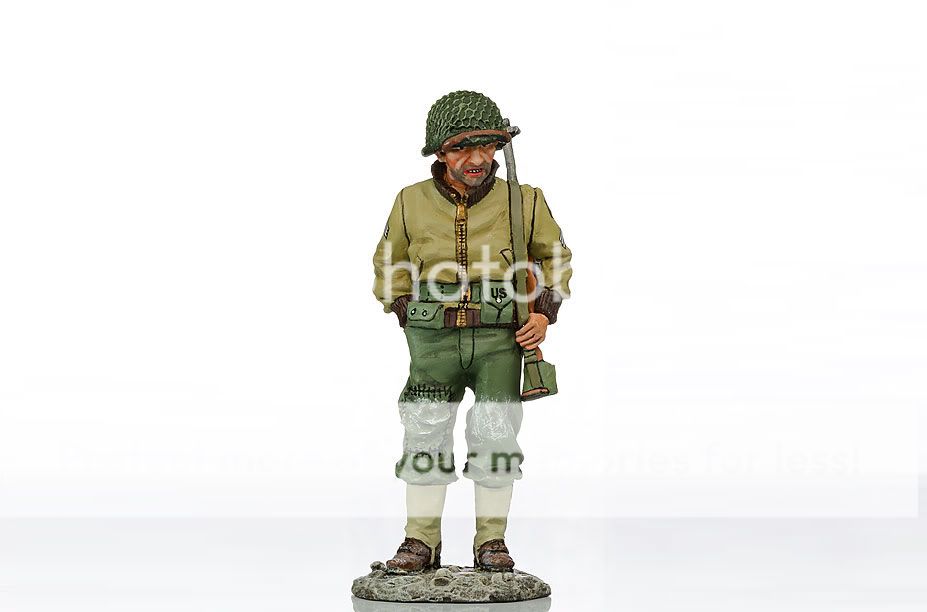
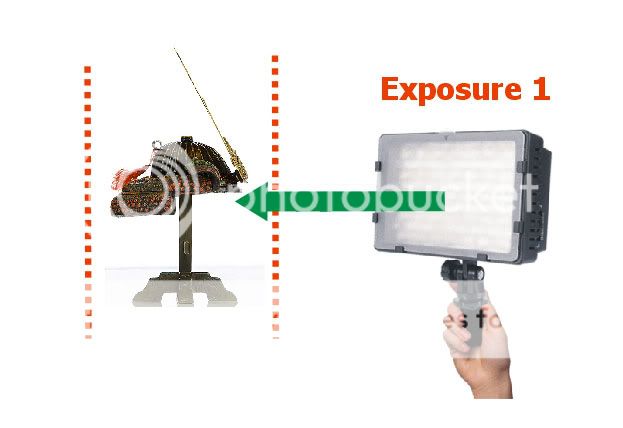
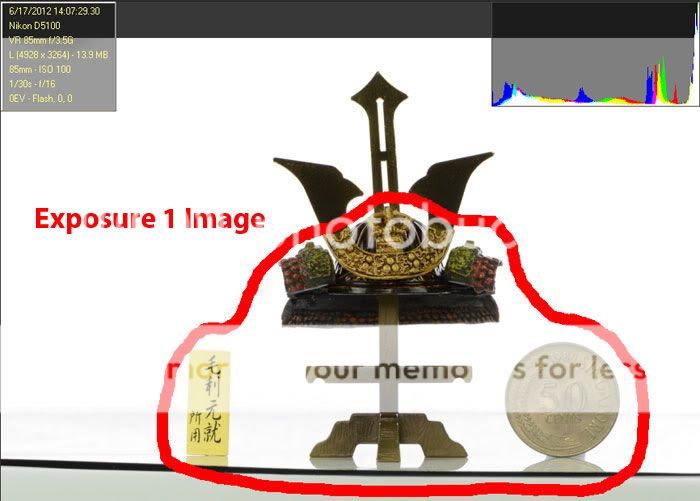
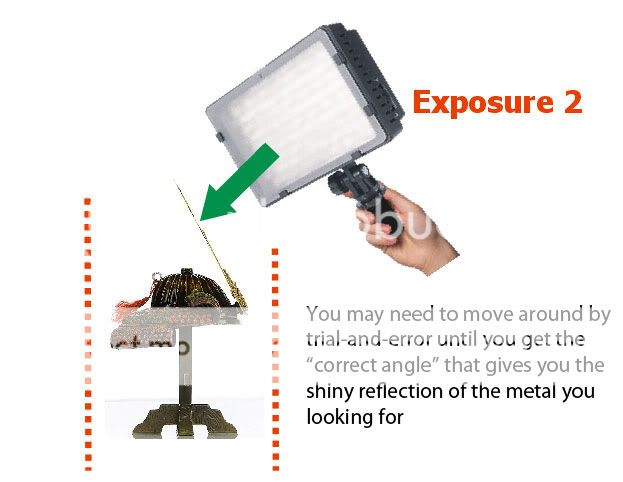
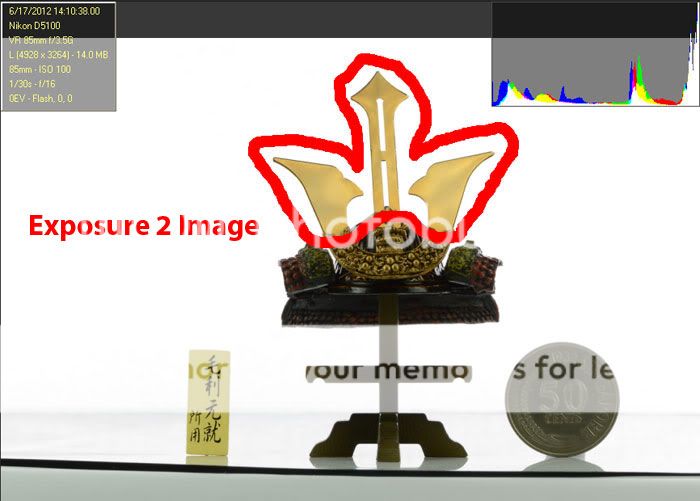
Shooting Small Toys Tips - Behind the Scenes
Here is how I did it...
BTW I am no expert in this field - the tips provided here are for home enthusiast who like to produce the shoots/images pictured in this thread
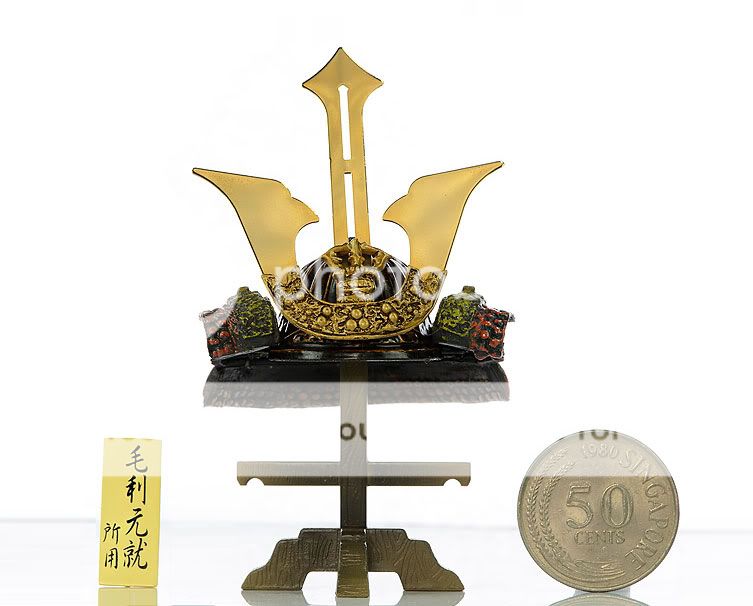
Part 1 - Decide What You Want to Shoot
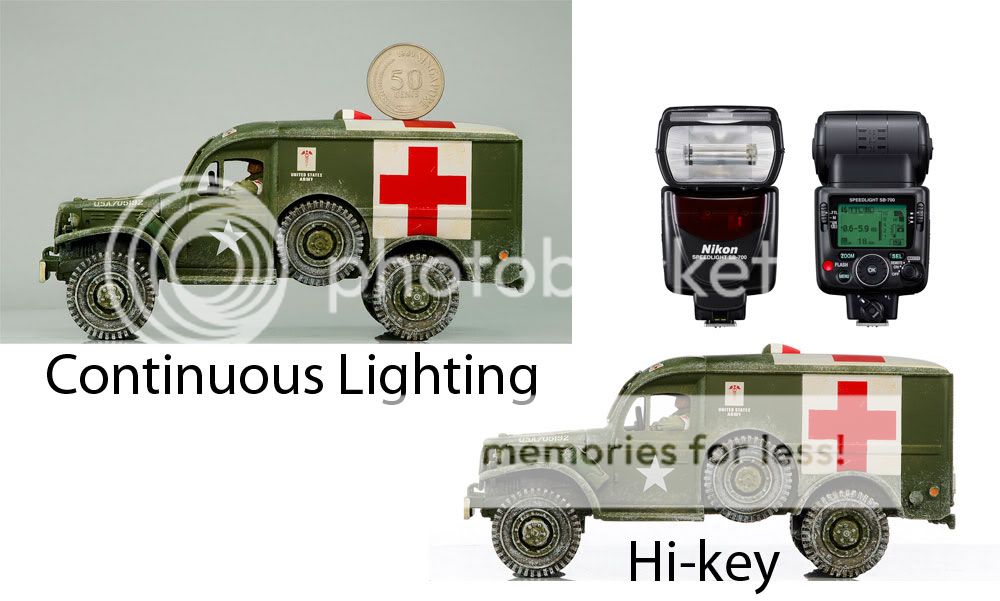
- Decision 1 - Continuous Lighting or High-Key. If shooting Hi-Key you'll need a Speedlite and a soft-box
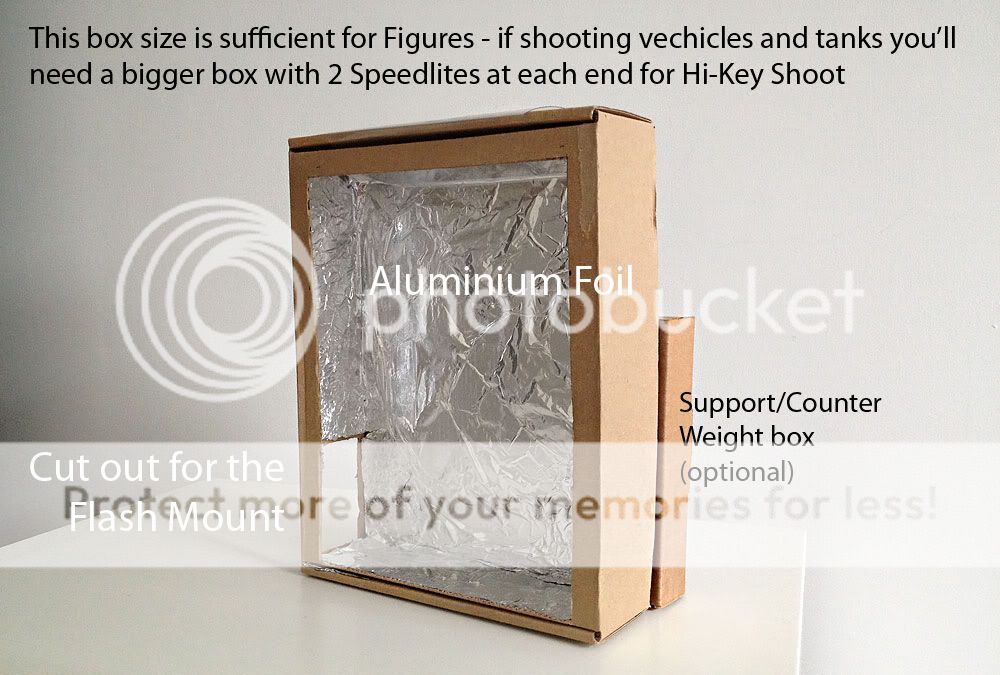
continued on next post....
The Product Shots will continue be posted in My Try @ Product Photography - Toys and Collectables
NOTICE: If you see this image
Here it goes...
Part 1 - Decide What You Want to Shoot (see thread below)
Part 2 - The Camera and Accessories
Part 3 - The Lightings and Support
Part 4 - Behind the Scenes
Optional Gadgets
TIPS - Focus Stacking
TIPS - Using Close Up Filters - How they Come Handy in Close-Up Shoots
TIPS - Image Stacking
TIPS - Color Space Which to Use ? Adobe1988 or sRGB?
TIPS - Calibrating Your Computer Monitor
TIPS - Using Reflectors
TIPS - Get a SECOND Hygrometer !
TIPS - Light Sources - Understanding the Fundamentals
TIPS - Shoot at Lens Optimum Apertures !
TIPS - White Balance in Product Photography - Get it Always Uniform
TIPS - Post-Processing Anime Figures
TIPS - No Monitor Calibration Tool - Use this Manual Tuning Steps, It May Just Work !
TIPS - Photoshop Layering - Combining Layers to Get the Final Picture
TIPS - Windows 7 Color Management Interfering with the Calibration Software After the Computer Recovers from Sleep or Hibernate Mode
TIPS - How to Determine the Total Number of Shutter Count on Your Camera Using Photoshop
TIPS - Shooting Top-Down - Top View (Part 1)
TIPS - Does the PHILIPS BULBS Flicker?
TIPS - NIKON DG-2 EyePiece Magnifier - Does it Work ?
TIPS - How to Focus Miniatures WITHOUT Using the NIKON DG-2
TIPS - Shooting Top-Down - Top View (Part 2)
TIPS - A Simpler Way to Shooting Top View of Toy Models
TIPS - The Lightings - Switching to LED Light Bulbs
TIPS - Post Processing Metallic Painted Model Cars
Shooting Small Toys Tips - Behind the Scenes
Here is how I did it...
BTW I am no expert in this field - the tips provided here are for home enthusiast who like to produce the shoots/images pictured in this thread
Part 1 - Decide What You Want to Shoot
- Decision 1 - Continuous Lighting or High-Key. If shooting Hi-Key you'll need a Speedlite and a soft-box
continued on next post....
Last edited: