RSSNewsFeeder
Member
The Trekpak Case Divider System is a beautiful piece of design. It’s simple, it’s clean, and most importantly, you can change your configuration as you needs. It’s meant to replace the current pick-n-pluck foam system that Pelican and other hard shell manufactures use. The problem with the pick-n-pluck is once you pull out the foam, you’re stuck with that set-up. If you decide to change this, your only option is to replace it with a new foam insert. And this gets expensive, not to mention inconvenient.
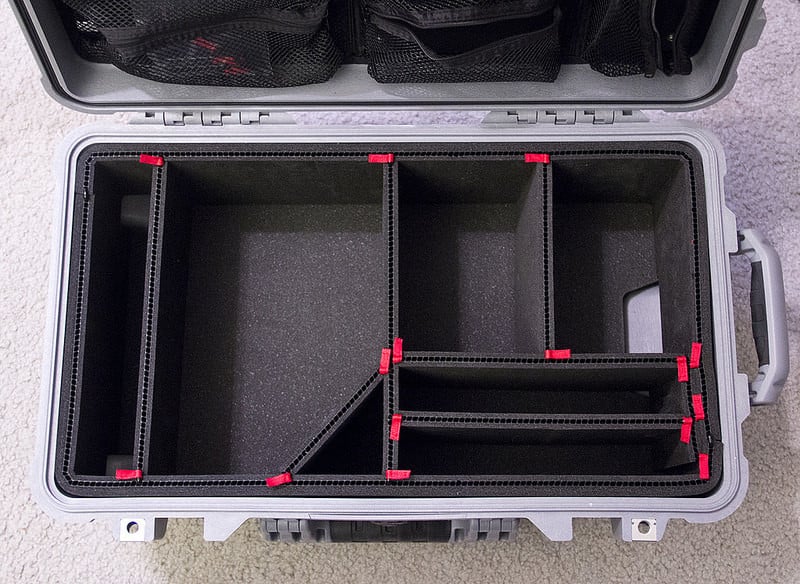
Trekpak system
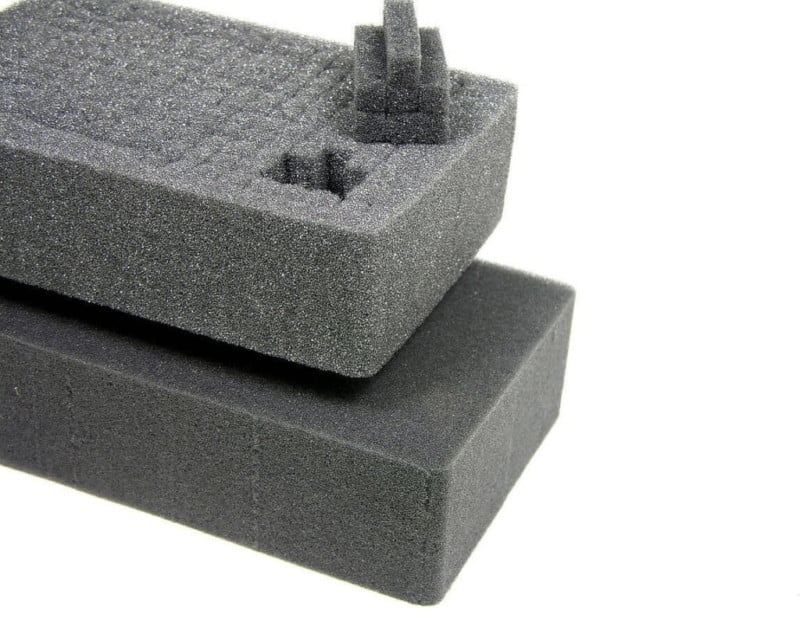
The current pick-n-pluck system
My sole complaint with the Trekpak system is its cost. If you look closely at the materials they’ve used, there’s nothing you can’t pick up at your local art store. Essentially it’s 2 layers of EVA foam glued to a corrugated plastic board.
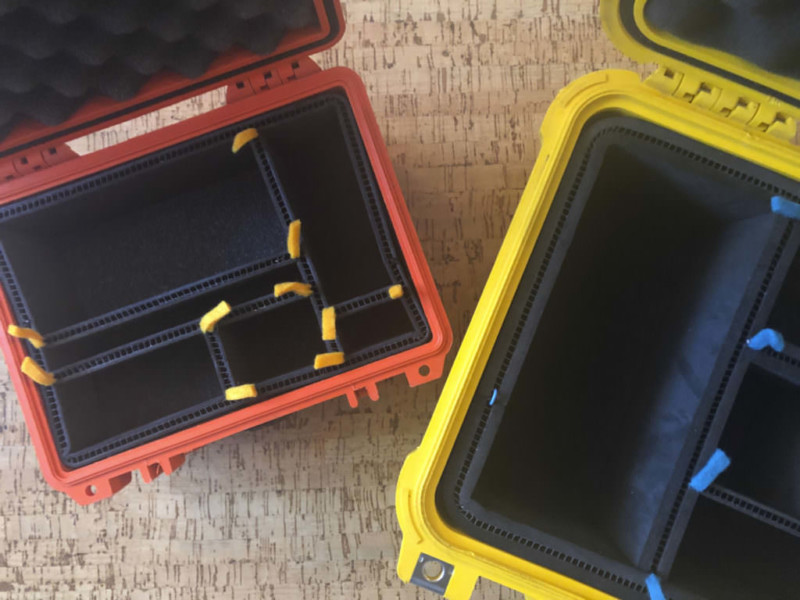
I have a couple of Pelican cases and over the years as my camera system has changed and evolved, I’ve had to reconfigure what gear goes in these cases. But every time I reconfigure I end up buying new pick-n-pluck inserts, which as I’ve said before, gets expensive.
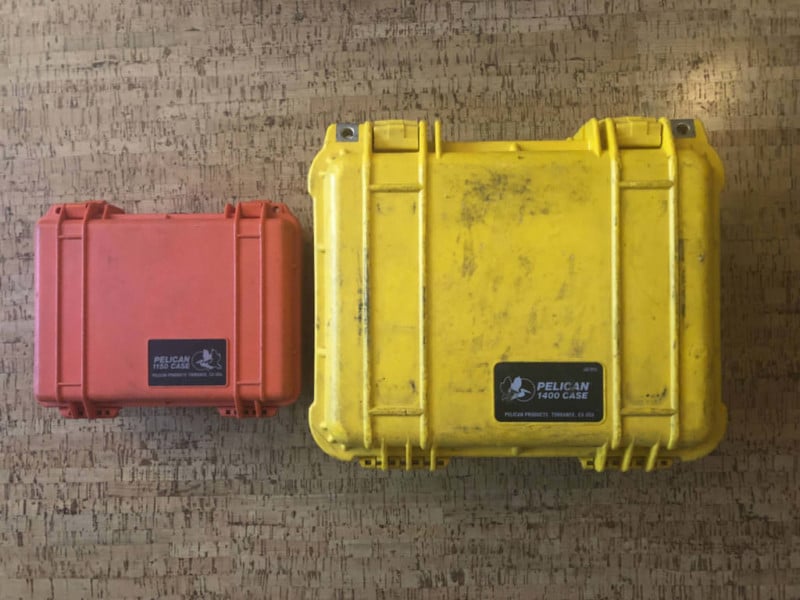
My trusty and well used Pelican cases
I decided to DIY my own Trekpak system. For this project, I made a foam insert system for both my Pelican 1400 and Pelican 1150 cases. Took me a couple of hours to put it together and the results were magnificent!
Materials for Your DIY Trekpak
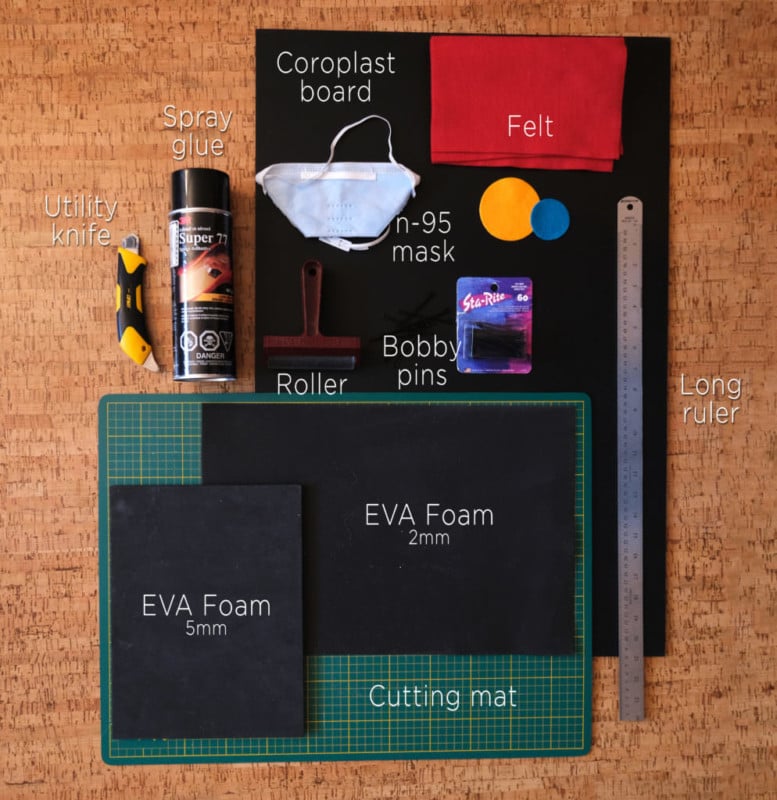
The materials needed are straight-forward. You could pick up almost all these items at Michaels Art Store. Amazon I’m sure has all this as well.
- Black EVA foam
- Black Coroplast (also called Corrugated Plastic sheet)
- Super 77 spray adhesive (use with N-95 mask)
- Cutting mat
- Utility knife
- Long ruler or straight edge
- Bobby pins or jumbo paper clips
- Roller
- Latex glove
The most important items in this project are the EVA Foam and Coroplast.
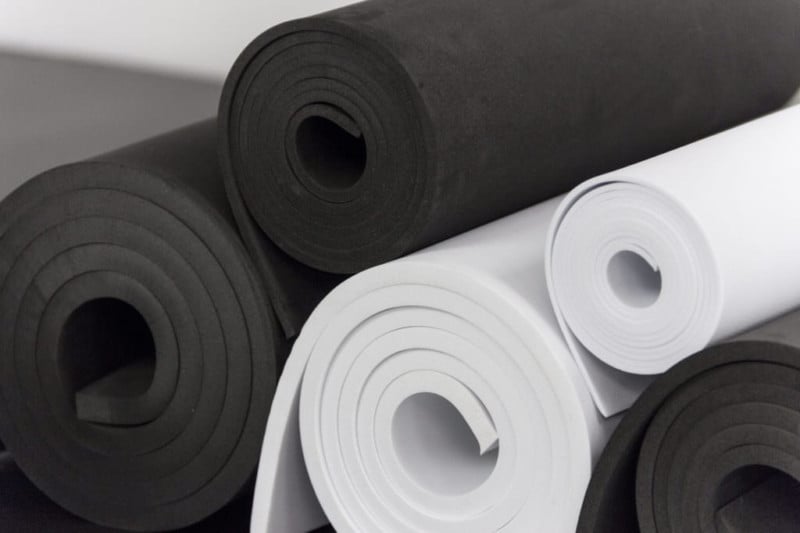
Ethylene-Vinyl Acetate (EVA) is a closed cell foam. It’s used for exercise mats, sports equipment and props for cosplay. Closed cell means it does not absorb water, so don’t go out and get any old foam, it’s gotta be EVA foam. And if you’re thinking of cutting up your old yoga mat, don’t! The ridges in the mat won’t glue flat onto the Coroplast board and you’ll just end up with a mess.
EVA foam comes in different lengths, so you’ll have to figure out how much you need for your own project. The most important detail to pay attention to is its thickness. My recommendation is 2mm. I made the mistake of buying the 5mm, and it turned out to be too thick – usable – but a bit thick.
If you feel the 2mm foam will be too thin, then go for the 4mm. Don’t forget by the time you’re done, you’ll have 2mm of foam on each side, plus the Coroplast, which itself is 4mm thick. Your total thickness of each divider ends up at 8mm, just over 1/4″ thick.
By itself, the 2mm dividers are not that rigid, but once you start assembling your configuration, the system holds itself together firmly.
Where to get EVA Foam
Adhesive-Backed EVA Foam
If you want to avoid the spray glue step, I recommend buying the Adhesive Backed Foam Sheets instead. Less messy and your lungs will thank you. The cost is slightly more for these but well worth it.
Adhesive Backed Foam
Size: 9” x 12”
2mm thick only
Price: $1.10/sheet
Adhesive Backed Foam
Size: 24” x 24”
2mm or 4mm thick
Price: $3.95/sheet
Regular EVA Foam
This is the regular version of the foam. You’ll have to use spray glue if you use this.
Michaels Art Store
Size: 12” x 18”
Thickness: 2mm only
Price: $1.10 / sheet
TNT Cosplay Supply
Size: 24” x 60”
Thickness: 2mm or 4mm
Price: $7.95/sheet
Where to Get Coroplast
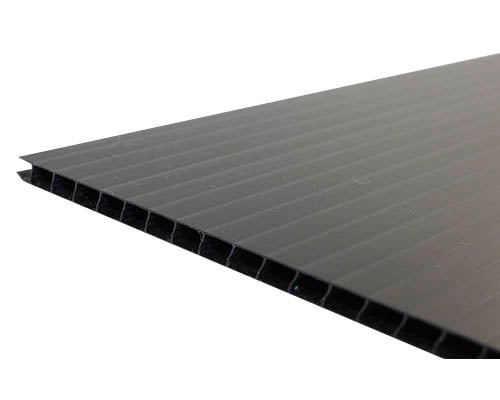
Coroplast (Corrugated Plastic Sheet) is widely available at any art store or even at the Dollar Store. The standard thickness is 4mm, it doesn’t need to be any thicker than that.
Corrugated Board at Michaels
Size: 20” x 30”
Price: $4.50
Spray Adhesive
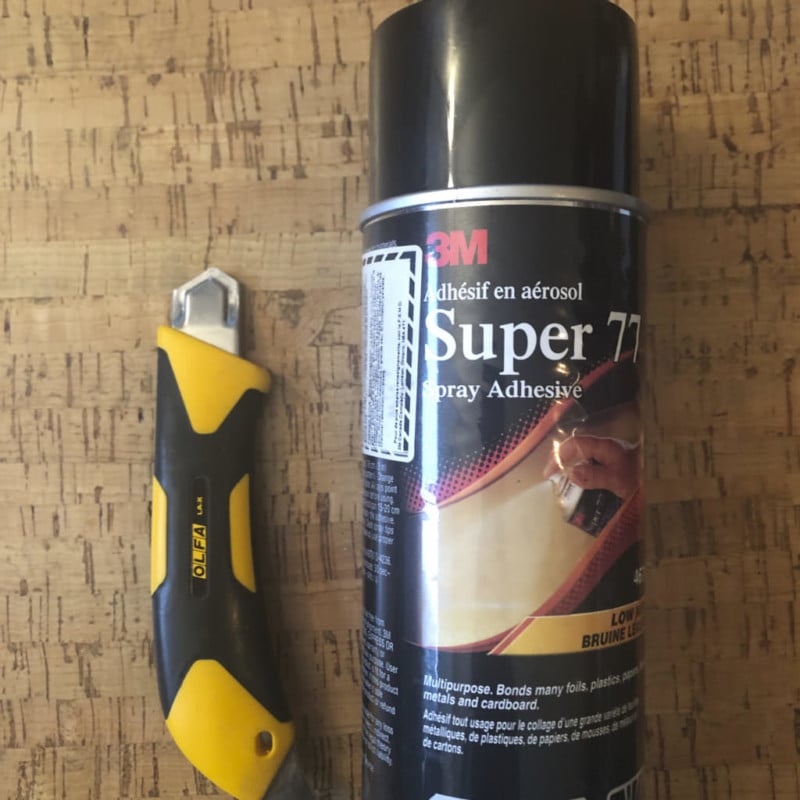
This is nasty stuff (just read the warning label). You definitely want to use this product outdoors. I usually line the area I’m spraying with newspapers so the ground doesn’t get all sticky from the spray glue. I highly advise the use of an N-95 mask so you’re not coating your lungs with spray glue. It’s not a bad idea to use latex gloves as well.
Scotch Super 77™ Multi-Purpose Spray Adhesive
Putting Your DIY Trekpak Together
Sketch out your measurements so you have a place to start. I ended up with extra dividers that I can cut down for future use.
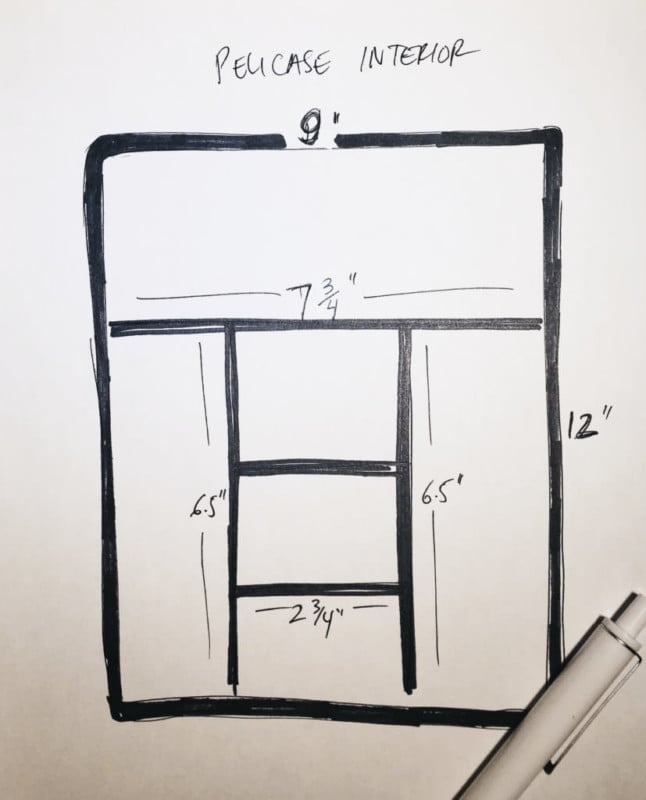
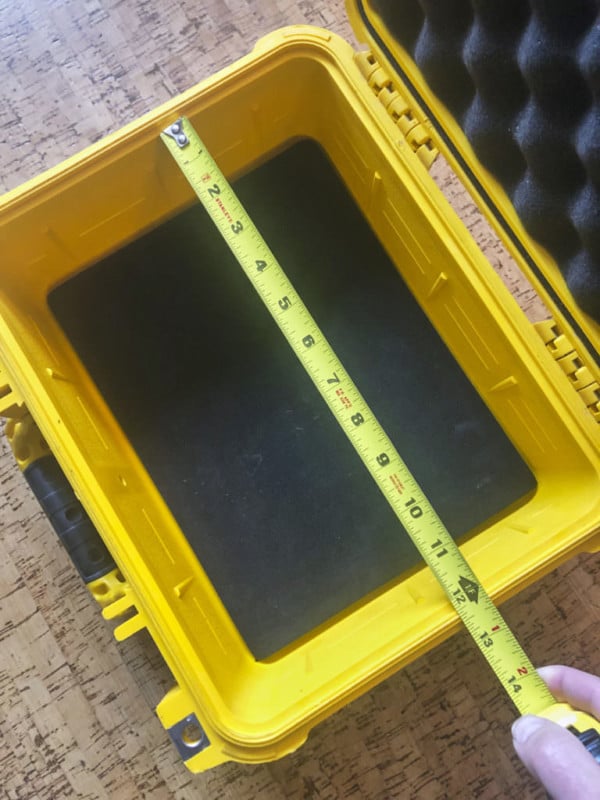
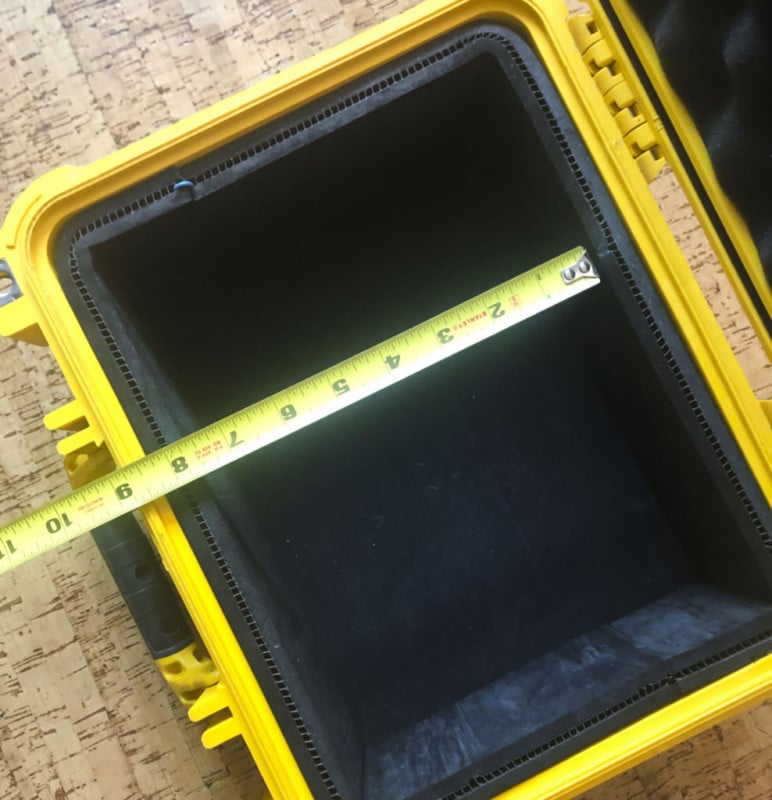
It’s best to start this project on a sheet of paper. Draw out your configuration so you’ll know how much EVA foam to buy and a game plan of how to put this together. Because you’ll end up making more dividers than needed, it’s not critical to be absolutely precise – just have a basic idea. Start by measuring the interior space of your Pelican case. If you measure the dimensions of the old pick-n-pluck insert, that gets you the same measurements.
In my case, the interior is 12” in length x 9” in width x 3.5” tall. I needed to assemble the interior perimeter first before worrying about the dividers. I wasn’t too worried about getting the fit perfectly. I made each panel longer than needed and then trimmed it down to fit.
12″ wide

The height of the dividers are 3.5″ tall
With the interior perimeter finished, I can now measure the width of the insert panels
Bending and shaping the corners with a lot of effort
Since I used 5mm foam instead of the 2mm, shaping the corners took some effort. By the time you glue the EVA foam to both sides of the Coroplast, you’re looking at a thickness of 14mm (over 1/2” of material). That’s why I recommend using the 2mm foam instead.
Cutting the excess foam off
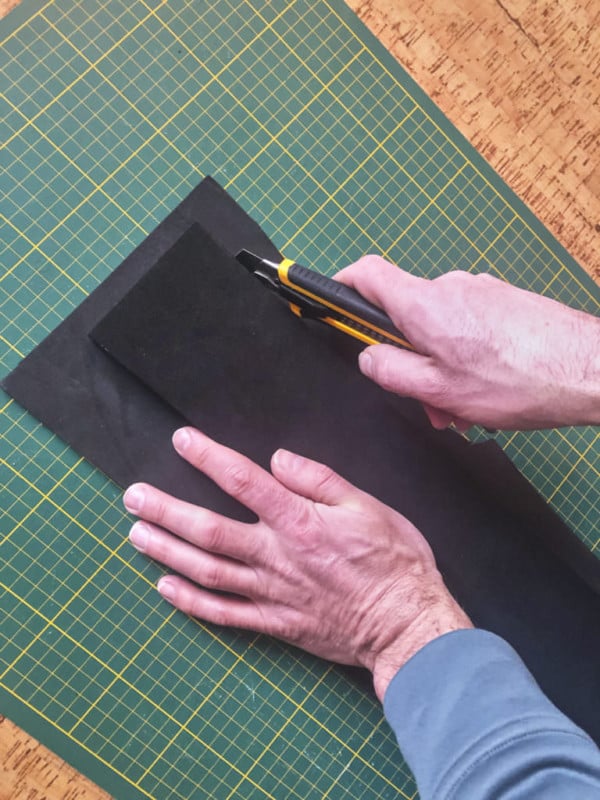
Once the interior perimeter was inserted it was time for the dividers. The EVA foam sheet that I bought was 24” wide, so I made as many 3.5” x 24” strips as I could. I first cut the Coroplast down to 3.5” x 24” strips and then glued the EVA foam to one side. The glue dries fairly quickly once it’s on the foam. I used a roller to apply pressure for better adhesion. I then trimmed off the excess foam with a utility knife. I repeated the same process on the other side. Once that was done I could start cutting them down to size to fit my configuration.
The depth measurements are different in my 2 Pelican cases so I repeated the same process above for the other case. It all worked out.
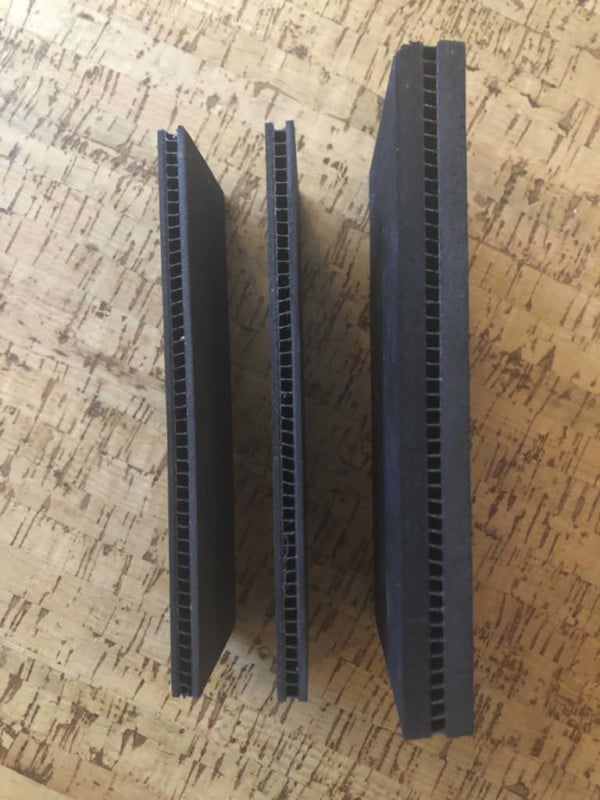
2mm vs 5mm. Big difference
Divider Pins
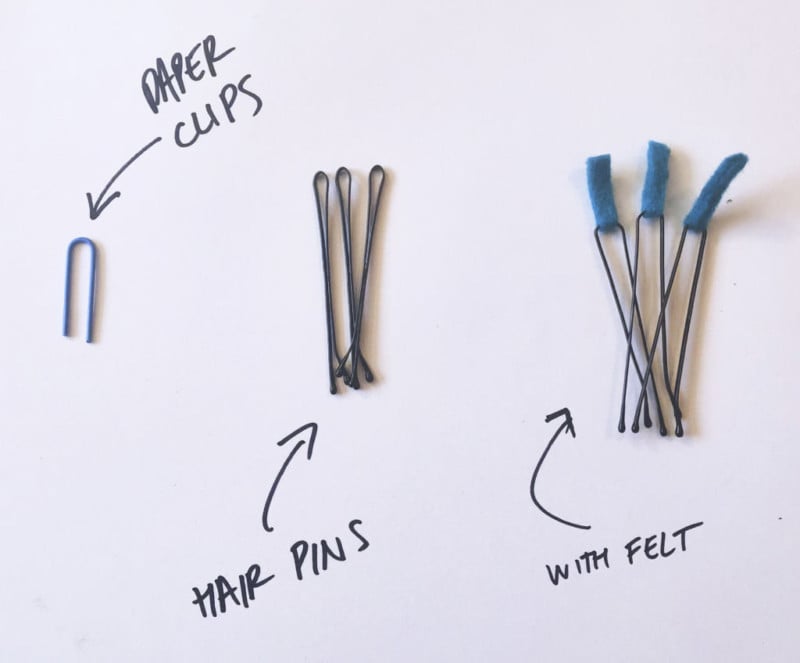
To finish this project off, you need pins to join the interior dividers. These I’m sure are custom made for Trekpak so I not expecting to find these on a store shelf. Getting a bit creative, I bought bobby pins, which in the end work great. Get the biggest ones you can find and you’ll have an easier time manipulating them. I also experimented with jumbo sized-paper clips. If you snip the ends off, they work just as well as the bobby pins.
For the pull tabs, I found some Peel-and-Stick felt lying around the house. I cut them into strips and wrapped them around the bobby pins. The Peel & Stick felt is dirt cheap.
Peel & Stick Felt
Cost: $1.20/sheet
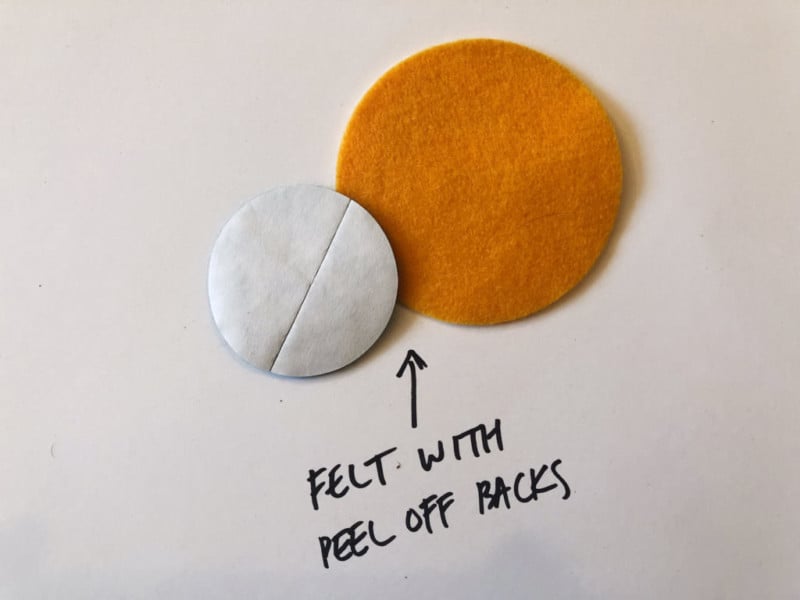
These are circular peel off back felt stickers. You can get the same in sheet format.
Cost Comparison
If you’re wondering what the cost comparison between buying the real Trekpak system vs the DIY Trekpak version. Here is the breakdown:
For the Pelican 1400
TrekPak Divider Kit for Pelican 1400 Small Protector Case
Cost: $62.95
For the Pelican 1150
TrekPak Divider Kit for Pelican 1150 Small Protector Case
Cost: $36.95
That’s $100.00 total for two cases.
I’ve read reviews from people who have bought the Trekpak system and their main complaint is they do not provide enough dividers with the system. So you’ll end up buying additional dividers, which of course adds to your cost.
My Project Costs
I already had some Super 77 spray glue from another project. I also had some Peel & Stick felt lying around. I made the DIY Trekpak inserts for both my 1400 and 1150 Pelican cases and had plenty of extra dividers for future configurations.
EVA foam: $9.00
Coroplast: $7.00
Bobby Pins: $3.50
The total cost of this project in Canadian dollars was $19.50 – about $15.00 in U.S. currency.
Conclusion
The end result looks just as clean and professional as the real thing. I will at some point redo my dividers and use the 2mm foam instead of the 5mm. There’s no need for it to be so thick, plenty of protection with the thinner foam.
I’ve got the flexibility to adjust my foam insert system for future configurations and I saved a wack of money doing it myself. I consider this DIY Trekpak project a success. Alright, Alright, Alright!
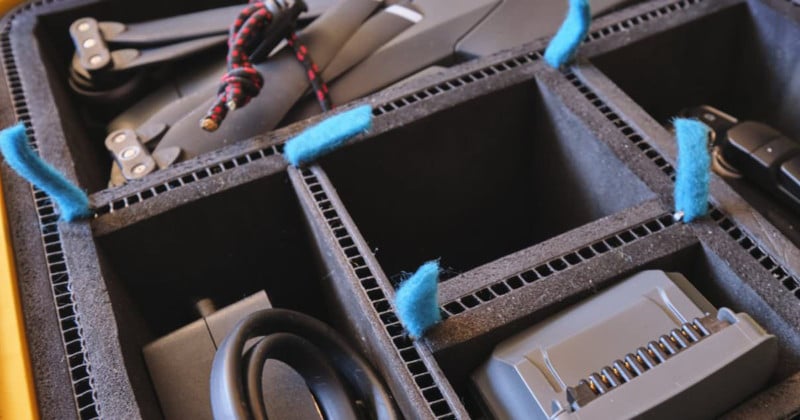
The final result looking very professional
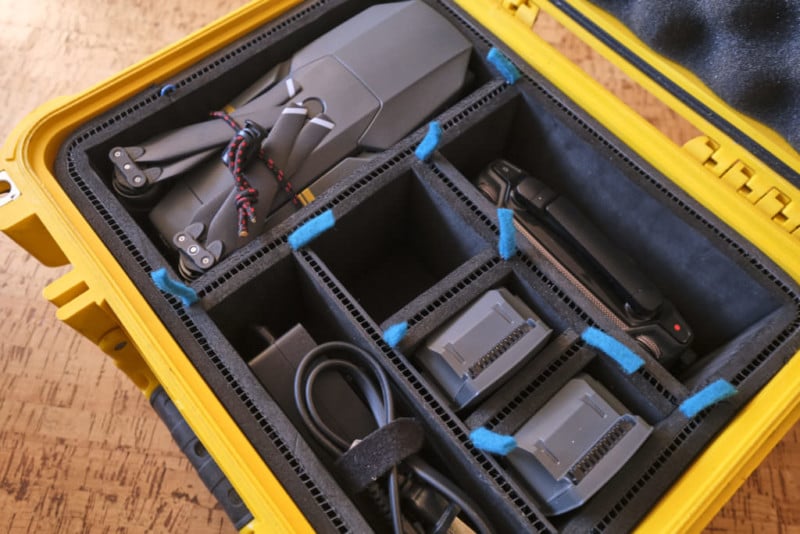
My drone all safe and sound
About the author: Ariel Estulin is an award-winning photographer and photo educator. The opinions expressed in this article are solely those of the author. Primarily interested in landscapes, Estulin travels the world seeking out beauty in those wild and remote places on earth that still remain untouched by civilization and where nature commands ultimate attention. His never-ending search for off-beat adventures have led him to explore the Nepali Himalayas. He teaches photography workshops at outdoorphotojourney.com. You can find more of his work on his website, Facebook, and Instagram. This article was also published here.
Continue reading...