RSSNewsFeeder
Member
This is something I wind up showing a lot of “The Grid” when we do blind critiques. “Fall off” is a lighting term, and it’s used a couple of different ways, but in this case, what we want is for our subject’s face to be the brightest thing in the image, and then the light should slowly “fall off” and get darker as the light goes further down the subject (this will make more sense when you see the image below).
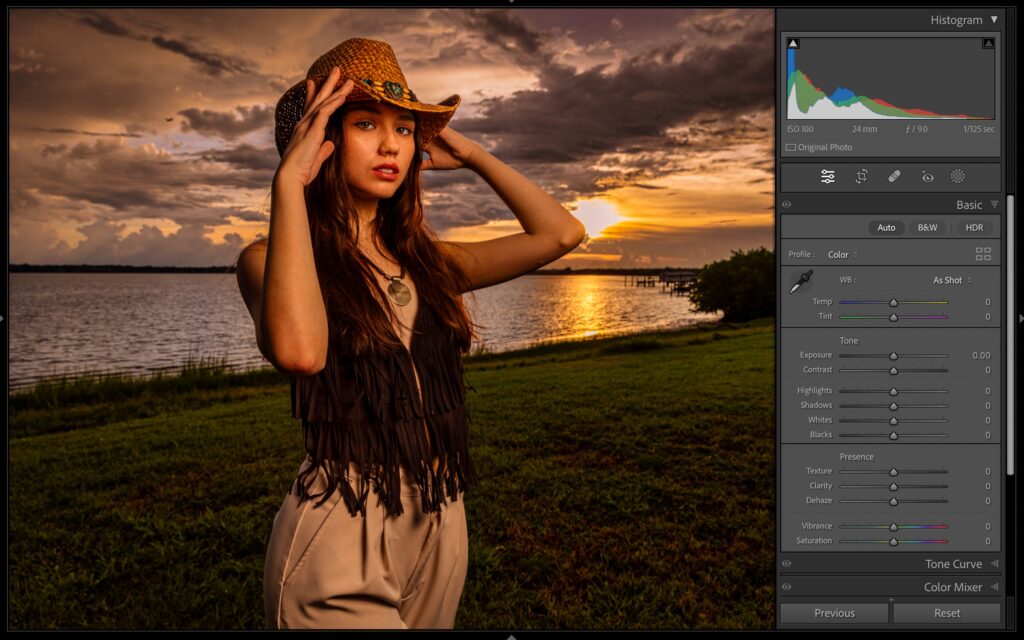
ABOVE: here’s what I’m talking about. I lit our subject with just one flash, and her pants are at least as bright (if not brighter) than her face – the light doesn’t fall off – she’s evenly lit, which is not what we’re generally looking for (lighting-wise).
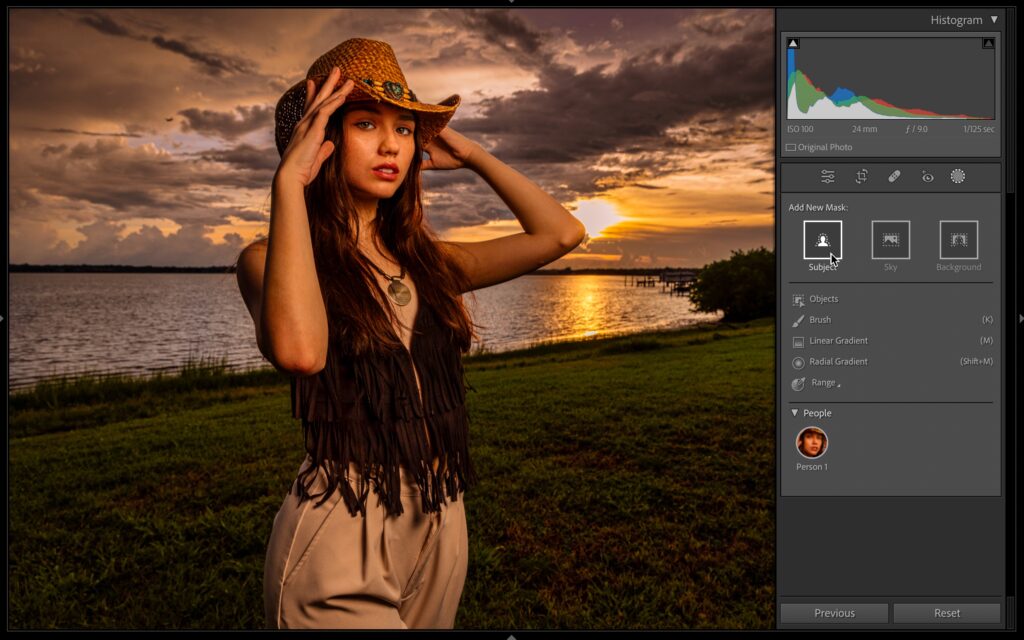
STEP ONE: In Lightroom, click on the Masking button and then click on “Select Subject” (as shown here).
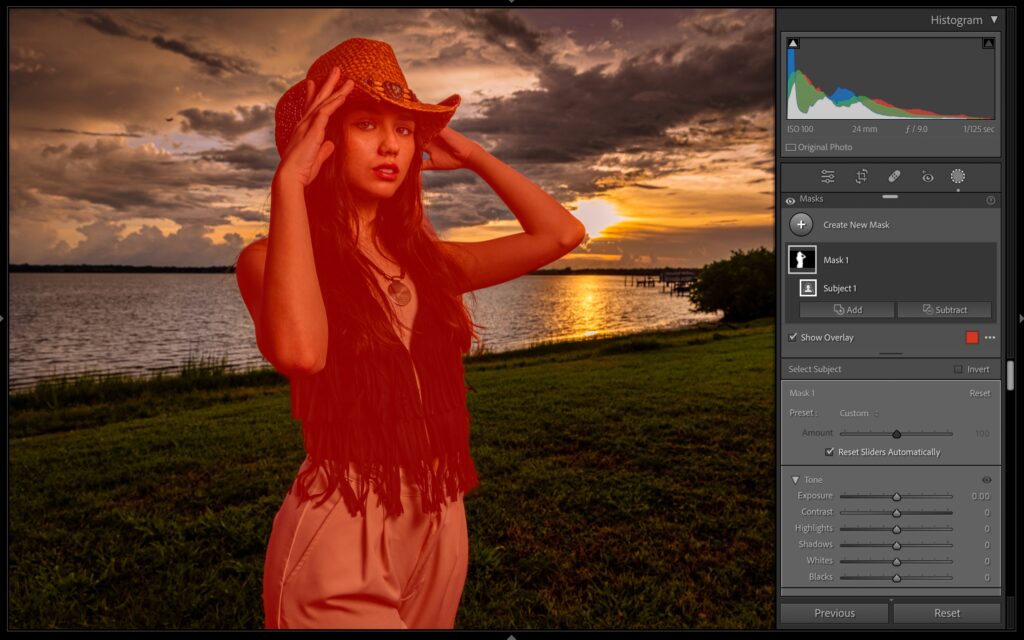
STEP TWO: When you click select Subject, a red tint appears over your subject (as seen above). If you make an adjustment now, it will affect all of here, so we need to subtract the parts we don’t want to effect.
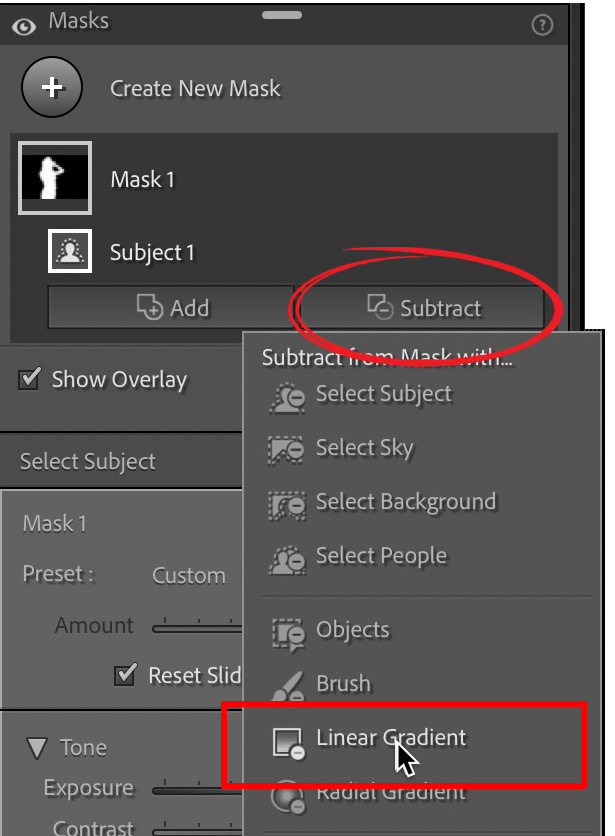
STEP THREE: To remove something from our mask, click the ‘Subtract” button just below your mask in the Masks panel (shown circled above). NOTE: if you don’t see this button, click on “Mask 1” and the Add and Subtract buttons will pop-down. Now go down into that menu and choose “Linear Gradient” (as shown above).
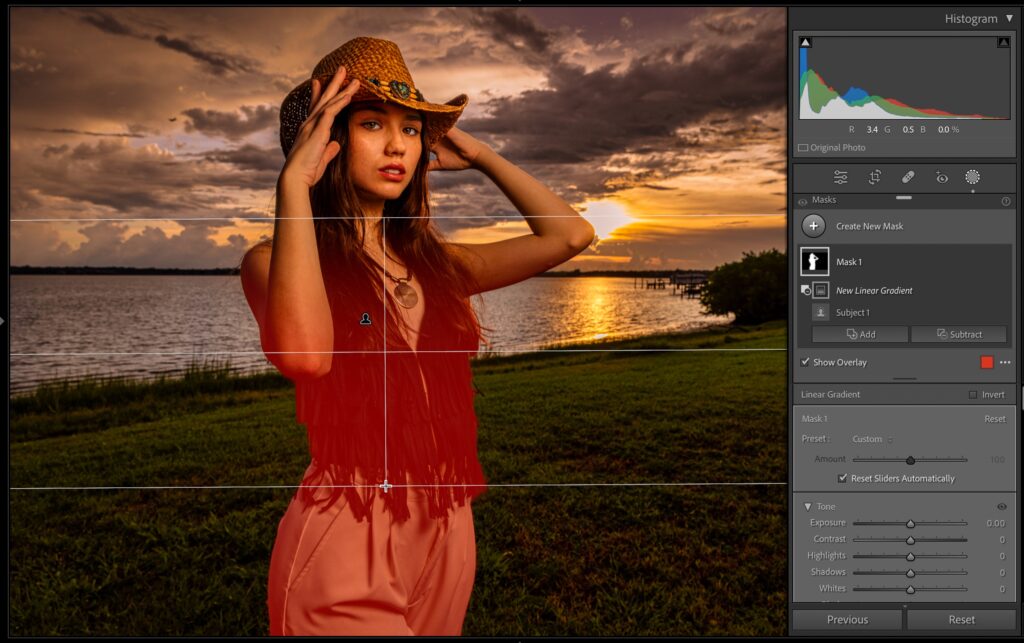
STEP FOUR: What we want to do is create that fall where her face stays the same, but it gets gradually darker as it moves down, so take the Linear Gradient too; click right near her neck and drag down (as shown here) and it removes her upper 1/4 from the mask (as seen above).
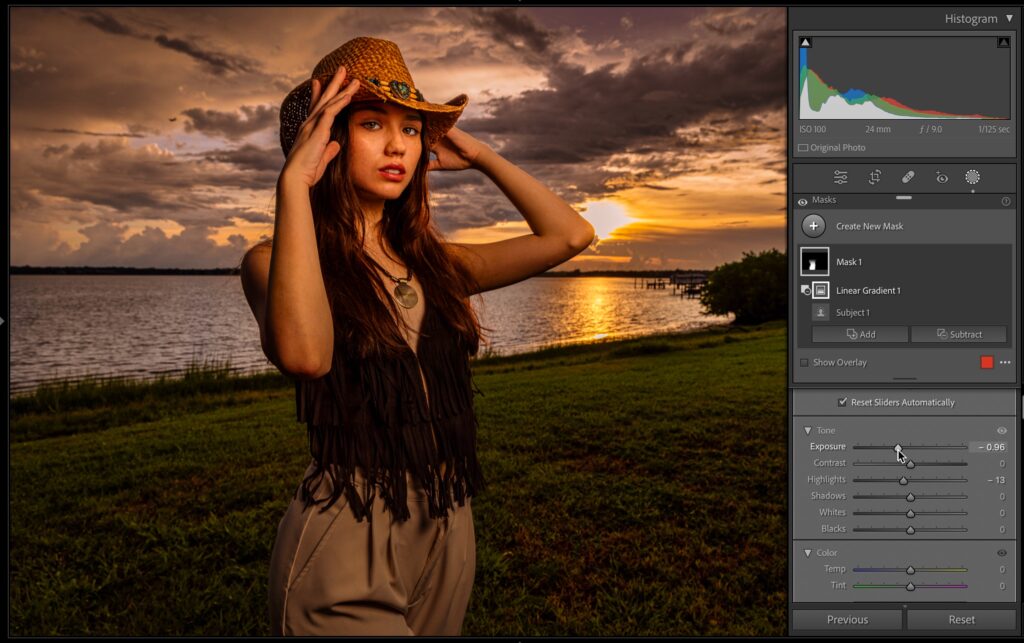
STEP FIVE: Now scroll down to the Tone controls and darken the exposure by dragging the Exposure a little to the left, and pull back the highlights a bit, too (dragging to the left), and that creates the falloff. You can see her pants are no longer the brightest thing – you’ve got that nice fall-off we’re looking for. Her face is the same brightness it was before, and by selecting subject first, it doesn’t affect the background (which it shouldn’t).
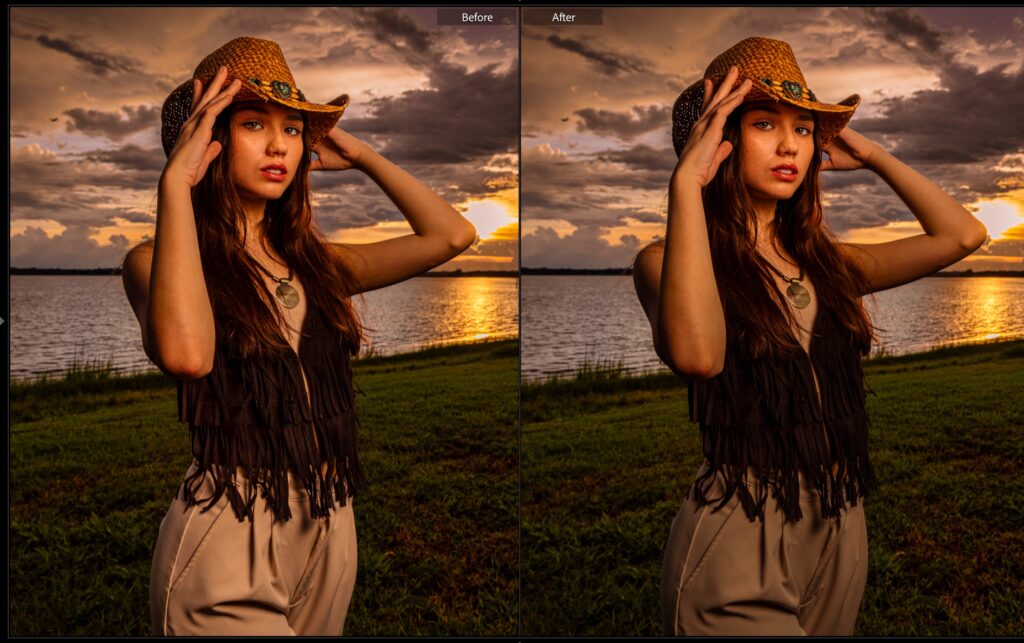
Above: Here’s a side-by-side view where you can see the difference. When you do this, the whole thing takes less than a minute, but it makes a world of difference lighting-wise.
Have a great Monday, everybody! (try not to think about what happened in the playoffs).
-Scott
P.S. I’m speaking at the FotoClave photography conference Feb 17-19, 2024 in San Ramon, California. I have a keynote presentation and a regular track session and aboth about travel photography, and I have a lot to share, so I hope you can check out the conference. There are loads of great instructors, including the incredible Frans Lanting. Hope you can make it Here’s the link with more details.
The post How to Easily Create Lighting “Fall Off” in Lightroom Using The New Masking Tools appeared first on Lightroom Killer Tips.
Continue reading...
ABOVE: here’s what I’m talking about. I lit our subject with just one flash, and her pants are at least as bright (if not brighter) than her face – the light doesn’t fall off – she’s evenly lit, which is not what we’re generally looking for (lighting-wise).
STEP ONE: In Lightroom, click on the Masking button and then click on “Select Subject” (as shown here).
STEP TWO: When you click select Subject, a red tint appears over your subject (as seen above). If you make an adjustment now, it will affect all of here, so we need to subtract the parts we don’t want to effect.
STEP THREE: To remove something from our mask, click the ‘Subtract” button just below your mask in the Masks panel (shown circled above). NOTE: if you don’t see this button, click on “Mask 1” and the Add and Subtract buttons will pop-down. Now go down into that menu and choose “Linear Gradient” (as shown above).
STEP FOUR: What we want to do is create that fall where her face stays the same, but it gets gradually darker as it moves down, so take the Linear Gradient too; click right near her neck and drag down (as shown here) and it removes her upper 1/4 from the mask (as seen above).
STEP FIVE: Now scroll down to the Tone controls and darken the exposure by dragging the Exposure a little to the left, and pull back the highlights a bit, too (dragging to the left), and that creates the falloff. You can see her pants are no longer the brightest thing – you’ve got that nice fall-off we’re looking for. Her face is the same brightness it was before, and by selecting subject first, it doesn’t affect the background (which it shouldn’t).
Above: Here’s a side-by-side view where you can see the difference. When you do this, the whole thing takes less than a minute, but it makes a world of difference lighting-wise.
Have a great Monday, everybody! (try not to think about what happened in the playoffs).
-Scott
P.S. I’m speaking at the FotoClave photography conference Feb 17-19, 2024 in San Ramon, California. I have a keynote presentation and a regular track session and aboth about travel photography, and I have a lot to share, so I hope you can check out the conference. There are loads of great instructors, including the incredible Frans Lanting. Hope you can make it Here’s the link with more details.
The post How to Easily Create Lighting “Fall Off” in Lightroom Using The New Masking Tools appeared first on Lightroom Killer Tips.
Continue reading...