Hi guys,
I was just having a look at somebody's Flickr and I found this photo effect that I like very much. I've been looking around for the past few days at how to create this effect but could not find. Luckily found one such photo.
Here's the link to that photo:
http://farm5.static.flickr.com/4053/4535298668_f137190352.jpg
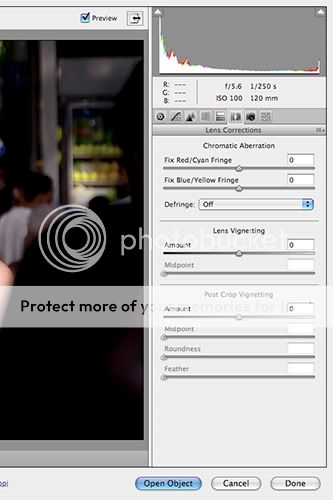
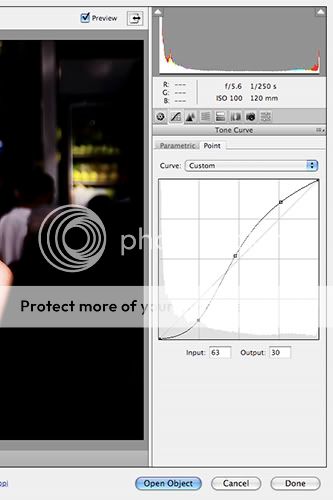
I want to know how he did that sort of black border near the photo's corners. Anyone can shed some light? Would be very much appreciated.
Here's from where it was taken:
http://www.flickr.com/photos/darrenbong/
I was just having a look at somebody's Flickr and I found this photo effect that I like very much. I've been looking around for the past few days at how to create this effect but could not find. Luckily found one such photo.
Here's the link to that photo:
http://farm5.static.flickr.com/4053/4535298668_f137190352.jpg
I want to know how he did that sort of black border near the photo's corners. Anyone can shed some light? Would be very much appreciated.
Here's from where it was taken:
http://www.flickr.com/photos/darrenbong/
")