[HELP] Masking Techniques Using Channel (Hair/Fur)


Status
Not open for further replies.

imanuel90

New Member
May 3, 2007
19
0
0
Singapore
Hi fellow CSers,
Basically, I want to crop an obect and place it onto a new background. This could be quite tricky when it comes to hair/fur. Rumours say that masking with channel is the best way to deal with hair/fur. However, there are some hiccups in my proccess. I've read quite a few numbers of masking tricks with channel in another forum but the explanation werent clear enough. Hope u guys could solve it for me...;)

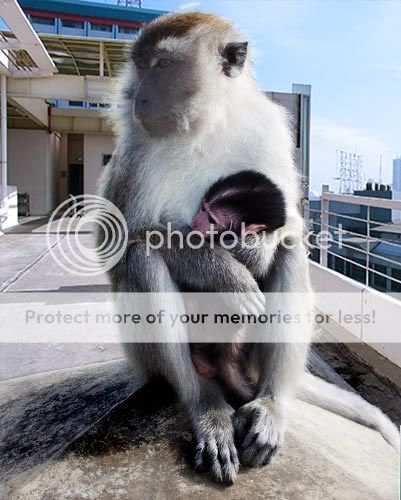
This is the original image taken from another forum,
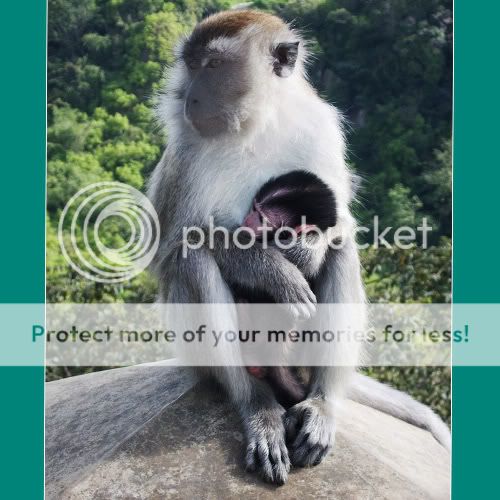
385592.jpg


And it became,
dsa.jpg


Through all the steps, so far ive stopped at the leveling (coz dunnow wads next ,lol)
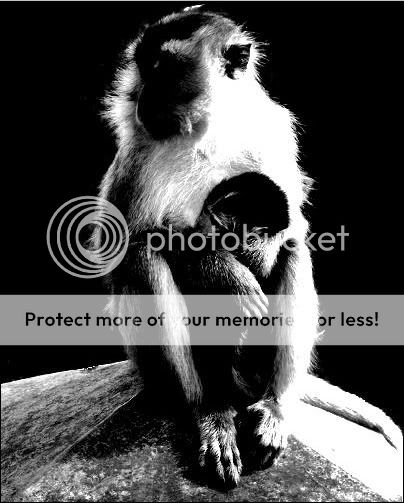
ddd.jpg


It would be really great if some of u pros who know how to do this technique could share some of ur solutions..thx a lot in advance..:)
 

What steps you have taken so we can see what can be improved...
 

Please describe your 'hiccups'. Your attempt likes pretty good. I don't see any problems.
 

i have

1. Explore the RGB channels for the channel that shows best contrast for body and channel that shows best contrast for hair.
2. Duplicate body channel and levels to get a defined edge (Just as shown in the picture in my first post)

well, the question is..after leveling and burning (as shown in the black and white pict), whats the next step?;)
 

HI`English said the bad, I hope you can understand. Distribution of the map!
y1pek1EF4bDYJDSFODvZZnXpOoBPY-l9R3jXCw8uJSkw4WNzpDofzTcdpSgxvDg1dZf

Eraser tool with the brush into some white : # FFFFFF
用橡皮擦工具将需要的部分擦成白色:#FFFFFF
y1pek1EF4bDYJCVl4Idd369mkHbohdG_Q4rjL31w2O3vCmNQHBjBnq6vUvUNSpZDMU8

Not part of the eraser tool with a black rub : #000000
将不需要的部分用橡皮擦工具擦成黑色:#000000
y1pek1EF4bDYJDJTuXoAWtyGBzC8A4GIB-nwjlu_VvIXiB_pQrL7auA-GXSW-znSPut

将已经涂成白色需要的部分载入选区`
Tu will have become part of the white printed in the constituency `
y1pek1EF4bDYJBUj36Bm6P7vdeAuzBfB0ikwqc89kNz3PzDs1-ZNWcgRPmmG50iSXOy

再回到图层,需要的地方已经被选出来了.
To return to the layer, the local election has been out
y1pek1EF4bDYJCFxTvIAZ9yJFOjUFVnP7xe7yR4faPwcUh26-Ep8AA0squMzc35Rfxy

CTRL+J..拷贝选区到新图层.您就可以为它换背景了!
CTRL+J .. constituency copy of the new layer. You can believe it for the background!


Hope to help you.
 

Waw, tat really helps a lot..thx to yanchen for providing me the steps..:)
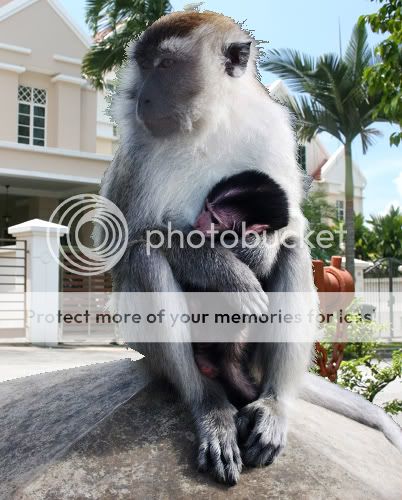
However, this is my result,
test.jpg


As you can see my cropping is not really that good (look fake), take a look at the fur of d monkey..How to improve it?
 

扣图的方法有很多种.关于毛发.你可以结合一下其他扣图法.比如在我上面说的最后一步再加上一个步骤!
The method of deduction there are many. On the hair. You can combine a few other deduction figure. For example, as I said in the final step with a step!
1179738386658520_file.jpg

在原图层上使用抽出工具将选择毛发.注意红色的地方.因为毛发是白色的.所以强制背景色使用白色.确定以后就可以得出比较精细的毛发.您可以加上蒙版.将不需要的部分刷掉!
In the original layer tools used to extract the hair choices. Attention to the red areas. Because the hair is white. So mandatory background Use white color. determine they can arrive at a more precise hair. You can add the Mongolian version. will be screened out some unnecessary !


如果您对扣图有兴趣.您可以尝试着变换这张照片的背景.我觉得它能让你有很大进步!
If you are interested deduction plan. You can try to transform the background of this photograph. I think it will allow you a lot of progress!
ps0412081-1.jpg
 

:eek: omg, tats even harder..lol
how to do tat one? show me urs..
 

Ya, lets not OT further. I do really appreciate his sharing of skills in the forum. I guess, yanchen has tried his best to help here though he could simply just dont care.
Slowly, i hope, he could improve his english in a way that we could understand even better.
Anywae, thanks a lot to yanchen...;)
 

WOW:eek: ! Amazing link..thx a lot bro..tat really helps..=)
 

Waw, tat really helps a lot..thx to yanchen for providing me the steps..:)
However, this is my result,
test.jpg


As you can see my cropping is not really that good (look fake), take a look at the fur of d monkey..How to improve it?
something you might want to look into... the lighting from the house is from the left, lighting on the monkey is from the right...possible in real life if you use artificial lighting but makes the image look less real...to fully blend in the hair and add fine hair, try adding a layer that is made of a selection of the hair that stands out into the background,change the blending mode of this to (in this case, probably) lighten and mask out any parts that don't add to fine detail of the hair...

should reduce the loose hair strands at the top...looks abit to strong and stands out too much...
 

monkey.jpg


this monkey required lot of brush works on the mask layer. mine lost the sharp detail of those loose hairs at the edge.
 

this monkey required lot of brush works on the mask layer. mine lost the sharp detail of those loose hairs at the edge.
try the method I mentioned in the post above yours... but duplicate that "lighten" layer and also try changing this duplicate layer's blend mode to darken...:)

also, the background looks very odd because it is very noisy and the colour temperature is very diff from the monkey... little details matter :)
 

Status
Not open for further replies.