A long overdue review of the Panosaurus v2.0 that I got from Photosphere (Facebook) quite some time ago.
Some of you may ask: why do I need this big clunky tool or others like it? Some may even have the impression that handheld panoramas can be done, after all, you've seen a lot of people doing it successfully. The fact is, unless you're a machine, the likelihood of a handheld panorama stitching well is pretty low, at least when viewed large. Of course, if all you do is post 1200 pixel wide panoramas then by all means, perfect your handholding panorama techniques. A panorama head like the Panosaurus allows you to rotate the camera around its nodal point. In physics, the nodal point is basically where those nifty light rays coming from the scene intersect within your lens before diverging to form the image on the screen (read: sensor) within your camera (image from Panoramafactory's page below for illustration).
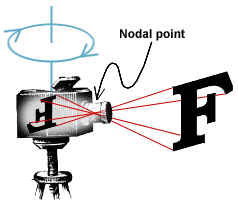
The image above is a negative example of how to shoot images that make up a panorama. Basically, you aren't going to be rotating about the nodal point, and between frames, the different objects in the scene start moving relative to each other. You can see why it's going to be difficult to stitch a good result if that happens. Just imagine - scene 1 where a tree covers an object entirely, but scene 2 (next frame), the object is peeking out. So is the object in or out? How does the software manage the frames? The end result is going to be a photograph full of stitching errors and ghost artifacts (half-in, half-out objects). In fact, the diagram illustrates clearly the usual case of mounting the camera on top of a ballhead.
Now that we understand why there is a need for this tool, let's cut to the chase:
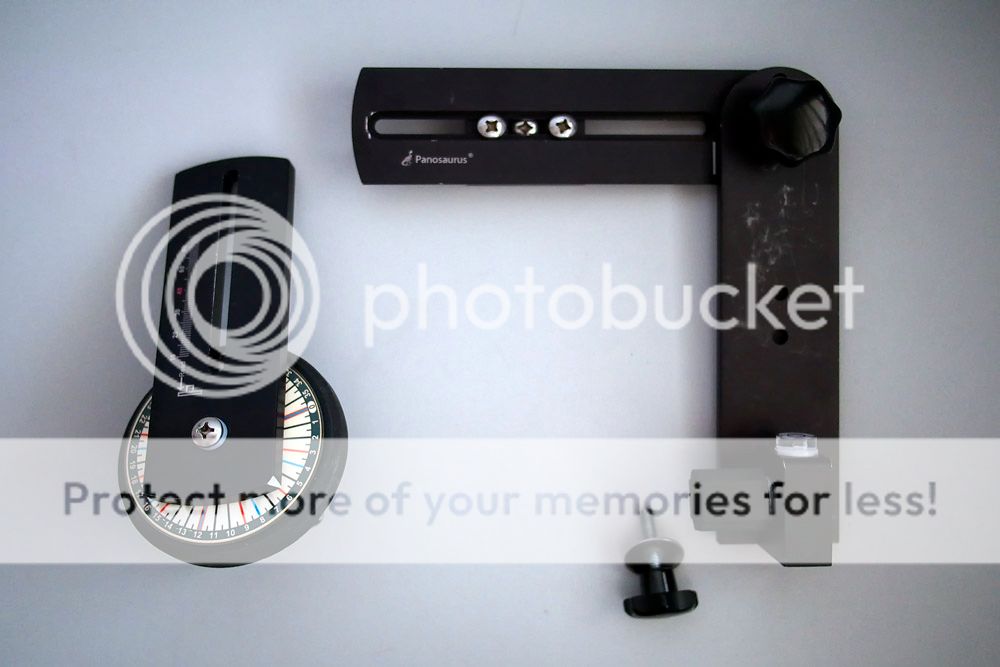
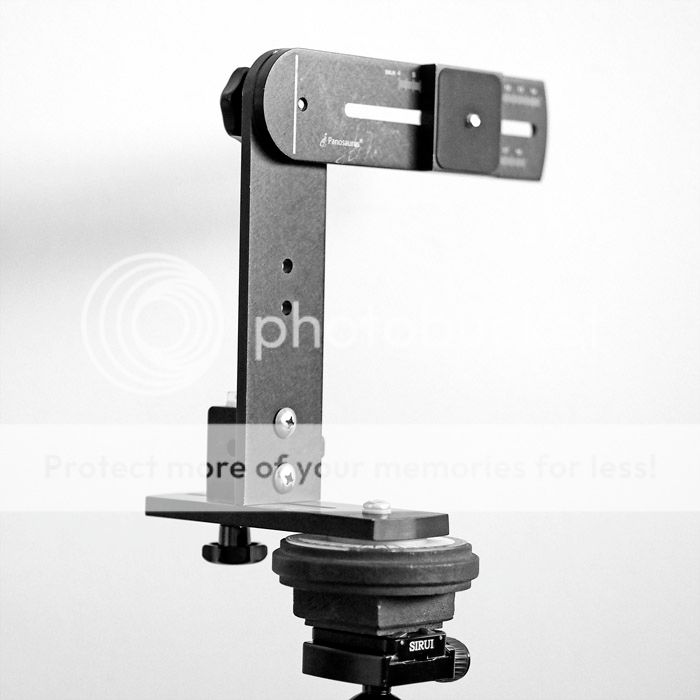
This is the Panosaurus v2.0 fully assembled. It's basically a very simple set up at about 900g and can support cameras with weight up to 10 pounds (~4-5 kg) so for most people's purposes, it will work. There are some caveats of course, which you can read about on the maker's page. Everyone has their own way of stowing this, but I like to keep it in 2 parts for easy assembly. Here's what it looks like assembled:
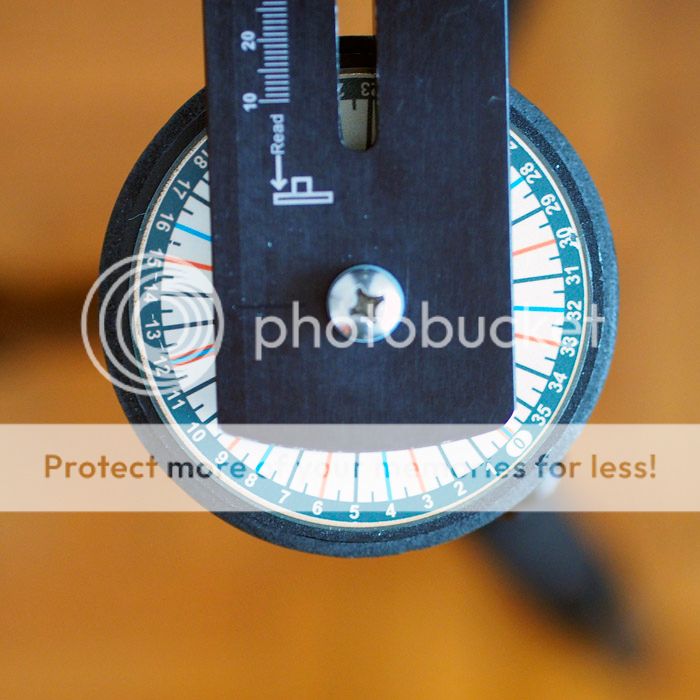
To me, the easiest way to take this apart is to remove the screw and washer that you see, which connects the vertical arm and the additional appendage on top to the base, then fold the top section onto itself and reattach the screw and washer. I usually use this with a single camera-lens combination, so just a single marking on the base scale (see below) to remind myself where I should stop at with a permanent marker does just fine. If you intend to use this with multiple lenses, then you'd have to make more markings or remember it somehow.
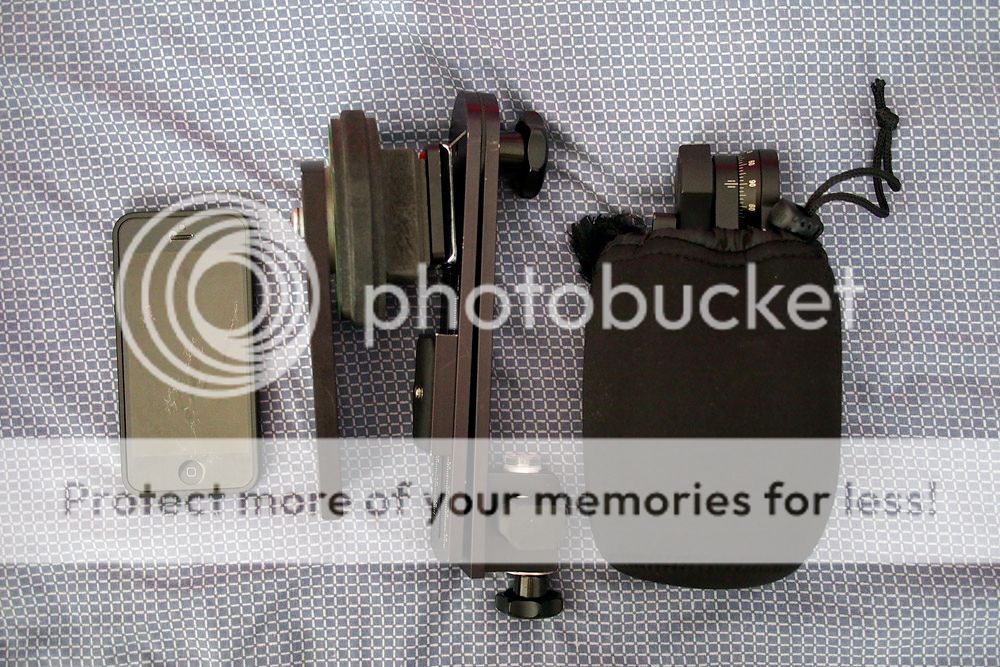
When taken apart it really isn't that large, it's just clunky. The main issue is that the Panosaurus is definitely not built to stow nicely together. It will deliver the bread and butter, but it's strictly no frills.
While clunky, the Panosaurus doesn't cut any corners on build. It's largely aluminium and feels solid. I can see how this will last a long time, though aesthetically speaking, over time the rubbing of parts within the pouch or bag you put it in will cause paint to easily wear out, as can be seen from the images in this thread. I purchased this unit for less than a year, and it's holding up very fine despite the abuse. I don't really take care of it. In fact, it's so solid it's caused two of my GGS screens on my ol' K5 to crack after some swinging resulted in the screen tapping (yes, tapping, I take good care of all my cameras) moderately on the Panosaurus. So I handle my cameras a lot more gingerly now around it.
Some of you may ask: why do I need this big clunky tool or others like it? Some may even have the impression that handheld panoramas can be done, after all, you've seen a lot of people doing it successfully. The fact is, unless you're a machine, the likelihood of a handheld panorama stitching well is pretty low, at least when viewed large. Of course, if all you do is post 1200 pixel wide panoramas then by all means, perfect your handholding panorama techniques. A panorama head like the Panosaurus allows you to rotate the camera around its nodal point. In physics, the nodal point is basically where those nifty light rays coming from the scene intersect within your lens before diverging to form the image on the screen (read: sensor) within your camera (image from Panoramafactory's page below for illustration).
The image above is a negative example of how to shoot images that make up a panorama. Basically, you aren't going to be rotating about the nodal point, and between frames, the different objects in the scene start moving relative to each other. You can see why it's going to be difficult to stitch a good result if that happens. Just imagine - scene 1 where a tree covers an object entirely, but scene 2 (next frame), the object is peeking out. So is the object in or out? How does the software manage the frames? The end result is going to be a photograph full of stitching errors and ghost artifacts (half-in, half-out objects). In fact, the diagram illustrates clearly the usual case of mounting the camera on top of a ballhead.
Now that we understand why there is a need for this tool, let's cut to the chase:
This is the Panosaurus v2.0 fully assembled. It's basically a very simple set up at about 900g and can support cameras with weight up to 10 pounds (~4-5 kg) so for most people's purposes, it will work. There are some caveats of course, which you can read about on the maker's page. Everyone has their own way of stowing this, but I like to keep it in 2 parts for easy assembly. Here's what it looks like assembled:
To me, the easiest way to take this apart is to remove the screw and washer that you see, which connects the vertical arm and the additional appendage on top to the base, then fold the top section onto itself and reattach the screw and washer. I usually use this with a single camera-lens combination, so just a single marking on the base scale (see below) to remind myself where I should stop at with a permanent marker does just fine. If you intend to use this with multiple lenses, then you'd have to make more markings or remember it somehow.
When taken apart it really isn't that large, it's just clunky. The main issue is that the Panosaurus is definitely not built to stow nicely together. It will deliver the bread and butter, but it's strictly no frills.
While clunky, the Panosaurus doesn't cut any corners on build. It's largely aluminium and feels solid. I can see how this will last a long time, though aesthetically speaking, over time the rubbing of parts within the pouch or bag you put it in will cause paint to easily wear out, as can be seen from the images in this thread. I purchased this unit for less than a year, and it's holding up very fine despite the abuse. I don't really take care of it. In fact, it's so solid it's caused two of my GGS screens on my ol' K5 to crack after some swinging resulted in the screen tapping (yes, tapping, I take good care of all my cameras) moderately on the Panosaurus. So I handle my cameras a lot more gingerly now around it.
Last edited: