
Hi, Gang. First a shoutout and thanks to all the folks who came out to see my Lightroom seminars in Raleigh (an awesome sold-out crowd of 250+ photographers), and in Lansing last week. I had such a great time – met so many great people — it was a treat. Next stop: Washington DC on Friday, August 17th. Come out and spend the day with me.
OK, on to today’s tip, and it’s a pretty handy one — it’s how to change the mask color when you’re using the Adjustment Brush. Here’s why you might want to do that, and how:

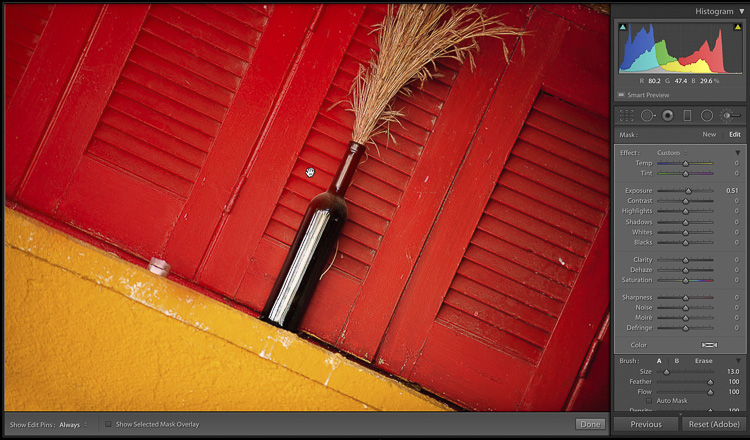
Above: Here’s the original image, and I used the Adjustment Brush here to the left of the black bottle to brighten that area.
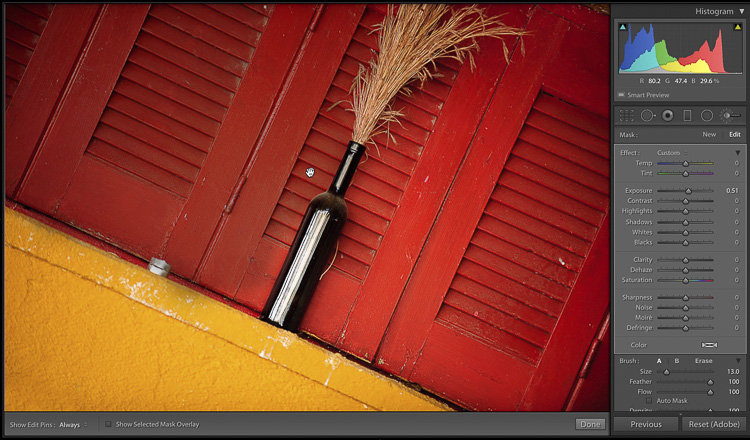
Above: To see the masked area, I move my cursor over the pin, and those areas now appear in a red tint (as seen here). Unfortunately, you can barely see it because the area I painted over with the brush is red. (also, this red tint color is an issue for folks who are color blind).

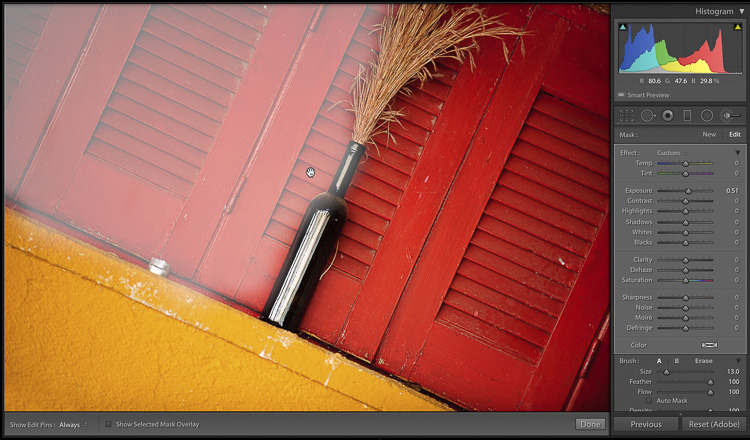
Above: To change the color of the mask, just press Shift-O (that’s the letter O — not a zero). The first time you press it, it changes to a green tint (as seen here).
Above: Press Shift-O again, it changes the mask color to white.
Above: Press Shift-O again and you get a Black tint (well, a dark grayish tint anyway).
There ya go. Hope you found that helpful.
Here’s wishing you a great start to your week – one filled with possibilities and opportunity.

Best,
-Scott
The post How to Change Lightroom’s Adjustment Brush Mask Color appeared first on Lightroom Killer Tips.
Continue reading...
OK, on to today’s tip, and it’s a pretty handy one — it’s how to change the mask color when you’re using the Adjustment Brush. Here’s why you might want to do that, and how:
Above: Here’s the original image, and I used the Adjustment Brush here to the left of the black bottle to brighten that area.
Above: To see the masked area, I move my cursor over the pin, and those areas now appear in a red tint (as seen here). Unfortunately, you can barely see it because the area I painted over with the brush is red. (also, this red tint color is an issue for folks who are color blind).
Above: To change the color of the mask, just press Shift-O (that’s the letter O — not a zero). The first time you press it, it changes to a green tint (as seen here).
Above: Press Shift-O again, it changes the mask color to white.
Above: Press Shift-O again and you get a Black tint (well, a dark grayish tint anyway).
There ya go. Hope you found that helpful.
Here’s wishing you a great start to your week – one filled with possibilities and opportunity.
Best,
-Scott
The post How to Change Lightroom’s Adjustment Brush Mask Color appeared first on Lightroom Killer Tips.
Continue reading...